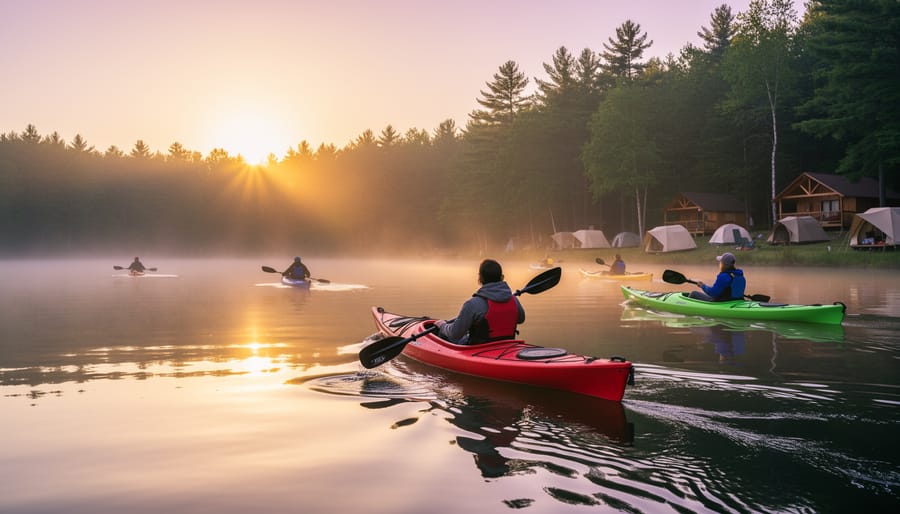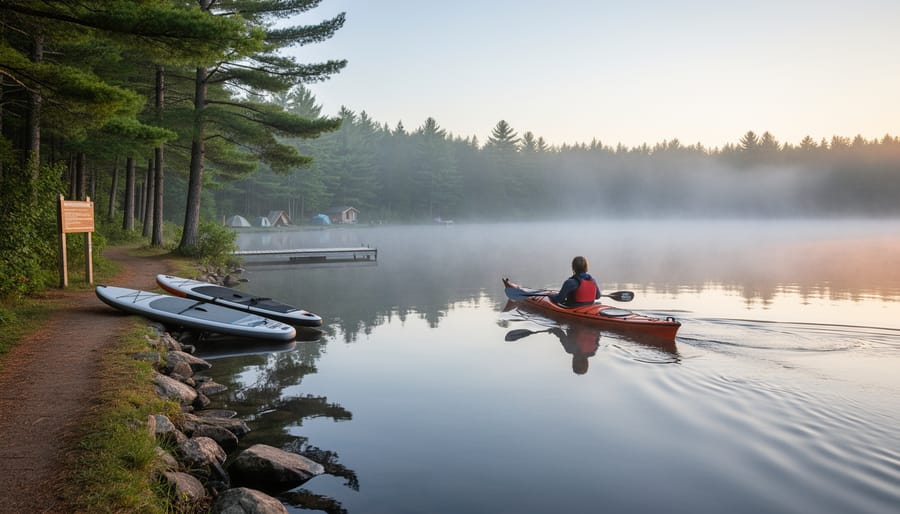
Month: June 2026

Where to Rent Camping Trailers Near Canadian Kayaking Destinations

Camping trailers transform multi-day kayaking expeditions across Canada from logistical puzzles into comfortable, strategic adventures by serving as mobile base camps you can position within minutes of launch sites. You can rent these trailers from national chains like Fraserway RV and CanaDream, or regional outfitters near premier paddling zones, with daily rates typically ranging from $75 to $200 depending on size and season. The booking process is straightforward: reserve online 2-3 months ahead for summer dates, confirm tow capacity with your vehicle, and plan your route to connect campgrounds near put-in points for destinations like Georgian Bay, the Saguenay Fjord, or Algonquin’s network of lakes.

The real advantage isn’t just shelter. A well-positioned trailer lets you dry gear overnight, store food safely away from wildlife, and shift your camp as conditions or curiosity dictate. Paddlers heading to remote stretches where grizzlies or black bears are active appreciate hard-sided security after a day navigating open water. Morning fog over iceberg trails in Newfoundland or glassy dawn starts on Lake Superior become simpler when your coffee and warm layers are steps away rather than buried in a wet tent.

Choosing the right trailer depends on your group size, towing experience, and campground accessibility near your target waterways. Compact teardrops work for solo kayakers or couples hitting backcountry-adjacent sites, while families tackling week-long circuits through British Columbia’s Gulf Islands benefit from larger units with slide-outs and full kitchens.

Why Camping Trailers Are Perfect for Multi-Day Kayaking Trips

After hours on the water battling wind and waves, the last thing you want is a damp tent and cold meal. Camping trailers solve the fundamental challenge of multi-day kayaking trips: they give you a dry, secure home base no matter what conditions you face on the water.

The gear storage advantage alone changes everything. Your drysuits, PFDs, paddles, and electronics need protected space between paddling sessions, and trailers provide dedicated compartments that keep saltwater spray and morning dew away from expensive equipment. You’ll also have room to organize fishing rods, camera gear, and the layers you swap out as weather shifts throughout the day.

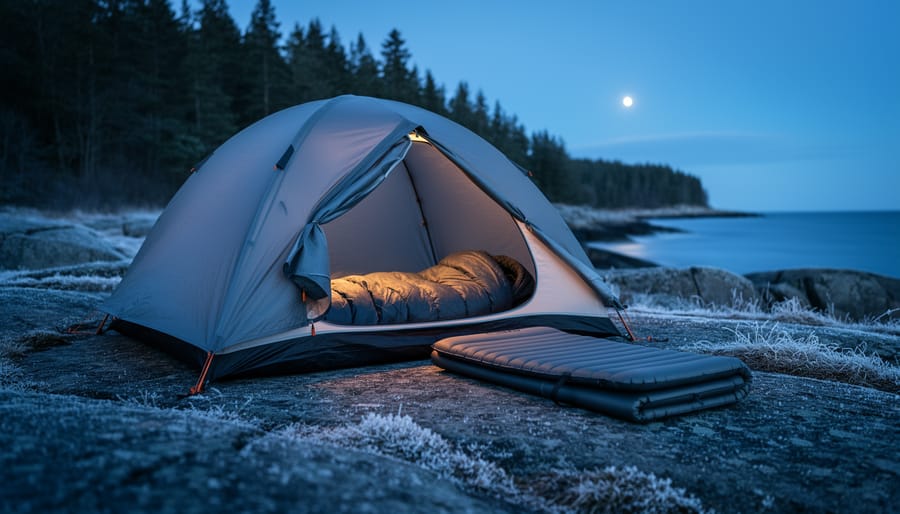
Comfort matters more than you might think when you’re paddling consecutive days. Sore shoulders and core muscles recover faster when you choose a sleeping pad that properly supports your body on a real mattress platform instead of deflating on uneven ground. Trailers offer climate control too, which means you can warm up quickly after cold-water immersion and actually sleep through the night instead of shivering in a sleeping bag.

The mobility factor opens up paddling opportunities that fixed campsites can’t match. You can position your trailer near different launch points throughout your trip, following wildlife migration patterns or moving to calmer bays when wind forecasts change. This flexibility proves essential when chasing iceberg trails along Newfoundland’s coast or tracking whale pods through British Columbia’s channels, you’re not locked into one spot for your entire adventure.

Remote access becomes feasible when your sleeping quarters and kitchen travel with you, letting you explore launch sites far from established campgrounds without sacrificing safety or basic comfort.
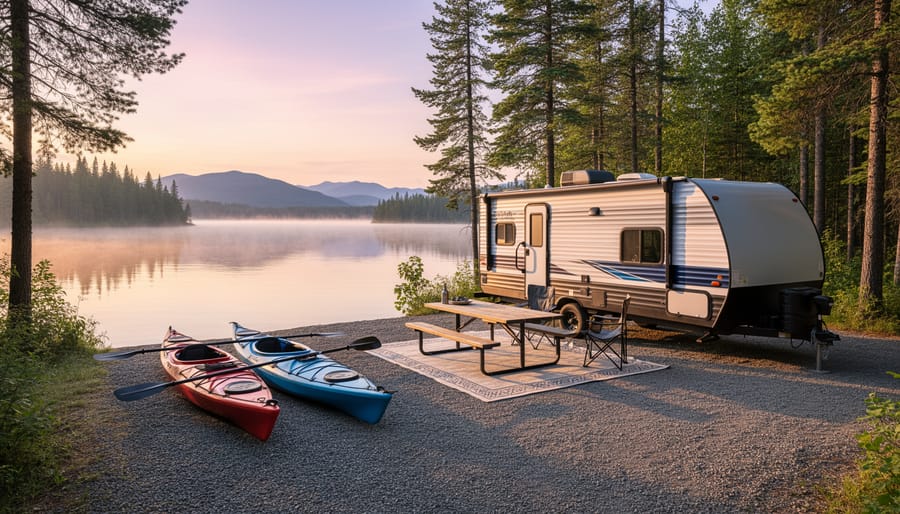
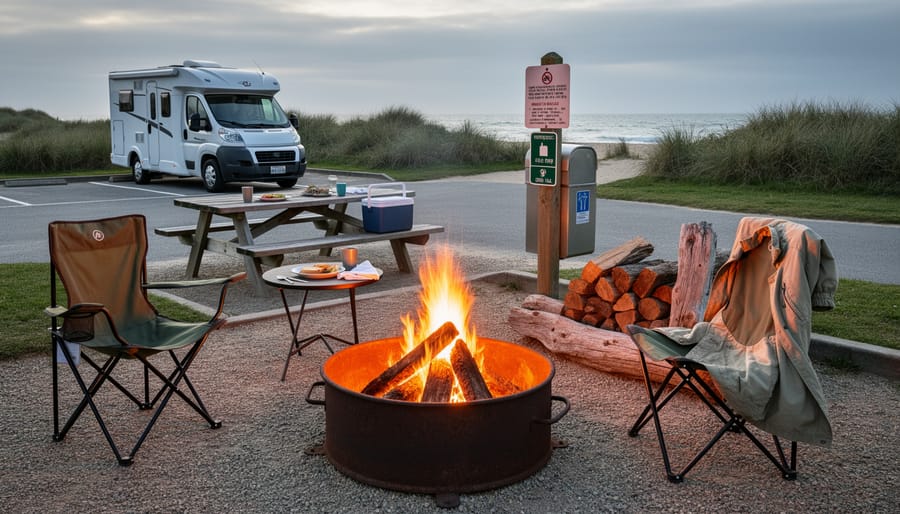
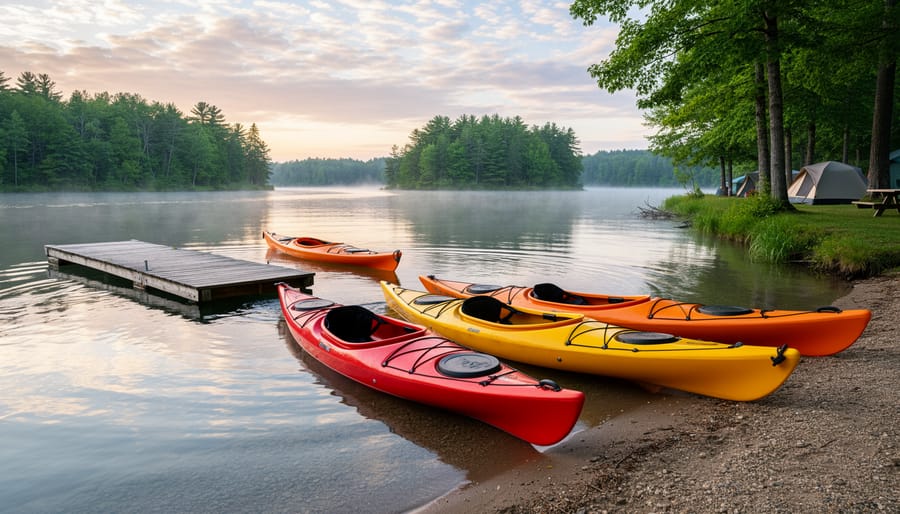
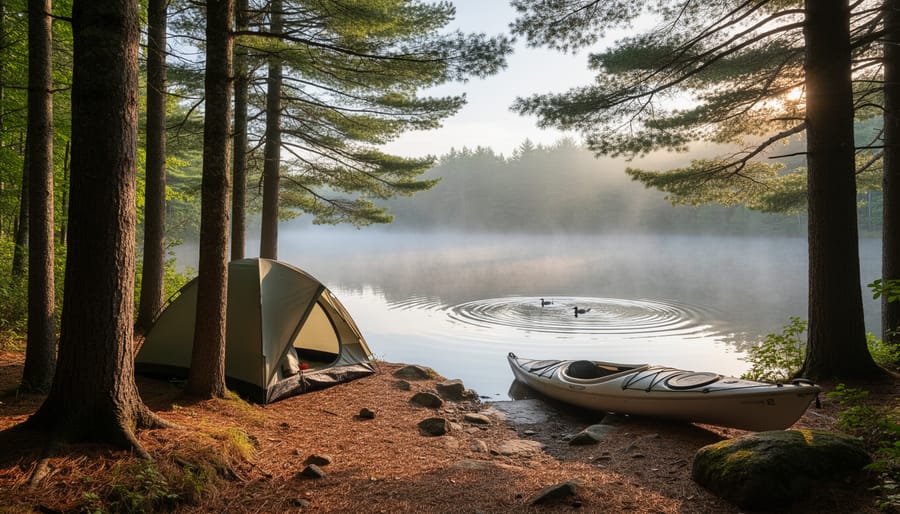
Camping trailer parked at a lakeside campground with kayaks ready to launch.
A camping trailer sets up a comfortable base at a Canadian campground, with kayaks staged for an early paddle.

Top Rental Companies Serving Canadian Kayaking Regions

Fraserway RV: Western Gateway to Coastal Paddling

Fraserway RV operates as Canada’s largest RV rental company with two strategically positioned locations that serve as perfect launching points for western kayaking adventures. Their Vancouver depot puts you within striking distance of the Salish Sea’s island-studded channels, where you can paddle alongside orcas and harbor seals through protected waters near the Gulf Islands. Launch from Tofino or Ucluelet on Vancouver Island’s rugged west coast for multi-day expeditions through Clayoquot Sound’s ancient rainforest inlets.

The Calgary location opens access to Alberta’s turquoise mountain lakes, Maligne Lake in Jasper and Moraine Lake in Banff offer glacier-fed paddling surrounded by dramatic peaks. Both depots stock a range of trailer sizes suitable for hauling kayaks, and their Canadian ownership means staff understand the specific challenges of accessing remote launch sites on logging roads and gravel campground approaches. Plan your pickup timing around coastal tides or alpine weather windows, knowing you have a dry base camp waiting after cold Pacific paddles or high-altitude lake crossings.

RVezy: Flexible Peer-to-Peer Options with Delivery

RVezy operates differently from traditional rental companies, it’s a peer-to-peer platform connecting kayakers directly with local trailer owners across Canada. This model opens up rental inventory in smaller communities and regions that major chains don’t serve, which matters when you’re planning a paddle trip to remote coastal areas or backcountry lake systems.

The delivery option solves a practical challenge for fly-in paddlers. Instead of navigating unfamiliar highways in a rented RV, you can arrange delivery directly to your campsite, home, or other approved destination. Your host brings the trailer to you, sets it up, and explains the systems before your trip begins. This service is particularly valuable when you’re flying into Halifax for a maritime kayaking expedition or landing in St. John’s to paddle among icebergs, you step off the plane and find your base camp waiting at the trailhead.

Every RVezy rental includes insurance coverage and roadside assistance, which provides essential peace of mind when you’re camping in areas with limited cell service. If something goes wrong mechanically while you’re parked at a remote launch site on Vancouver Island or along the Bay of Fundy, help is just a call away.

When booking through RVezy, you choose between pickup from a local host or delivery to your starting point. Browse listings in your target kayaking region, compare trailer sizes and amenities, then coordinate directly with the owner about your specific needs, like whether there’s exterior storage for paddles or roof rack capacity for your boats.

CanaDream: Nationwide Coverage for Cross-Country Expeditions

CanaDream operates an extensive network of rental depots stretching from British Columbia to the Atlantic provinces, making them a strong choice for kayakers planning ambitious cross-country paddling expeditions. Their widespread coverage means you can pick up a trailer in one region and drop it off in another, which is particularly valuable if you’re plotting a multi-week journey from, say, the Rocky Mountain lakes through the prairies to Ontario’s Thousand Islands.

This flexibility allows paddlers to design progressive itineraries without backtracking, imagine starting with alpine lake kayaking in Alberta, moving east to paddle the boreal shield lakes of Ontario, then finishing with coastal adventures in Nova Scotia. Each leg of your trip has a nearby CanaDream location for support. Their fleet includes various trailer sizes suitable for solo adventurers through family groups, with options that can handle the gear loads kayakers accumulate on extended trips. The company’s established presence across Canada also means they’ve refined their understanding of regional camping infrastructure and can offer location-specific advice on RV-friendly campgrounds near paddling launch sites.

How to Book Your Camping Trailer for a Kayaking Adventure

Booking a camping trailer for your kayaking expedition requires more planning than a typical RV trip, but the process is straightforward once you know what matters for paddlers. Start early, popular rental units near prime water access points fill up fast during Canada’s short paddling season.

  1. Choose your kayaking destination and firm up your travel dates, accounting for weather windows and water conditions at your target launch sites.
  2. Decide between pickup from a rental location or delivery directly to your campsite, delivery costs more but saves you the hassle of towing if you’re flying in or prefer to focus on paddling rather than driving.
  3. Select your trailer size based on gear volume. Solo kayakers or couples can manage with smaller units, but groups hauling multiple boats, paddles, dry bags, and safety equipment need adequate storage space.
  4. Verify that insurance coverage and roadside assistance are included in your rental agreement, RVezy includes both, which provides essential peace of mind on remote routes.
  5. Confirm your booking and prepare for either pickup from your chosen location or coordinate delivery logistics with your host.

The pickup-versus-delivery decision matters significantly for kayakers. If you’re renting from Fraserway RV’s Vancouver or Calgary locations, pickup works well when your paddling destinations are within reasonable driving distance. RVezy’s delivery option shines for fly-in adventures or when you want your base camp waiting at a specific campground near your launch point.

Trailer size deserves careful thought. A couple planning camping Chenal du Moine trips might rent a compact unit, while groups tackling multi-day expeditions need room for wet gear storage separate from sleeping quarters. Consider where you’ll stash paddles, life jackets, dry suits, and cooking equipment, plus all your camping food ideas for the week.

Ask about vehicle specifications if you’re towing kayak trailers behind the rental RV. Some units handle additional weight better than others, and you need to know towing capacity before you show up with a loaded kayak trailer. Clarify what’s included beyond the basics, some rentals provide camping chairs and kitchen supplies, while others expect you to bring everything except the vehicle itself.

Strategic Camping Trailer Bases for Prime Canadian Kayaking Spots
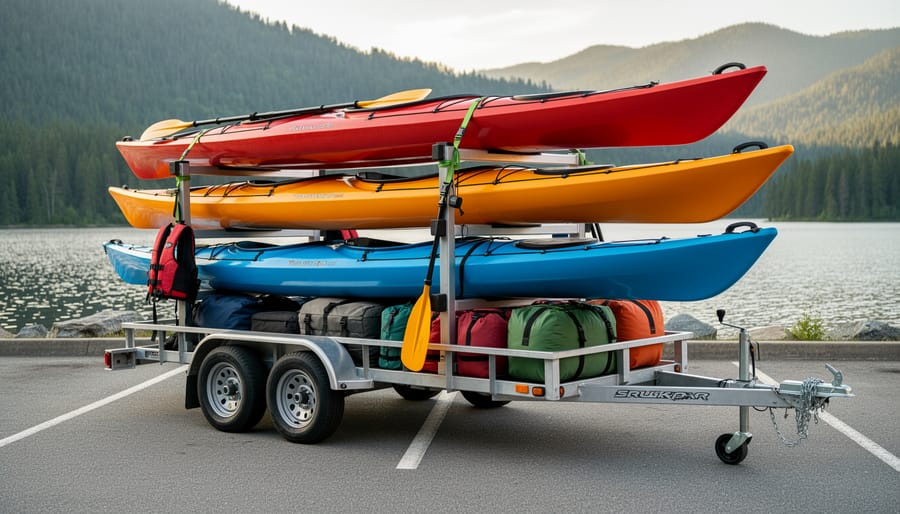
Kayaker loading a sea kayak onto a trailer-mounted rack beside a camping trailer.
Secure loading and quick access make a trailer-based setup ideal for multi-day kayaking trips.

West Coast: Vancouver Island and BC Mainland Waters

British Columbia’s protected waterways offer some of North America’s most spectacular paddling, with Vancouver Island serving as the crown jewel. Position your camping trailer at Rathtrevor Beach Provincial Park near Parksville for quick access to the Strait of Georgia’s calm channels, or head to Tofino’s Bella Pacifica Campground to launch into Clayoquot Sound’s maze of islands where sea otters fish among kelp forests just metres from your kayak.

For mainland adventures, Porpoise Bay Provincial Park in Sechelt gives you a comfortable base to explore Desolation Sound’s warm waters. The park’s RV-friendly sites accommodate larger trailers while keeping you twenty minutes from multiple launch points. Paddlers consistently report orca encounters in Johnstone Strait when kayaking from Telegraph Cove, though you’ll need to plan carefully since the nearest full-service RV park sits thirty kilometres south in Port McNeill.

Wildlife timing matters here. June through September brings humpback whales to the west coast of Vancouver Island, while orcas follow salmon runs through inside passages from July into October. Your camping trailer lets you wait out weather and adjust your paddling schedule when marine conditions shift, a crucial advantage when targeting wildlife-rich waters that demand respect and patience.

East Coast: Maritime Provinces and Iceberg Trails

Newfoundland and Labrador deliver kayaking experiences unlike anywhere else in Canada. Paddling through cold Atlantic waters past towering icebergs requires serious preparation, and a camping trailer parked at a nearby RV site becomes essential infrastructure rather than luxury. The warmth of a trailer after hours on frigid water isn’t just comfort, it’s safety.

Prime launch points cluster around the Northern Peninsula and along the coast near Twillingate, where paddlers encounter whales and icebergs during late spring and early summer. RV-friendly campgrounds at Gros Morne National Park and private sites near St. Anthony provide heated sleeping quarters within minutes of put-in locations. You’ll appreciate a hot shower and dry storage for neoprene gear after a day navigating around ice formations the size of buildings.

The short kayaking season here, typically late May through July when icebergs drift south, means advance booking matters. Secure your camping trailer rental for these months well ahead, and confirm your campground can accommodate your unit size while providing the water access serious cold-water paddling demands.

Central Canada: Lake Systems and River Routes

Ontario and Quebec offer some of Canada’s most accessible freshwater kayaking, with calm lake systems and gentle river routes that suit paddlers just starting out. The region’s well-developed RV infrastructure means you’ll find campgrounds with full hookups within easy reach of popular launch points like Algonquin Park’s interior lakes, the Thousand Islands waterways, and Quebec’s Mauricie region.

These destinations work beautifully for families. Kids can practice paddling skills on protected bays while you dock your camping trailer at sites offering swimming beaches and interpretive trails. The short portages and well-marked routes eliminate the guesswork that intimidates newer kayakers, and you’re never more than a day’s paddle from your base camp.

Summer temperatures make Central Canada’s waters far more forgiving than coastal expeditions. You’ll spot loons, beavers, and painted turtles rather than navigating tidal currents or cold ocean swells. Provincial park campgrounds typically accommodate trailers up to 35 feet, with many offering kayak rentals on-site if you’re testing the sport before investing in your own gear. Book early for July and August, these family-friendly spots fill quickly during school holidays.

What Kayakers Need to Know Before Renting

Before you book a camping trailer for your kayaking adventure, understanding the practical logistics will ensure your rental unit can handle your gear and itinerary. Most rental RVs aren’t designed to tow additional trailers, so if you’re bringing multiple kayaks, confirm roof rack availability and weight limits with the rental company during booking, many standard RV roofs can safely carry two kayaks, but exceeding capacity creates dangerous driving conditions. Securing boats properly matters: invest in quality foam blocks and cam straps rather than relying on bungee cords, and double-check all tie-downs after the first hour of driving and at every fuel stop.

Note: Always verify your rental RV’s towing capacity before booking if you’re bringing a kayak trailer, ensure watercraft are secured with proper straps and padding, and choose campgrounds with direct water access or nearby launch sites to avoid long portages.

Wet gear storage is a constant challenge on multi-day paddle trips. Look for rental units with exterior storage compartments where you can stash dripping life jackets, paddles and spray skirts without soaking the interior living space. Some kayakers pack collapsible drying racks or paracord to string up gear outside the trailer at camp, which works well in good weather but requires secure storage once dried. Consider the campground’s infrastructure when selecting your base: RV sites located near boat launches save you from hauling kayaks across the park each morning, and facilities with fish-cleaning stations or outdoor showers let you rinse saltwater gear before it corrodes zippers and hardware.

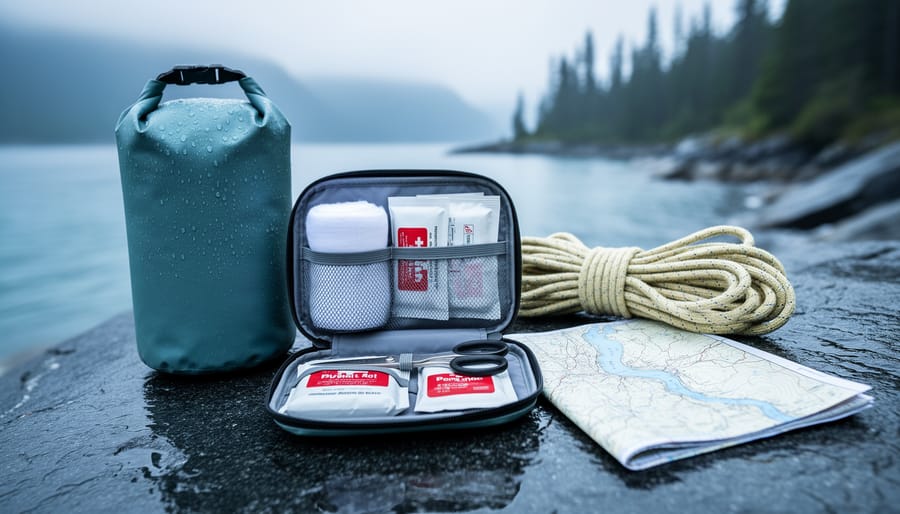
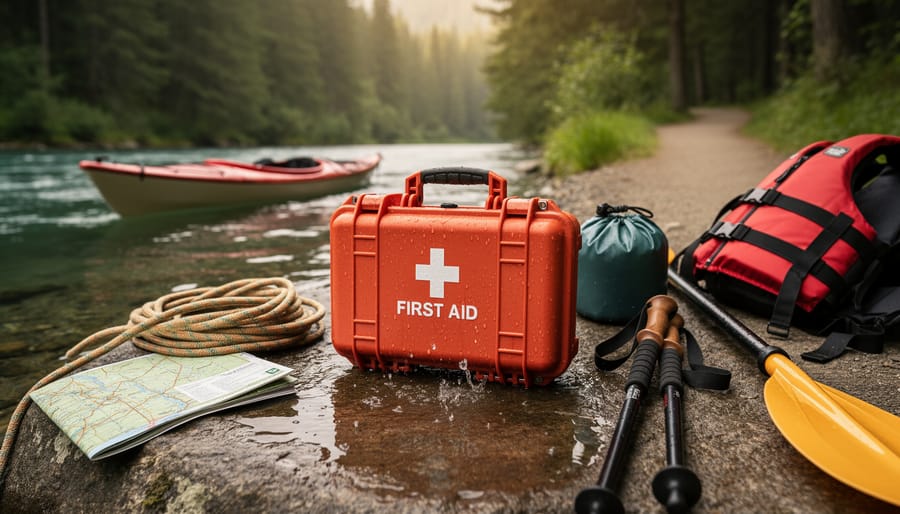
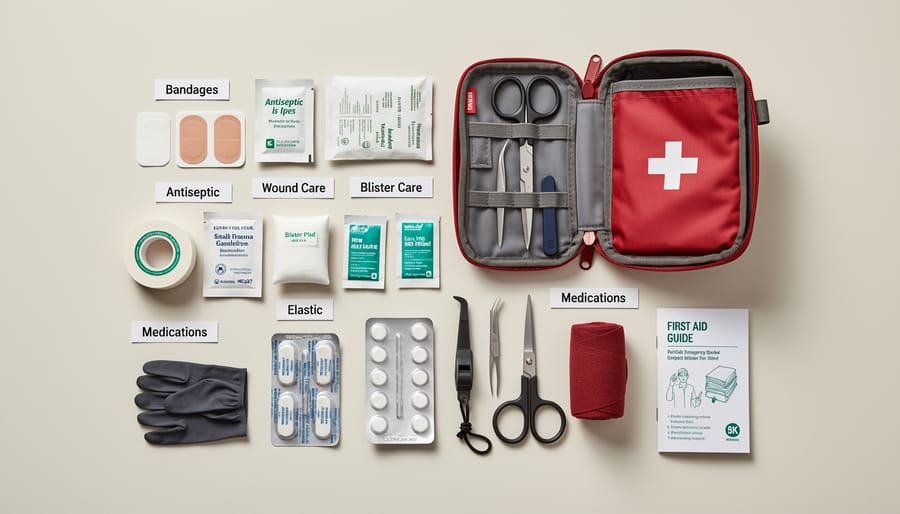
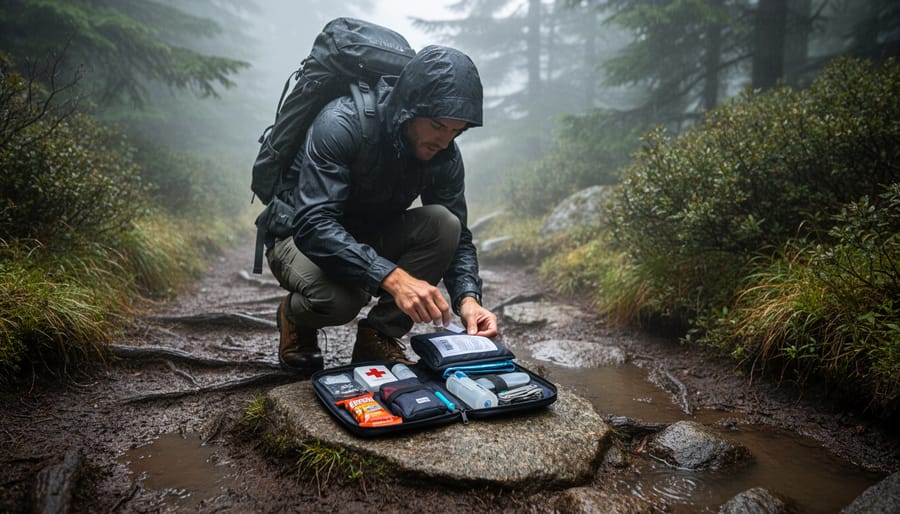
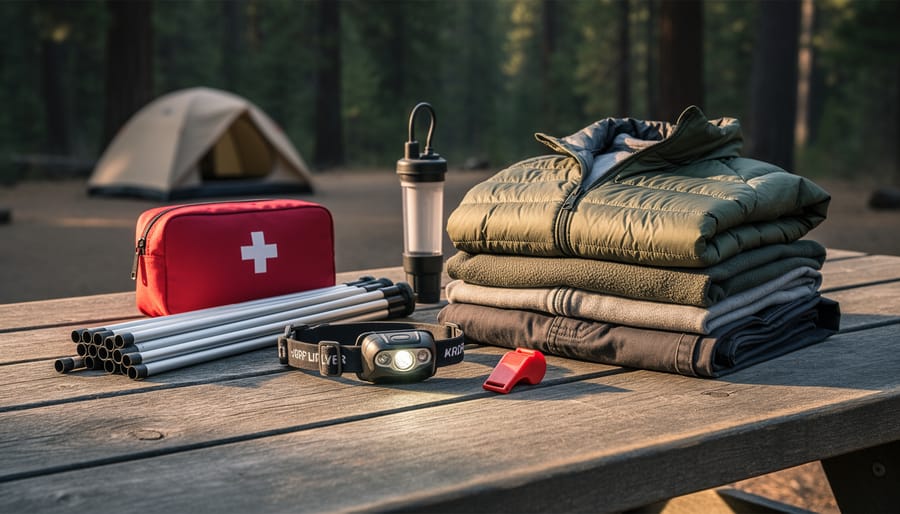
Pack essential safety items including first aid kits sized for both paddling emergencies and general camping needs, and store them in accessible locations rather than buried in external compartments. Check that your chosen campground offers cell coverage or emergency communication options, particularly in remote coastal areas where weather can change rapidly. Finally, familiarize yourself with the rental RV’s systems before leaving the pickup location, knowing how to troubleshoot the water pump or reset a tripped breaker prevents frustration when you’re tired after a long day on the water.
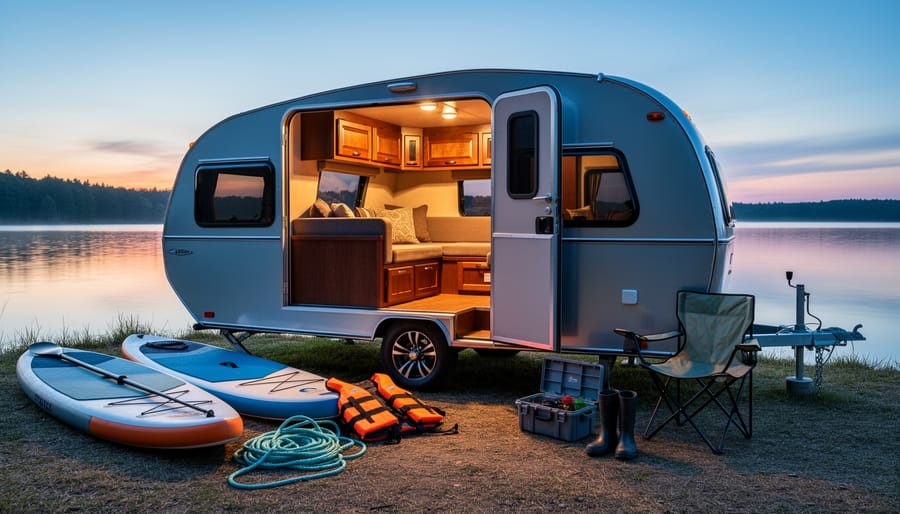
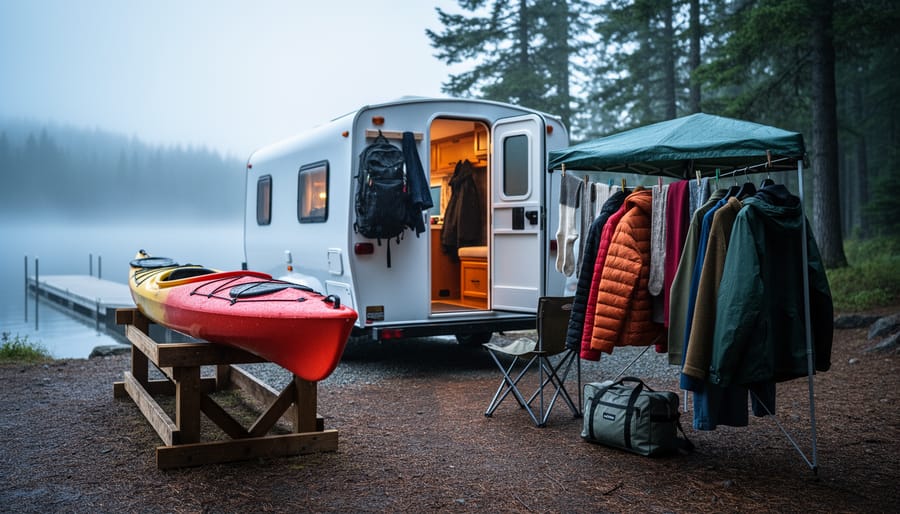
Camping trailer door lit from inside at night with kayaks resting by the shoreline.
After a day on the water, a rented camping trailer offers warm shelter and easy access to your gear.

Renting a camping trailer opens up Canada’s kayaking destinations in ways that hotel-hopping or backpacking can’t match. You get a warm, dry place to return to after cold-water paddles through iceberg trails, secure storage for expensive gear, and the freedom to chase the best conditions from British Columbia’s coastal channels to Newfoundland’s wildlife-rich waters. Whether you’re a beginner planning your first overnight paddle or an experienced kayaker mapping out a multi-week expedition, the rental options we’ve covered, from Fraserway RV’s western locations to RVezy’s delivery-to-campsite convenience and CanaDream’s nationwide reach, make it easier than ever to build your adventure around paddling, not logistics.

The combination works because it removes the either-or choice between comfort and remote access. Park your trailer at a lakeside campground, launch at dawn, and return to hot showers and a real bed. Move your base camp when you’re ready to explore the next waterway. For 2026 trips, start your planning early, book your trailer with kayak transport in mind, and get ready to experience Canada’s paddling landscapes with a home on wheels as your launching point.
Why Your Hiking Sleep Depends on the Right Sleeping Pad

A cold night on the trail can turn an unforgettable adventure into a miserable ordeal, and your sleeping pad is the only barrier between you and heat-draining ground that pulls warmth from your body faster than any wind chill. Whether you’re preparing for a multi-day trek along iceberg-dotted coastal trails in Newfoundland or planning a backcountry camping trip through bear country in the Rockies, the right sleeping pad determines whether you wake refreshed or stiff, sore, and dangerously cold.

The sleeping pad market in 2026 offers unprecedented options, from featherlight inflatable models weighing under 12 ounces to insulated foam pads built for winter camping. But this variety creates confusion. R-value ratings, packed weight, durability claims, and price points ranging from $30 to over $250 leave many hikers paralyzed by choice or, worse, purchasing the wrong pad for their needs.

Understanding what separates a genuinely comfortable, reliable sleeping pad from marketing hype requires looking beyond brand names. Temperature ratings matter far more than many realize. A pad with an R-value of 2.0 might work fine for summer trips in the Grand Canyon but will leave you shivering on spring shoulder-season hikes when wildlife emerges from hibernation and overnight temperatures still drop below freezing.

This guide cuts through the confusion by examining the core features that actually impact your sleep quality and safety, comparing real products available now, and matching specific pads to different hiking scenarios across North American terrain.

What Makes a Hiking Sleeping Pad Essential

When you settle into your tent after a long day on the trail, what separates you from the cold, uneven ground is more than a luxury, it’s a critical piece of gear that determines whether you wake up refreshed or miserable. A quality sleeping pad serves three vital functions that directly impact your safety and comfort in the backcountry.

First, insulation from the ground is non-negotiable for wilderness camping. Even in summer, the earth beneath you can drain body heat twenty times faster than still air. Your sleeping bag compresses under your weight, losing most of its insulating ability on the bottom side. The sleeping pad fills that gap, creating a thermal barrier that keeps you warm. This matters whether you’re camping on iceberg trails in colder northern regions or in lower-elevation forests where overnight temperatures still drop significantly.

Note: Hypothermia can develop even in moderate temperatures if you lack adequate ground insulation, particularly in remote wilderness areas where help is hours or days away.

Second, cushioning transforms rocky, root-riddled terrain into tolerable sleeping surfaces. Anyone who has tried to sleep directly on hard ground knows that even small stones become painful pressure points after a few hours. A good pad distributes your weight evenly, protecting your hips, shoulders, and spine from the terrain beneath. This cushioning becomes crucial on multi-day expeditions where cumulative fatigue affects both physical performance and decision-making skills.

Third, temperature regulation works both ways. While insulation prevents heat loss in cold conditions, proper airflow in warmer weather helps you stay comfortable without overheating. The pad creates a stable microclimate between your body and the ground, adapting to seasonal variations across North America’s diverse landscapes.

For beginners tackling their first overnight hike and seasoned backpackers pushing into challenging wildlife territories alike, the sleeping pad represents one third of your sleep system alongside tent and sleeping bag. Skimp here, and the entire system fails, no matter how expensive your other gear. The right pad means you recover properly, maintain energy reserves, and stay safe enough to enjoy the adventure you came for.

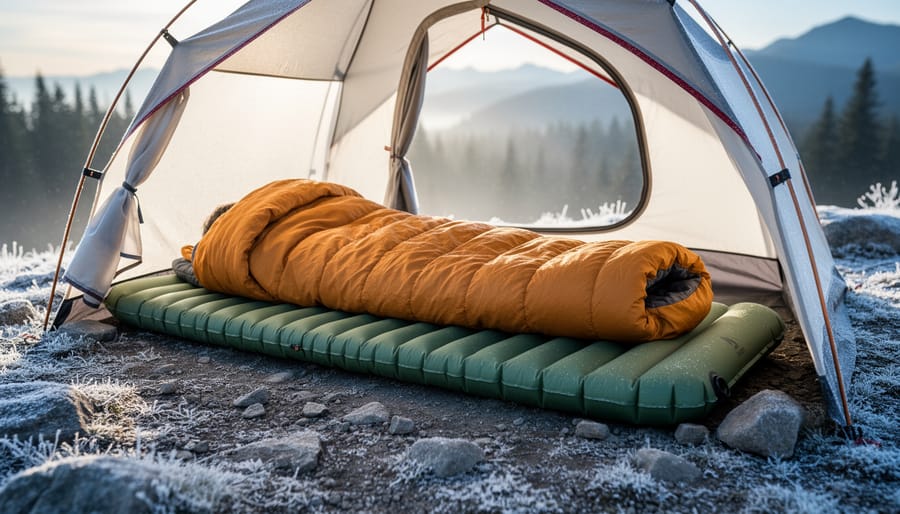
Backpacker adjusting an ultralight sleeping pad on cold rocky ground at a remote campsite
A properly inflated hiking sleeping pad can make a noticeable difference when the ground is cold and uneven.

Key Features That Define a Quality Hiking Sleeping Pad

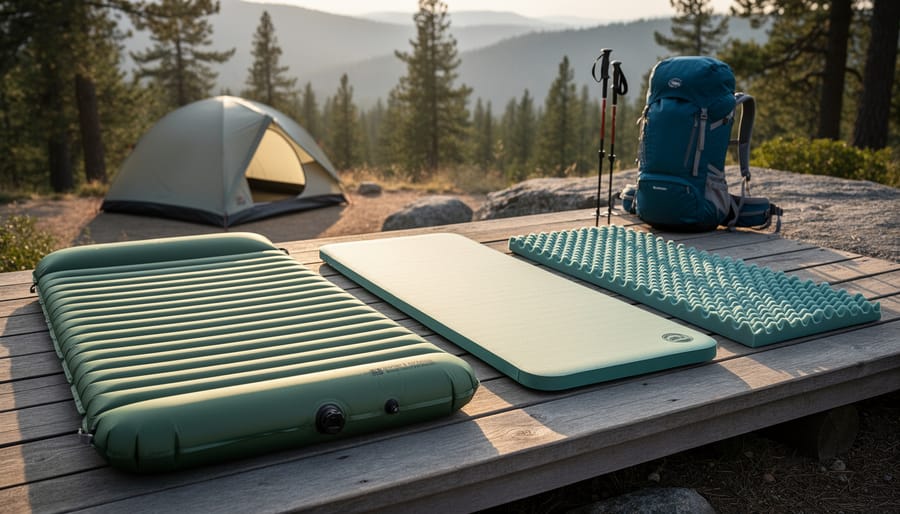
Assorted hiking sleeping pads laid out on a table with backpacking gear nearby
Different sleeping pad styles offer distinct insulation and cushioning options for varying hiking conditions.

R-Value and Insulation Performance

The R-value is your sleeping pad’s warmth rating, measured on a scale where higher numbers mean better insulation against cold ground. This single number determines whether you’ll sleep comfortably or shiver through the night. R-value reflects insulation performance through standardized testing, though real-world conditions can vary.

R-Value Range Season Temperature Conditions
1.0-2.9 Summer Warm nights above 50°F
3.0-4.9 Three-Season Spring through fall, down to 30°F
5.0+ Winter Cold conditions below 30°F

For serious backpackers chasing warmth without weight penalties, the Exped Ultra 6.5R leads the pack with an R-value of 6.9 at just 12.5 ounces for the medium mummy size. That warmth-to-weight ratio makes it exceptional for high-altitude camps and iceberg trail expeditions where cold ground can sap your energy overnight. At $200, you’re paying for engineering that keeps you warm in harsh environments without dragging down your pack weight.

Contrast that with the Klymit Static V Base, which lacks insulation entirely and works only for summer trips when ground temperatures stay mild. It’s lighter on your wallet and your back, but it’ll leave you cold the moment temperatures drop. Choose your R-value based on where you’ll actually hike, not where you wish you were going. Some reviewers note that Exped’s R-value seems optimistic compared to field performance, so build in a margin if you run cold or camp in exposed areas where wildlife roams and wind cuts through.

Weight and Packability

Every ounce matters when you’re five miles into a backcountry trail with a full pack digging into your shoulders. For backpackers, weight determines how far you can push each day, how your body feels by evening, and whether you’re energized or exhausted when you finally reach that mountain vista. Car campers, on the other hand, can afford to prioritize comfort over grams since they’re parking steps from their tent.
Ultralight pads like the Exped Ultra 6.5R at 12.5 ounces represent the cutting edge of weight reduction without sacrificing warmth. That’s lighter than a water bottle, yet it delivers serious insulation for cold-weather hikes. The Therm-a-Rest Z Lite Sol, weighing 14 ounces, offers another lightweight option that never fails because it’s solid foam with no air chambers to puncture.

The trade-off becomes real when you compare these to heavier alternatives. A plush, three-inch-thick air pad might weigh 24 ounces or more and feel like sleeping on a cloud, but those extra ten ounces add up when you’re also carrying food, water, and safety gear through rugged terrain. Backpackers covering serious mileage typically target total sleeping system weights under two pounds, while weekend warriors on easier trails can afford a bit more cushion.

Packability matters almost as much as weight. Air pads compress into stuff sacks smaller than a Nalgene bottle, freeing space inside your pack for essentials. Foam pads like the Z Lite Sol fold accordion-style and strap externally, which works fine but takes up visible real estate on your pack’s exterior.
Durability and Material Construction

Your sleeping pad’s construction determines whether it survives a season or fails you on night two of a remote trip. Three main designs dominate the market: air pads use inflatable chambers for lightweight packability, foam pads rely on closed-cell material that can’t puncture, and self-inflating pads combine open-cell foam with air for a balance of comfort and convenience.

Air pads like the Exped Ultra 6.5R and Nemo Tensor All-Season deliver impressive warmth-to-weight ratios but demand careful handling. A sharp rock or curious raccoon can end your sleep comfort instantly, so inspect your campsite and carry a repair kit. The trade-off is worth it for serious backpackers who need to shave ounces without sacrificing insulation.

Foam pads, including the Therm-a-Rest Z Lite Sol, are virtually indestructible. You can toss them onto glacial moraine, thorny brush, or rough ground without concern. They’re bulkier and less comfortable, but that reliability matters when you’re days from civilization or camping near wildlife corridors where a bear might wander through your gear.

Self-inflating pads split the difference, offering decent durability with better comfort than pure foam. They’re heavier than air pads but more packable than closed-cell options, making them solid choices for car camping or shorter trips where weight isn’t critical.

Comfort and Sleeping Position

Your sleeping position and movement habits matter more than you might think when choosing a hiking pad. Side sleepers need at least three inches of loft to prevent hip and shoulder pressure points from pushing through to the ground, while back sleepers can often get away with two to two-and-a-half inches. If you toss and turn throughout the night, that extra thickness becomes crucial since you’ll be shifting onto different body parts all night.

Pad shape directly affects how well you sleep. Mummy-shaped pads taper toward the feet, shaving precious ounces while still supporting your torso and shoulders where you need it most. Models like the Exped Ultra 6.5R come in mummy configurations that balance weight savings with adequate width for movement. Rectangular pads offer more room to sprawl and shift positions without rolling off the edge, but you’ll pay for that freedom with added weight and bulk in your pack. Some hikers find the tapered mummy shape restrictive, especially if they sleep on their stomach or change positions frequently.

Width matters too. A standard 20-inch pad works for most back and side sleepers who don’t move much, but restless sleepers or those with broader shoulders often prefer 25-inch options to avoid midnight tumbles onto the tent floor.

Choosing the Right Sleeping Pad for Your Hiking Adventures

For Weekend Warriors and Beginner Hikers

If you’re just starting to explore overnight hiking or heading out for weekend trips on well-maintained trails, your sleeping pad choice should balance comfort with simplicity. You don’t need to obsess over every ounce or spend a fortune, but you do want a pad that’ll actually let you wake up refreshed, not sore and regretful.

A good starter pad strikes a middle ground. Look for something with decent insulation (an R-value around 2-3 works for three-season use on most established trails), enough thickness to cushion your hips and shoulders, and a straightforward setup. Self-inflating pads are beginner-friendly because they partly inflate on their own, saving you from huffing and puffing after a long day on the trail. Air pads offer lighter weight and pack smaller, though they require manual inflation.

Weight matters less for weekend trips since you’re not grinding out multi-day expeditions. A pad in the 1-2 pound range gives you comfort without turning your pack into a torture device. Focus instead on getting the basics right: pair your pad with other camping essentials and solid trail food ideas and you’ll set yourself up for success. Test your pad at home first, practice inflation and packing, and you’ll build confidence before hitting those scenic North American trails.

For Serious Backpackers and Multi-Day Expeditions

Serious backpackers tackling multi-day expeditions need pads that balance warmth, weight, and durability without compromise. Routes like the Long Range Traverse or North Coast Trail demand gear that performs night after night across varied terrain, from rocky highlands to coastal forests where wildlife may be active.

For these adventures, prioritize an R-value of 4.0 or higher to handle unpredictable temperature swings at elevation or near water. The Exped Ultra 6.5R offers exceptional warmth at just 12.5 ounces, making it ideal when every ounce counts but cold nights are likely. Alternatively, the Nemo Tensor All-Season Ultralight Insulated delivers solid insulation while packing down small for tight backpack configurations.

Durability matters on extended trips where punctures mean miserable nights. Air pads with ripstop fabrics withstand abrasion better than bargain options, and carrying a lightweight repair kit becomes non-negotiable. Test your inflation method at home so you can set up quickly after exhausting trail days. Your pad is recovery equipment, not luxury, so invest in proven performance that won’t leave you shivering when you’re days from the trailhead.

For Cold-Weather and High-Altitude Adventures

When you’re venturing into mountainous terrain or environments with icebergs and cold conditions, insulation becomes your sleeping pad’s most critical feature. Look for an R-value of at least 5.0 for three-season alpine trips, and 6.0 or higher for winter camping or extreme cold. The Exped Ultra 6.5R stands out here with its R-value of 6.9 while weighing just 12.5 ounces, offering warmth without the bulk that slows you down on steep ascents. Pair your insulated pad with a closed-cell foam option like the Therm-a-Rest Z Lite Sol as extra ground insulation for added protection in harsh environments. Remember that cold ground drains body heat faster than cold air, so skimping on pad insulation compromises both comfort and safety when temperatures drop.

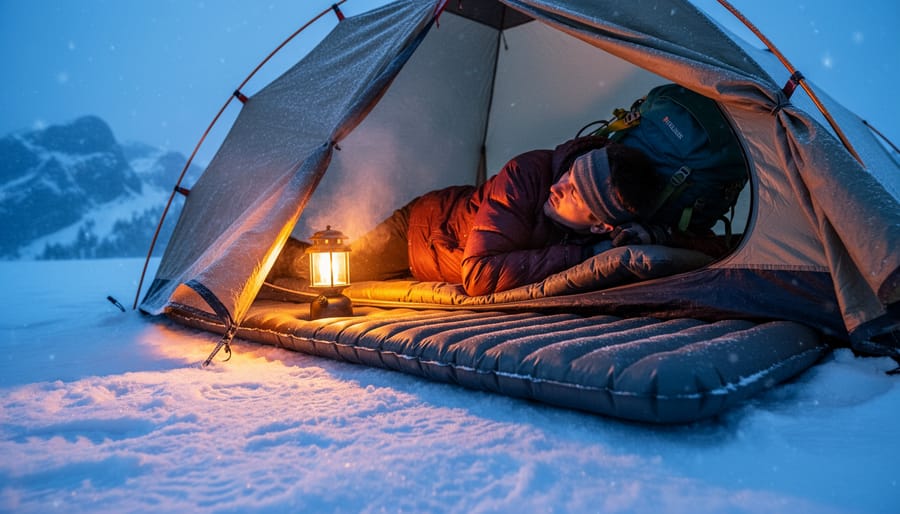
Insulated sleeping pad inside a tent at a snowy mountain campsite with frost on the ground
In cold conditions, an insulated sleeping pad helps protect you from frigid ground so you can rest and recover overnight.

Top Hiking Sleeping Pads Worth Considering in 2026

After understanding the features that make a quality hiking sleeping pad, here’s how top 2026 models stack up for different hiking scenarios. These selections represent tested options across the warmth, weight, and budget spectrum, helping you match a pad to your specific adventures.

Model Weight R-Value Price Best For
Exped Ultra 6.5R 12.5 oz 6.9 $200 Cold weather, year-round
Nemo Tensor All-Season Ultralight All-season rated Mid-range Three-season versatility
Therm-a-Rest Z Lite Sol 14 oz Moderate Budget-friendly Reliability, no punctures
Klymit Static V Base Lightweight Minimal Entry-level Summer trips only

The Exped Ultra 6.5R stands out with a category-leading warmth-to-weight ratio, delivering an R-value of 6.9 at just 12.5 ounces for the medium mummy version. At $200, it’s a serious investment that pays dividends when you’re camping near iceberg trails or in high-altitude environments where nighttime temperatures plummet. Available in both mummy and rectangular shapes with various width options, it suits hikers who refuse to compromise between winter warmth and ultralight performance.

For three-season hikers who want versatility without extreme cold-weather specs, the Nemo Tensor All-Season Ultralight Insulated balances insulation, packability, and comfort. It compresses small in your pack yet provides reliable cushioning and temperature regulation across spring through fall conditions, making it ideal for multi-day expeditions where weather can shift.

The Therm-a-Rest Z Lite Sol at 14 ounces offers a different value proposition: bulletproof reliability. This closed-cell foam pad can’t puncture, requires zero inflation, and doubles as a sitting pad during breaks. It’s perfect for beginners learning trail skills or experienced hikers tackling rocky terrain where sharp stones and wildlife encounters make durability paramount. While it sacrifices some comfort compared to air pads, you’ll never worry about a midnight deflation crisis.

Budget-conscious summer hikers gravitate toward the Klymit Static V Base. Its minimal insulation limits use to warm-weather trips, but if you’re exploring established trails during peak season and prioritizing low cost over year-round capability, it gets you on the trail without breaking the bank. Just recognize its limitations before planning shoulder-season adventures or mountainous routes where temperatures drop unexpectedly.

Caring for Your Sleeping Pad on the Trail

Your sleeping pad can handle tough conditions, but a little care goes a long way. Start by choosing your campsite wisely, clear away sharp rocks, sticks, and pinecones before rolling out your pad. Even durable materials appreciate a buffer, so if you’re in particularly rocky terrain or areas with thorny vegetation, lay down a ground cloth or use your sleeping bag’s stuff sack as a protective layer under key pressure points.

Inflation matters more than you’d think. For air pads, avoid over-inflating in cold weather since the air inside will expand as it warms. Use the manufacturer’s recommended method, whether that’s breath inflation, a pump sack, or an integrated valve system, and always close valves tightly before settling in for the night. In the morning, open the valve and gently press out air rather than forcing it, which stresses seams unnecessarily.

Deflation gets easier with a simple trick: start at the opposite end from the valve and slowly roll toward it, squeezing air out as you go. This prevents trapped air pockets that make packing awkward and protects internal baffles from compression damage.

Pack a lightweight repair kit and know how to use it before you need it. Most kits include patches and adhesive that work on trail-side punctures. For foam pads like the Therm-a-Rest Z Lite Sol, tears can be temporarily fixed with duct tape until you’re home. With air pads, locate leaks by listening for hissing or submerging sections in water if you’re near a stream.

Storage at home matters too. Keep your pad loosely rolled or flat in a dry space, never compressed long-term, which degrades materials and insulation. After trips through wildlife country or muddy trails, wipe down your pad before storing to prevent mold and material breakdown.

Your hiking sleeping pad isn’t just another piece of gear to check off a list. It’s the foundation of every sunrise you’ll wake up to see, every trail you’ll conquer with energy to spare, and every memory you’ll make under North America’s vast skies. Whether you’re paddling to remote campsites where icebergs drift past your shore or hiking through valleys where wildlife roams freely, quality rest transforms good adventures into extraordinary ones.

Investing in the right pad means investing in yourself. It means waking refreshed on day three of a backcountry expedition instead of dragging through exhaustion. It means staying warm on alpine ridges and comfortable on rocky ground. Most importantly, it means exploring with confidence, knowing your body gets the recovery it needs to fully experience everything from coastal fog banks to mountain summits.

So choose wisely, pack smart, and sleep well. The trails are waiting, and you deserve to meet them at your best.

Easy Camping Food Ideas That Actually Taste Good on the Trail

The best camping meals come together in under 20 minutes and require nothing more than a single pot or skillet. After years of navigating everything from multi-day iceberg trail paddling expeditions to weekend wilderness getaways, I’ve learned that elaborate cooking has no place at the campsite when you’re exhausted from a full day outdoors.

Smart campers prep ingredients at home. Chop vegetables, pre-mix spice blends, marinate proteins, and pack everything in labeled containers before you leave your driveway. This single strategy cuts cooking time in half and keeps you from dealing with messy prep work when all you want is hot food and a campfire.

Foil packet meals solve the eternal camping dilemma of limited cookware and tedious cleanup. Wrap seasoned chicken with potatoes and peppers, seal it tight, and toss it directly onto hot coals for 15 minutes. You get a complete dinner with zero dishes to scrub in the dark.

One-pot breakfasts like skillet scrambles or overnight oats give you fuel without fuss. Combine eggs, pre-cooked sausage, and cheese in a cast iron pan, or let oats soak overnight in a mason jar with dried fruit and nuts. Both options leave you more time to hit the trails instead of babysitting a camp stove.

The camping meals that work best are the ones you’ll actually make when you’re tired, hungry, and surrounded by curious wildlife. Forget Instagram-worthy spreads. Focus on food that tastes great, comes together fast, and uses ingredients that won’t spoil in your cooler.

Why Easy Camping Food Matters for Outdoor Adventures

You’ll burn thousands of calories on a full day of paddling or hiking, and your body needs real fuel to keep going. The difference between a satisfying meal and mediocre trail food isn’t just taste, it’s your energy level at mile seven, your recovery overnight, and whether you’re excited to get back out there the next morning or dragging yourself from the tent.

Smart camping food planning directly impacts how much adventure you fit into your day. When breakfast takes five minutes instead of thirty, you’re on the water catching sunrise light across iceberg trails. When dinner doesn’t require constant stirring or monitoring, you spend that time exploring the shoreline or watching wildlife instead of hunched over a camp stove. The right meals deliver proper carbohydrate for exercise without weighing down your pack or killing your momentum.

Note: The best camping meals balance calorie density, preparation simplicity, and genuine enjoyment, you need all three for multi-day wilderness trips.

Weight matters when you’re portaging a kayak or climbing elevation. Every ounce you carry affects your pace and endurance. Strategic food choices let you pack lighter while eating better, pancake mix in a sealed pitcher weighs far less than individual packages, pre-cracked eggs in a bottle eliminate fragile cartons, and smart ingredient selection means fewer items taking up precious pack space.

Active outdoor enthusiasts need more than survival rations. You’re not just feeding yourself; you’re fueling serious physical output in conditions that demand reliable energy. Proper meal planning transforms camping from an endurance test into something you genuinely look forward to, where good food becomes part of the adventure rather than an afterthought between paddles.

Smart Prep-Ahead Strategies for Camp Cooking

The difference between fumbling with ingredients at your campsite and enjoying a smooth cooking experience comes down to what you do at home before you leave. Smart prep work transforms camping meals from frustrating chores into quick wins that let you spend more time on the water or trails.

Start with your protein. If scrambled eggs are on your breakfast menu, crack them at home and pour them into a sealed bottle or shaker container. This eliminates the nightmare of carrying fragile egg cartons through rugged terrain and gives you pour-ready eggs that cook faster. A good squeeze bottle works perfectly and takes up less space in your cooler than a dozen-egg carton.

Pre-mixing dry ingredients saves significant time and mess at camp. You can store pancake mix in a pitcher with a tight-sealing lid, keeping the powder ready until you add water at your campsite. This approach works for any dry mix you’d normally prepare from scratch. Just label your containers clearly so you’re not guessing what’s inside when you’re hungry after a morning paddle.

Fruit prep deserves attention too. Pre-cut all your produce at home except bananas, which brown too quickly when sliced early. Watermelon, cantaloupe, pineapple, grapes, and berries all travel well when washed, chopped, and stored in sealed containers. You’ll thank yourself when you can grab a handful of ready-to-eat fruit instead of wrestling with a knife on an uneven camp table.

For multi-day trail prep portion your meals into individual servings before leaving home. Pre-measure spices, sauces, and condiments into small containers or bags rather than hauling full bottles. Consider marinating meat before freezing it in zip-top bags, the frozen blocks act as extra cooler ice while they thaw, and your protein arrives pre-seasoned.

The prep-ahead approach extends to creative solutions like bringing tubes of crescent rolls for versatile meal options. These refrigerated doughs need cool storage but reward you with fresh-baked taste that elevates camp cooking beyond typical trail fare.

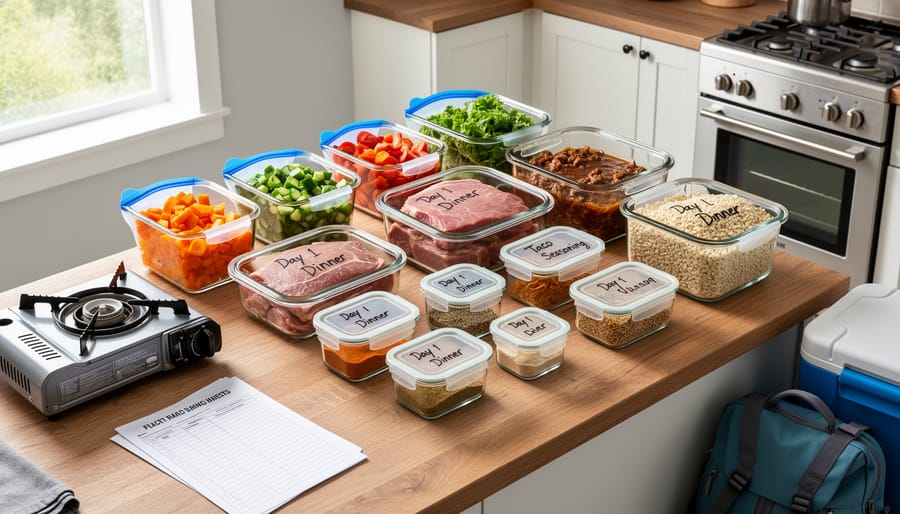
Overhead view of pancake batter pitcher, sealed egg bottles, and containers of pre-cut fruit arranged on a kitchen counter for camping prep.
Prep-ahead ingredients staged at home make campsite cooking faster, simpler, and less stressful on travel days.

Easy Breakfast Ideas to Fuel Your Morning Paddle

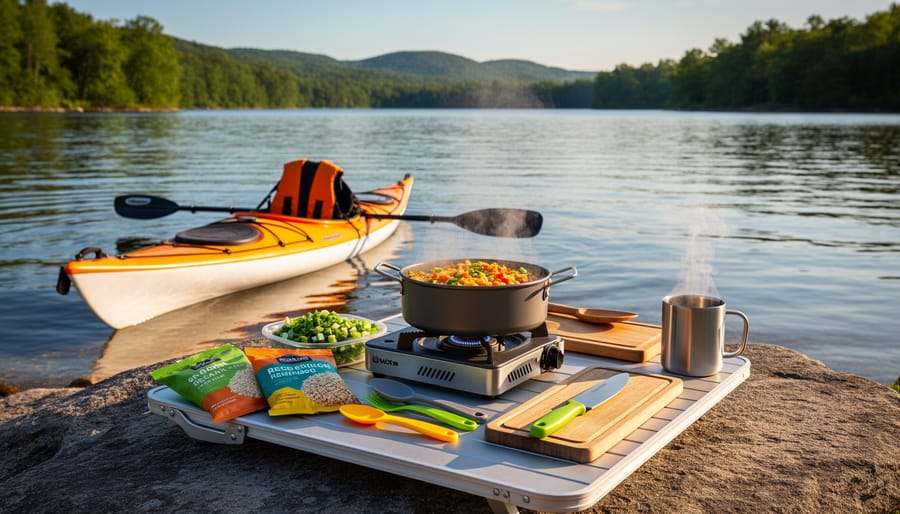
Kayaking camp meal setup with a portable stove, skillet with eggs, cutting board fruit, and prepacked ingredients on a picnic table by the river.
A vibrant camp cooking setup by the water shows how quick, satisfying meals can fit right into an active kayaking day.

Pancakes Made Simple

The humble pitcher transforms pancake mornings from frustrating measuring sessions into pour-and-cook simplicity. At home, measure your dry pancake mix and transfer it directly into a sturdy pitcher with a tight-sealing lid. This pre-portioning eliminates the need to haul bulky boxes or fumble with measuring cups at the campsite while keeping the powder completely dry during transport.

When breakfast time arrives, add the required water directly to the pitcher, secure the lid, and shake vigorously until the batter reaches your preferred consistency. The spout design gives you precise control over portion sizes as you pour onto your camp griddle or skillet, preventing the messy drips and spills that come with scooping batter from bowls or bags. This method works equally well whether you’re cooking over a propane camp stove or balancing a pan on grate bars above your campfire.

Choose a pitcher with measurement markings on the side so you can accurately gauge water amounts without additional tools. The container pulls double duty too, after breakfast cleanup, it stores leftover batter for the next morning or serves as a general-purpose camp pitcher for mixing drinks or storing water.

Egg-Based Morning Fuel

Forget the hassle of babying a cardboard carton through your gear, eggs make the trip much better when you crack them at home and pour them into a sealed water bottle or camping-friendly container. This simple trick eliminates the worry of crushed shells in your backpack and gives you ready-to-cook scrambled eggs that just need a quick shake before hitting the pan.

A standard 16-ounce bottle holds about six to eight eggs, perfect for feeding a small group after a morning paddle. Add a pinch of salt and pepper before sealing if you want, or keep it plain and season at camp. The sealed bottle protects your food from the bumps of trail hiking and keeps everything contained if you’re storing it in a cooler with ice packs.

When you’re ready to cook, give the bottle a vigorous shake to mix the yolks and whites thoroughly. Pour straight into your heated skillet over the campfire or portable stove, scrambling as usual. Clean the bottle afterward and you’ve got a container ready for the next adventure, no fragile packaging required.

Quick Grab-and-Go Options

Pre-cut fruit salads save precious morning minutes when you’re eager to launch your kayak at sunrise. Package strawberries, melon chunks, grapes, and apple slices in sealed containers the night before (skip bananas until morning to prevent browning). Hard-boiled eggs peeled at home, individual nut butter packets, and whole-grain muffins wrapped in foil become substantial day hike meals that require zero campsite prep. Granola mixed with dried cranberries and almonds in resealable bags offers crunchy energy you can eat straight from the container while breaking down your tent, keeping you fueled for whatever wilderness adventures await.

Satisfying Dinner Solutions After a Day on the Water

After spending the day paddling through cold waters or navigating rocky terrain, your body craves real food that delivers warmth and substance. Dinner is your chance to refuel completely, and the right approach means satisfying meals without turning your campsite into a complicated outdoor kitchen.

One-pot meals are the foundation of smart camp cooking because they minimize cleanup while maximizing flavor. A simple chili starts with browning ground beef or turkey in your camp pot, then adding canned beans, diced tomatoes, and a packet of seasoning, everything cooks together in under 30 minutes. Pasta dishes work equally well: boil your noodles, drain most of the water, then stir in jarred sauce and pre-cooked sausage you sliced at home. The key is choosing ingredients that don’t require refrigeration and can handle being transported in your pack or dry bag.

Those crescent roll tubes mentioned for breakfast pull double duty at dinner. Wrap the dough around hot dogs for pigs in a blanket, stuff them with pre-cooked ground meat and cheese for makeshift empanadas, or roll them into spirals around a skewer for campfire breadsticks. The dough stays stable for a couple days in cool weather and cooks perfectly over coals or on a camp stove griddle.

Consider organizing your trail dinner ideas by cooking method to match your setup each night:

  • Campfire options: foil packet meals with chicken, potatoes, and vegetables; skewered kebabs with pre-marinated meat; Dutch oven cornbread
  • Portable stove meals: ramen upgraded with dehydrated vegetables and an egg; instant rice with canned chicken and seasoning packets; mac and cheese with added tuna
  • No-cook backup dinners: tortilla wraps with peanut butter and honey; bagels with cream cheese and smoked salmon; trail mix combined with dried fruit for calorie-dense grazing

The meals that work best after wildlife encounters or long paddling days are the ones you can prepare mostly on autopilot. Pre-measure spices into small bags at home, portion out ingredients into daily bundles, and choose recipes where “cooking” means mostly just heating and combining. You’ll spend less time hovering over a stove and more time enjoying the fact that you’re eating hot food under open sky, which somehow tastes better than anything you’d make in a full kitchen anyway.

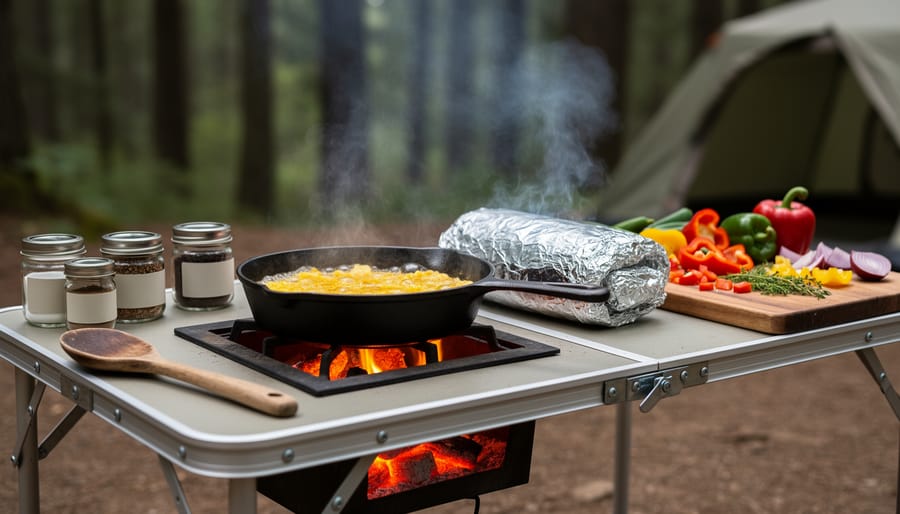
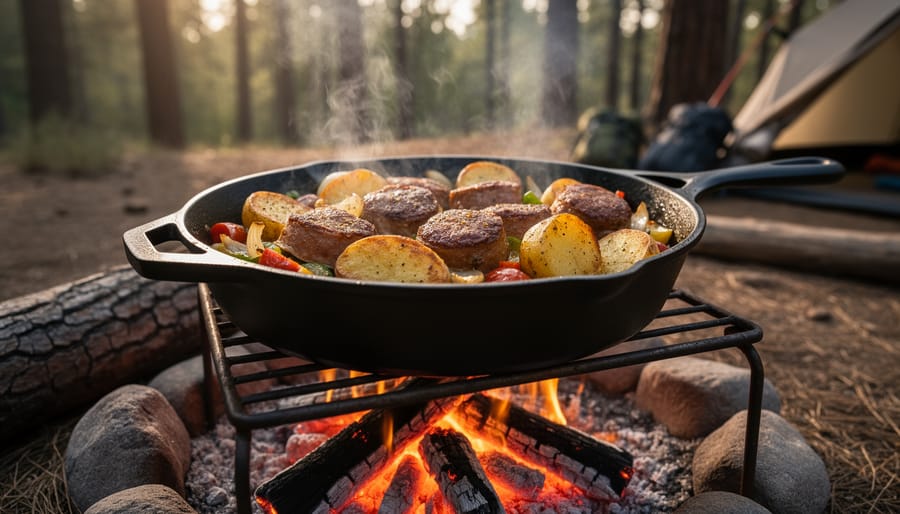
Campfire dinner with a cast-iron skillet bubbling over coals and crescent-roll pastries browning nearby, with tents and forest blurred in the background.
A cast-iron skillet dinner over the campfire shows how hearty trail meals can be simple and incredibly flavorful.

Fast Snacks and Quickie Lunches for Trail Days

When you’re mid-paddle or halfway up a trail and hunger hits, you need food that doesn’t slow you down. The best trail snacks and lunches work without refrigeration, require zero preparation, and can be eaten with one hand while you’re perched on a rock watching for wildlife.

Trail mix remains unbeatable because you can customize it before you leave home. Toss together nuts, dried cranberries, chocolate chips, and whatever else sounds good, then portion it into resealable bags. Jerky works the same way, it’s protein-dense, doesn’t spoil, and fits anywhere in your pack. Pair either with whole apples or oranges, which handle bumps better than softer fruit and don’t need cutting.

Peanut butter is your secret weapon for midday energy. Spread it on tortillas, crackers, or sturdy bread, then roll or stack them in wax paper. These keep for hours and deliver fat and protein when you’re starting to fade. If you’re feeling fancy, add honey or banana slices before wrapping. String cheese and summer sausage round out the protein options, both travel well without ice if you’ll eat them within a day or two.

For something more substantial, build simple wraps the morning you’ll eat them. Spread cream cheese on a tortilla, layer deli meat and pre-cut veggies, roll tight, and slice into pinwheels. Wrap them in foil and they’ll stay together in your dry bag until lunch. Crackers and hummus packets make another solid combination, the single-serve pouches eliminate the mess of transporting an open container.

Granola bars and energy bars seem obvious, but they’re obvious for good reason. They don’t melt (usually), don’t crumble easily, and you can eat them while kayaking without creating a situation. Stock a variety because you’ll get sick of the same flavor by day three of any backcountry trip.

Campfire Treats Worth the Effort

After mastering breakfast and dinner, it’s time for the reward that makes everyone gather around the fire. Campfire cones deliver that nostalgic sweet fix with way more excitement than standard s’mores, and they’re ridiculously simple to pull off after a long day paddling or hiking.

Grab waffle cones before your trip and stuff them with whatever sounds good: chocolate chips, mini marshmallows, peanut butter, and chopped fruit like bananas create a melted, gooey treat that beats stale graham crackers every time. The cone acts as both bowl and wrapper, which means zero cleanup and maximum fun.

  1. Fill each waffle cone about two-thirds full with your chosen mix of chocolate chips, marshmallows, peanut butter, and fruit.
  2. Wrap the stuffed cone completely in aluminum foil, crimping the edges to seal it tight.
  3. Place the wrapped cone at the edge of your campfire coals, not directly in flames, for about five minutes.
  4. Rotate the cone once or twice with tongs to heat evenly without burning.
  5. Carefully unwrap the foil (it’ll be hot), and let the cone cool for a minute before eating straight from the crispy shell.

Banana boats offer another foolproof option. Slice a banana lengthwise without cutting all the way through, stuff the gap with chocolate chips and marshmallows, wrap in foil, and warm over coals for about five minutes. The banana turns soft and warm, creating a natural bowl for melted toppings.

For groups with adventurous eaters, try cinnamon sugar tortillas. Spread butter on a flour tortilla, sprinkle with cinnamon and sugar, roll it up, wrap in foil, and warm by the fire until the sugar caramelizes slightly. Simple, portable, and satisfying after watching wildlife or navigating iceberg trails all day.

Packing and Storage Tips for Wilderness Trips

Organizing your food properly makes the difference between a smooth wilderness adventure and a frustrating scramble through soggy bags at dinnertime. Whether you’re paddling past icebergs or setting up camp after a full day on the trails, smart packing keeps your meals accessible and your energy high.

Start with rigid containers for fragile items. That pitcher you’re using for pancake mix doubles as protective storage during transport, and sealed bottles for pre-cracked eggs prevent the mess of broken shells in your pack. Hard-sided containers protect items like fruit salads and pre-cut produce from getting crushed under sleeping bags and gear. Place these containers in the center of your pack or dry bag, surrounded by softer items like clothing that cushion impacts.

Weight distribution matters more on multi-day trips. Pack heavier food items closer to your back and centered between your shoulder blades for hiking comfort. In kayak dry bags, position denser foods low and toward the center of the bag to maintain proper balance on the water. Keep the first day’s meals and snacks near the top for easy access, saving freeze-dried or lighter options for later in the trip when you’ve consumed the heavier fresh ingredients.

Wildlife protection requires serious attention in North American wilderness areas. Bear canisters are mandatory in many backcountry zones and worth carrying even where optional. If you’re exploring areas like Camping Chenal Du Moine check specific wildlife protocols before departure. Never store food in your tent or leave it unsecured at camp. Hang food bags at least 12 feet high and 6 feet from tree trunks when bear canisters aren’t available, or use designated food lockers where provided.

Separate your cooking items from your sleeping area by at least 100 yards. Store anything with a scent, including toothpaste and sunscreen, alongside your food supplies rather than near where you sleep.

The difference between a memorable wilderness adventure and one you’re counting down to finish often comes down to the meals. When you’re paddling past towering icebergs or settling into camp after miles on the trail, satisfying food transforms the experience from endurance test to genuine enjoyment. These easy camping food ideas aren’t about gourmet complexity, they’re about fueling your body properly so you can focus on what matters: spotting wildlife, exploring hidden waterways, and soaking in North American landscapes that few people ever see.

The prep-ahead strategies, simple breakfast solutions, and creative campfire treats covered here work because they respect your time and energy. You didn’t travel to remote wilderness areas to spend hours cooking over a camp stove. You came to paddle, hike, and explore. Smart food planning means more sunrises on the water and fewer nights wondering why you bothered hauling ingredients you never used.

Start small on your next trip. Try the pancake pitcher method or crack those eggs into a sealed bottle before you leave home. Experiment with campfire cones after a long day on the trail. Each small improvement compounds, turning camping meals from something you tolerate into something you actually look forward to. The wilderness tastes better when you’re eating well, and these straightforward approaches prove you don’t need to sacrifice flavor for simplicity. Your next adventure deserves better than soggy sandwiches and survival rations, pack smarter, eat better, and make every moment count.

Your Complete Booking Strategy for Camping Chenal Du Moine in 2026

Camping Chenal du Moine sits on the doorstep of one of Quebec’s most spectacular paddling destinations: the 103-island archipelago of Parc national des Îles-de-Boucherville. This shoreline campground has become the launchpad of choice for kayakers eager to explore sheltered channels where great blue herons hunt along grassy banks and the St. Lawrence River reveals its quieter side.

Securing a spot here requires planning. The campground’s limited waterfront sites book out weeks ahead during peak season, especially for weekend arrivals. Log into the Sépaq reservation system exactly four months before your target date (bookings open at 8:00 AM) to claim prime sites. Mid-week arrivals in June or September offer better availability and calmer waters for paddling.

What sets this location apart is immediate water access without the logistical headaches. Launch your kayak steps from your tent and within minutes you’re threading through channels where the current slackens and wildlife thrives. The archipelago’s protected waters make it ideal for paddlers still building confidence, while experienced kayakers can venture toward the main river channel where conditions demand stronger skills.

The campground itself is modest but functional. Sites include fire pits and picnic tables, with clean facilities nearby. You’re not here for luxury camping. You’re here because dawn on the water, watching mist lift off channels as turtles surface and ospreys dive, creates moments no resort can replicate.

Pack your boat and gear ready to go. Time on the water is the currency that matters here.

Why Camping Chenal Du Moine Is Worth Planning Ahead For

Camping Chenal Du Moine sits at the edge of one of North America’s most remarkable freshwater ecosystems. With privileged access to the St. Lawrence archipelago’s 103 islands, rivers, and marshes, this campground serves as your gateway to a paddling paradise that few other locations can match.

The archipelago creates a labyrinth of sheltered channels and open waterways that draw kayakers from across the continent. Unlike exposed coastal paddling or simple river routes, these St. Lawrence archipelago islands offer protected exploration through diverse terrain where every bend reveals new scenery. You’ll glide past reed-fringed islands, navigate calm channels between marsh grasses, and discover hidden inlets that feel completely removed from civilization.

The wildlife viewing here rivals dedicated nature reserves. Great blue herons stalk the shallows at dawn, their prehistoric silhouettes frozen against the morning mist. Beavers construct their lodges in quiet backwaters, and if you paddle silently through the channels, you’ll spot painted turtles basking on half-submerged logs. Kingfishers patrol overhead, diving suddenly for fish, while muskrats leave V-shaped wakes across glassy water. The marshes teem with life during spring and fall migrations, making the area a magnet for birders as much as paddlers.

This rich environment draws visitors from May through October, and prime summer weekends fill quickly. The campground’s direct water access means you can launch at sunrise and explore for hours without trailering to distant put-ins. That convenience, combined with the archipelago’s protected waters suitable for beginners yet engaging enough for experienced paddlers, makes Chenal Du Moine especially popular among multi-day kayaking groups and families seeking accessible adventure.

Securing your preferred dates means planning ahead. The combination of limited campsites and exceptional paddling access creates competition you won’t face at ordinary campgrounds.

What You Need to Know Before Booking

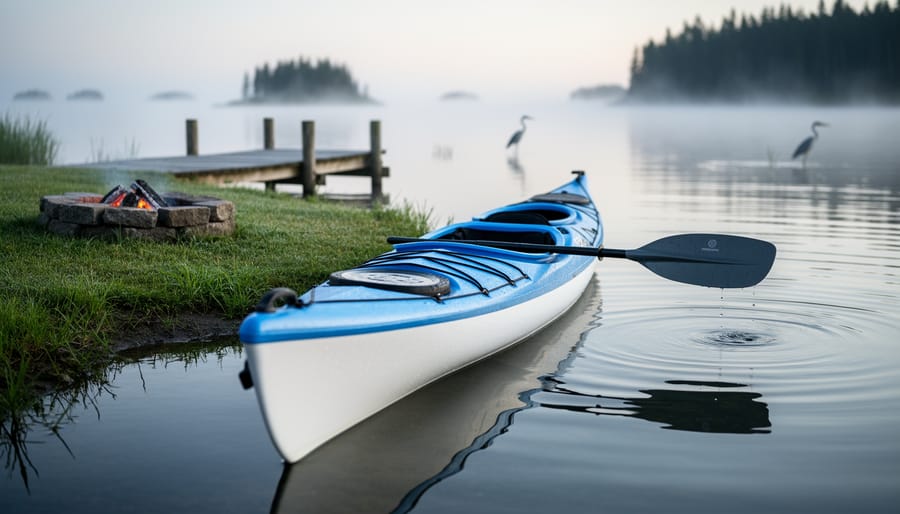
Kayak near a wooden dock at Camping Chenal Du Moine with campers preparing to paddle
A kayak launch scene at Camping Chenal Du Moine sets the tone for an archipelago paddling adventure from the campsite’s shoreline.

Access Requirements and Location Details

Camping Chenal Du Moine sits in Sainte-Anne-de-Sorel, Quebec, roughly 90 minutes northeast of Montreal along Highway 40 and Route 132. The drive takes you through charming riverside towns before reaching the archipelago region. You’ll find the campground well-signed from the main road, though GPS coordinates ensure you won’t miss the turn during your first visit.

Parking is straightforward once you arrive. Most campsites accommodate vehicles directly at your spot, while designated overflow areas handle peak-season crowds and day-use kayakers launching from the facility. The flat terrain makes navigating with trailers and RVs manageable for most drivers.

Seasonal access typically runs from late spring through early fall, when water levels and weather conditions support safe kayaking through the marshes and channels. Ice and flooding can limit access during winter and early spring months. Contact the campground before finalizing your plans, especially if you’re booking shoulder-season dates in May or late September. They’ll confirm current conditions and any temporary restrictions affecting vehicle access or water routes through the 103-island archipelago system.

Best Times to Visit for Kayaking

The St. Lawrence archipelago reveals different personalities throughout the paddling season, each offering distinct rewards for kayakers. Late May through mid-June delivers exceptional birding as herons, kingfishers, and waterfowl establish nesting territories across the marshes. Water levels run high from spring runoff, creating swift currents through the channels that demand confident boat handling but open access to smaller waterways that become shallow later. Mornings are cool, mosquitoes are active, and campground crowds remain light.

July and August bring warm, stable weather ideal for overnight kayak camping among the islands. Water temperatures climb into the comfortable range for accidental swims, and long daylight hours let you cover serious distance through the 103-island maze. Beaver and muskrat activity peaks during dawn and dusk paddles. The trade-off: these months draw the highest campground occupancy, so securing your site requires advance planning. Afternoon thunderstorms build quickly over the river valley, making weather awareness essential.

September offers a sweet spot for experienced paddlers. Crowds thin dramatically after Labour Day while water conditions remain excellent through the month. Migratory birds stage through the marshes, and autumn colors frame your routes by mid-month. Water levels drop, exposing sandbars that create new hazards but also primitive camping spots. Nights turn cold, but daytime paddling stays pleasant with fewer insects and crystalline light for photography.

How to Secure Your Campsite

Securing a campsite at Chenal Du Moine requires a proactive approach, especially if you’re planning to visit during the prime kayaking months of June through August. The campground operates on a reservation system, and understanding how to navigate the booking process can make the difference between scoring your ideal dates and missing out on this archipelago gateway.

Your first step should be direct contact with the campground itself. While many Quebec campgrounds have migrated to online booking platforms, calling Camping Chenal Du Moine directly remains the most reliable way to get current information about availability, reservation windows, and any seasonal booking restrictions. Having a conversation with staff also lets you ask specific questions about kayak storage, launch access, and site selection based on your paddling plans.

  1. Check the campground’s website or call ahead to understand their reservation opening dates for the 2026 season, as many Quebec campgrounds release their calendars several months in advance.
  2. Prepare a list of preferred date ranges and backup options, since prime waterfront or easily accessible sites fill quickly during peak season.
  3. Contact the campground by phone or through their official channels with your dates ready, and be prepared to discuss your specific needs, such as kayak launch proximity or group site requirements.
  4. Confirm all reservation details in writing if possible, including your arrival date, site number or type, total cost, and cancellation policies.
  5. Set a calendar reminder to follow up a week before your arrival to reconfirm your reservation and ask about current water conditions for kayaking.

For weekend stays between late May and early September, booking at least four to six weeks in advance gives you the best shot at availability. Holiday weekends disappear even faster. If you’re flexible with your dates, weekday arrivals often have better availability and give you a quieter experience on the water as you explore the 103-island ecosystem.

Don’t rely solely on third-party booking sites. These platforms sometimes show outdated availability or lack the detailed site information you need for planning kayaking access. Going directly to the source ensures you get accurate, current information and can ask nuanced questions about which sites work best for launching into the channels and marshes.

Kayaking Launch Points and Water Access from the Campground

Navigating the 103-Island Archipelago

The 103-island archipelago sprawls across the St. Lawrence in a maze of channels, backwaters, and marsh-lined passages that reward methodical planning. Before your first paddle stroke, study the water levels and current flow patterns, which shift dramatically between spring runoff and late-summer lows. Local paddlers recommend starting with shorter loops close to the campground while you learn how channels interconnect, then gradually extending your range as the landscape’s logic becomes clear.

Navigation here differs from open-water paddling. The channels twist through dense vegetation, and what appears to be a through-route on a map may dead-end in shallow marsh. Carry a waterproof chart or GPS device, mark your launch point clearly, and note distinctive features like fallen trees or distinctive rock formations to orient yourself on the return. The marsh environment creates natural wind blocks but also limits sightlines, so tracking your progress becomes essential.

Consider guided kayaking for your first day, particularly if you’re unfamiliar with river-marsh systems. Experienced guides know which channels hold deeper water, where currents accelerate around island tips, and which routes offer the richest wildlife encounters without requiring advanced paddling skills.

Safety in the archipelago means respecting changing conditions. Afternoon winds funnel through wider channels and can create choppy water that challenges stability. Always file a float plan with someone at the campground, carry a whistle and basic repair kit, and avoid paddling alone in unfamiliar sections. The islands provide abundant landing spots for breaks, but verify you’re on public land before going ashore. This ecosystem’s complexity makes every paddle unique, but proper preparation transforms potential confusion into genuine exploration.

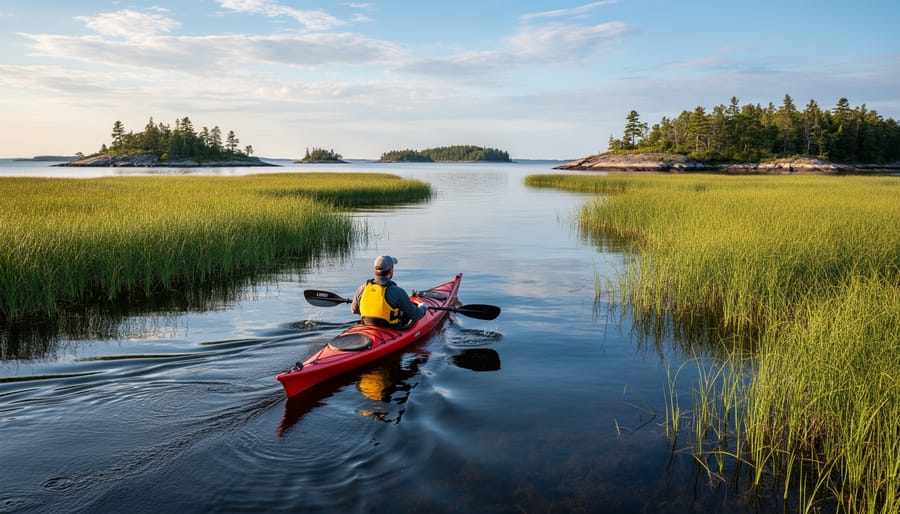
Kayaker paddling through calm marsh channels near the St. Lawrence archipelago at sunrise
Paddling through the marsh channels captures why Camping Chenal Du Moine is such a strong base for exploring the St. Lawrence archipelago by kayak.

Essential Gear and Preparation for Your Camping-Kayaking Adventure

Packing for a camping trip in an archipelago setting requires balancing comfort with portability. The kayak packing challenge at Chenal Du Moine centers on fitting everything into dry bags while keeping weight distribution stable for paddling through channels and marshes.

Start with your waterproofing strategy. Every piece of gear should assume full water exposure. Invest in quality dry bags in multiple sizes (20L for clothes, 10L for electronics and valuables, 5L for food items). Double-bag anything that can’t get wet. Electronics, first aid supplies, and matches need redundant protection. A waterproof phone case with a lanyard keeps your navigation tools accessible while paddling.

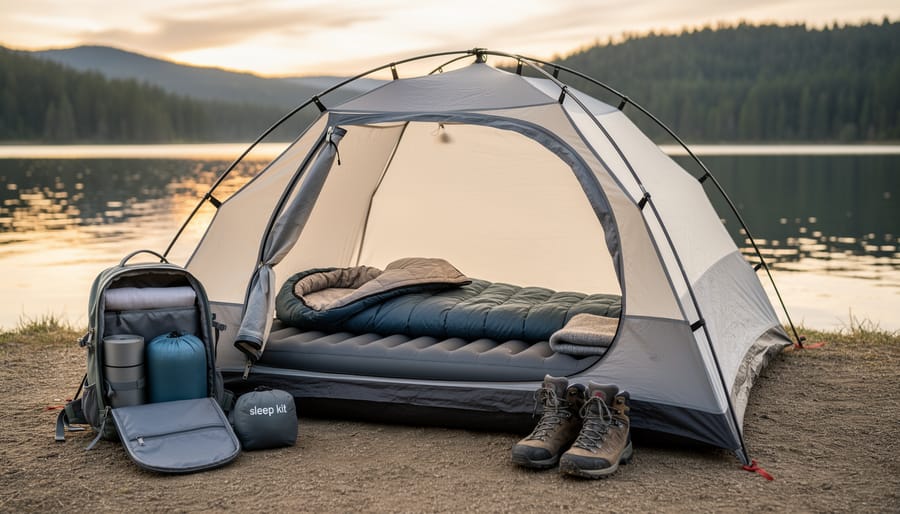
For camping gear in this marsh environment, choose your tent carefully. A three-season tent with a solid rainfly and good ventilation handles Quebec’s summer humidity. Bring extra stakes since island campsites sometimes have sandy or loose soil. A compact sleeping pad with an R-value of at least 3 provides insulation from cool, damp ground near water. Pack a headlamp with fresh batteries plus a backup light source.

Category Essential Items Optional Upgrades Beginner Notes
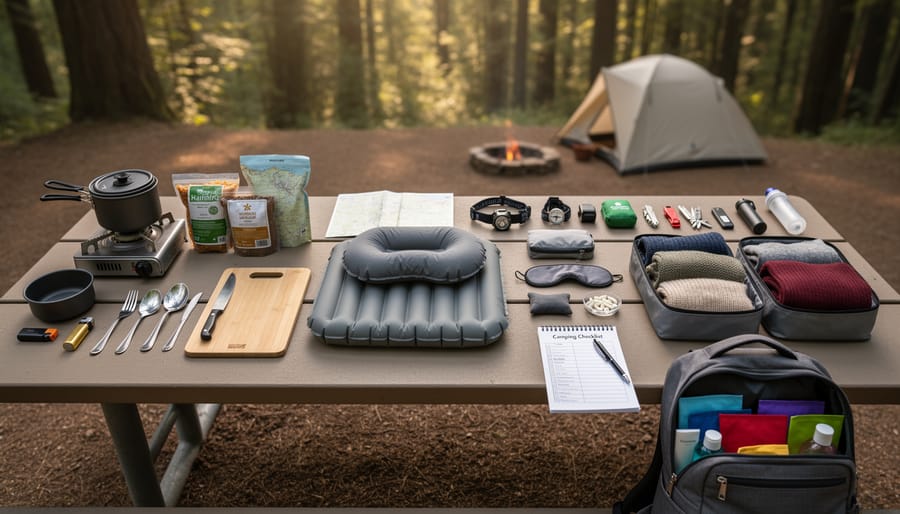
Camping Tent, sleeping bag, pad, headlamp Camp chair, lantern, pillow Test setup at home first
Kayaking PFD, paddle, dry bags, bilge pump Spray skirt, paddle float, GPS Rent kayak on-site if available
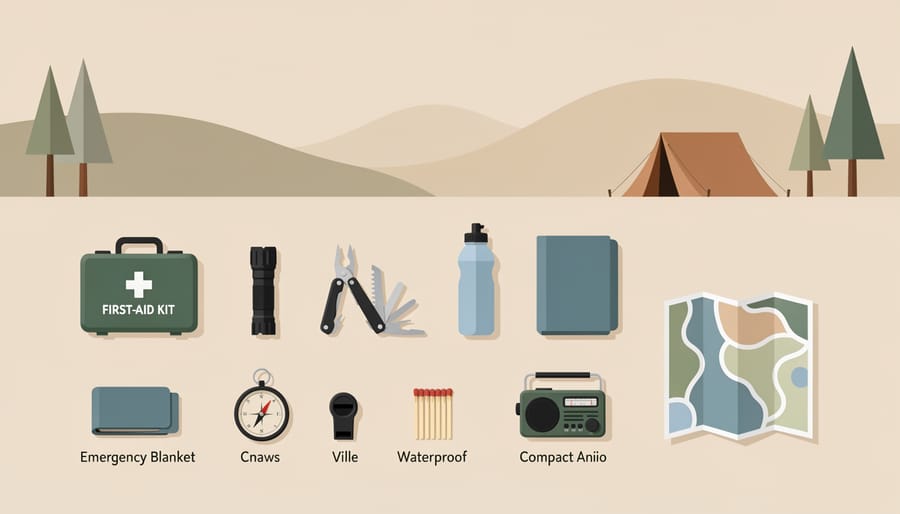
Safety First aid kit, whistle, map, sunscreen VHF radio, flares, repair kit File float plan with campground
Clothing Quick-dry layers, rain jacket, hat Wetsuit, neoprene gloves Avoid cotton; bring extra socks

Your pack list for kayaking safety should include a properly fitted personal flotation device (non-negotiable), a spare paddle secured to your kayak, and a bilge pump or large sponge. Navigation tools matter in the 103-island archipelago where channels can look similar. Carry a waterproof map of the St. Lawrence waterways, a compass, and consider a handheld GPS as backup to phone navigation.

For wildlife encounters common in these marshes (herons, beavers, turtles), bring binoculars and keep a respectful distance. A dry bag designated for trash prevents attracting animals to your campsite. Insect repellent becomes essential during Quebec summers, particularly near marshes at dawn and dusk.

Weather shifts quickly on the water. Pack a wind-resistant rain jacket even if forecasts look clear. Sun protection (high-SPF sunscreen, wide-brimmed hat, polarized sunglasses with a retainer strap) prevents miserable days on reflective water. Check marine weather forecasts before each paddle, not just general weather apps.

Wildlife and Natural Features to Watch For

The St. Lawrence archipelago’s marshes and channels create a biodiversity hotspot you’ll encounter from your first paddle stroke. Great blue herons stand motionless in the shallows during early morning hours, their silhouettes striking against mist-covered water. Belted kingfishers announce their presence with rattling calls before diving for fish, while green herons hunt along the vegetated edges of smaller channels.

Beavers are most active at dawn and dusk, often spotted swimming between lodges or working on dam repairs. Watch for their V-shaped wakes cutting across calm water. Muskrats are equally common, their smaller size and lighter-colored fur distinguishing them from their larger cousins as they munch on marsh vegetation near the banks.

Northern map turtles bask on logs throughout the warmer parts of the day, quickly sliding into the water as kayaks approach. You might also spot painted turtles and the occasional snapping turtle in deeper channels. Pike, perch, and bass inhabit these waters, creating feeding opportunities for the bird species overhead.

The interconnected marshes support diverse waterfowl, including wood ducks, mallards, and Canada geese, particularly during migration periods in spring and fall. Osprey hunt above the channels, circling before spectacular dives.

Paddle quietly and keep your movements smooth. Wildlife encounters happen most often when you move with the rhythm of the water rather than against it. Early morning and the hour before sunset offer the richest viewing opportunities, when many species are actively feeding. Bring binoculars but respect distance. Never pursue animals that move away, and give nesting areas wide berth during spring and early summer. The archipelago’s maze of channels means patient paddlers are consistently rewarded with sightings that rushed visitors miss entirely.

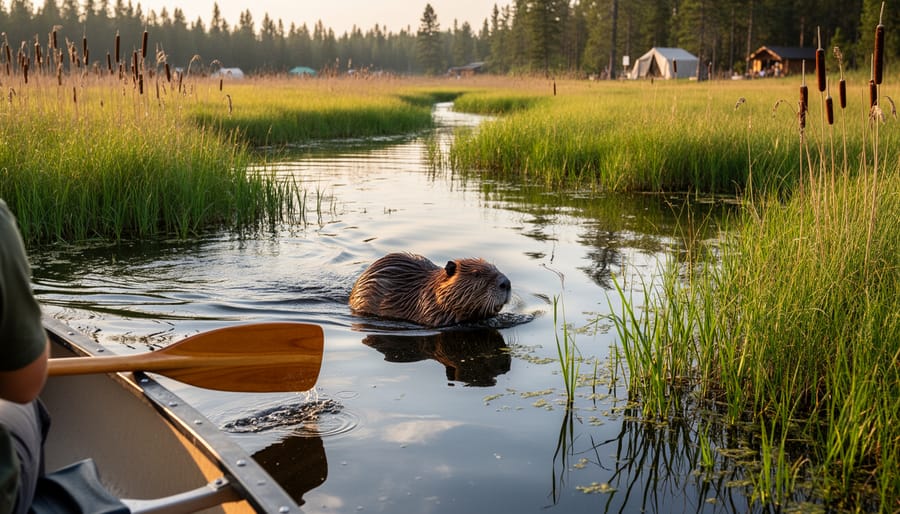
Beaver swimming in a marsh channel with rippling water and reeds in the background
A beaver sighting illustrates the rich wildlife habitat you may encounter while paddling near the campground’s marshes and channels.

Making the Most of Your Stay: Activities Beyond Kayaking

The St. Lawrence archipelago offers far more than exceptional paddling. When you need a break from your kayak, the Sainte-Anne-de-Sorel region rewards exploration on land and water alike.

Fishing enthusiasts will find productive spots throughout the channels and marshes surrounding the campground. The same waters that make kayaking magical also support populations of pike, perch, and bass. Early morning anglers often have the quiet channels to themselves, watching herons hunt in the shallows while casting their lines.

Cycling routes wind through the agricultural landscapes and riverside communities near the campground. The flat terrain makes for easy pedaling, and quiet country roads offer glimpses of century-old farmhouses and riverside vistas. Many visitors bring bikes to explore the broader Sorel-Tracy region, which sits at the confluence of the St. Lawrence and Richelieu rivers.

Birdwatching reaches beyond what you’ll spot from your kayak. Walking trails near the marshes attract photographers and wildlife enthusiasts hoping to capture herons, kingfishers, and migrating waterfowl. The diversity of habitats across the 103 islands creates exceptional conditions for birding throughout the season.

The town of Sainte-Anne-de-Sorel itself offers small-town charm, local restaurants featuring regional cuisine, and provisions for campers who forgot something essential. After days spent navigating the archipelago, an evening exploring the local community adds another dimension to your St. Lawrence adventure.

Camping Chenal Du Moine stands out as an exceptional base camp for anyone looking to explore the St. Lawrence archipelago’s 103 islands, rivers, and marshes. Whether you’re a seasoned paddler or just getting comfortable in a kayak, the privileged access this campground provides to one of Quebec’s most remarkable ecosystems creates opportunities for genuinely memorable adventures. The combination of diverse paddling routes, abundant wildlife, and the unique island landscape makes every trip different.

Planning ahead is essential for securing your spot during 2026’s peak season. Contact the campground directly for current availability, reservation procedures, and any specific requirements for your visit. They’ll provide the most accurate information about booking windows and what to expect when you arrive.

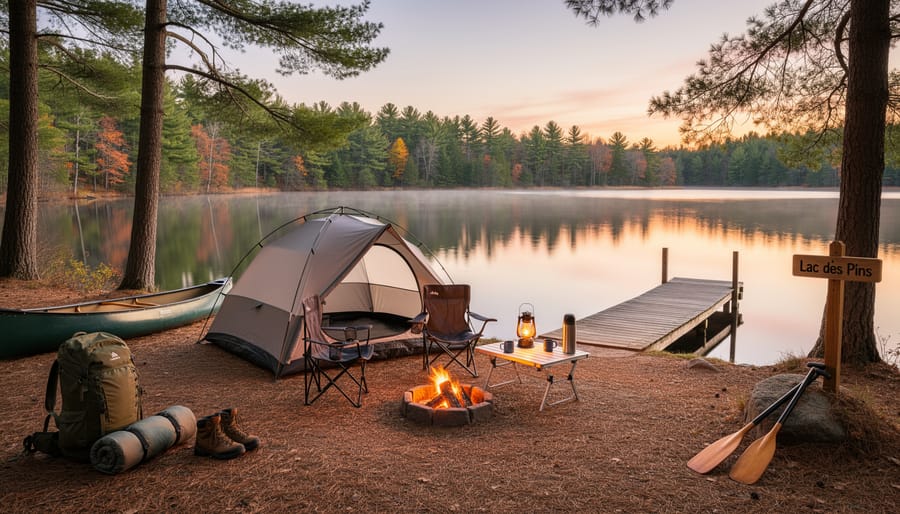
If you’re exploring other Quebec paddling destinations, camping Lac des Pins offers a completely different but equally rewarding water-based experience worth considering for future trips.

The channels, marshes, and islands of Chenal Du Moine are waiting. With proper preparation and respect for this delicate environment, you’re in for a safe, enriching adventure that captures what makes Quebec’s waterways special.