How to Choose Bear Bells for Hiking: A Canadian Buyer’s Guide
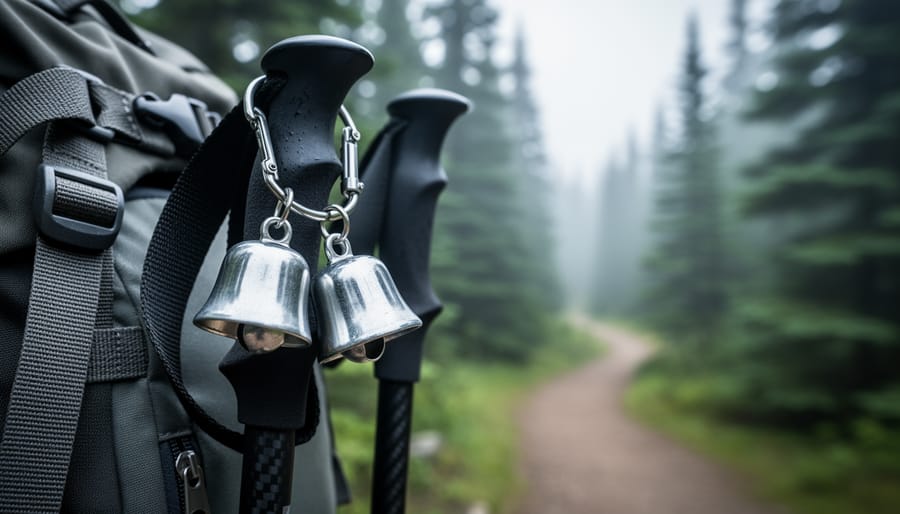
Bear bells are lightweight metal bells that clip onto your pack or walking stick to create continuous noise as you hike, alerting bears to your presence and reducing surprise encounters. In Canada, you’ll find them at major outdoor retailers like MEC and Atmosphere, online through and REI, and at specialty shops across hiking regions, with prices ranging from around $10 to $30 depending on size, design, and whether you’re buying singles or multi-packs.
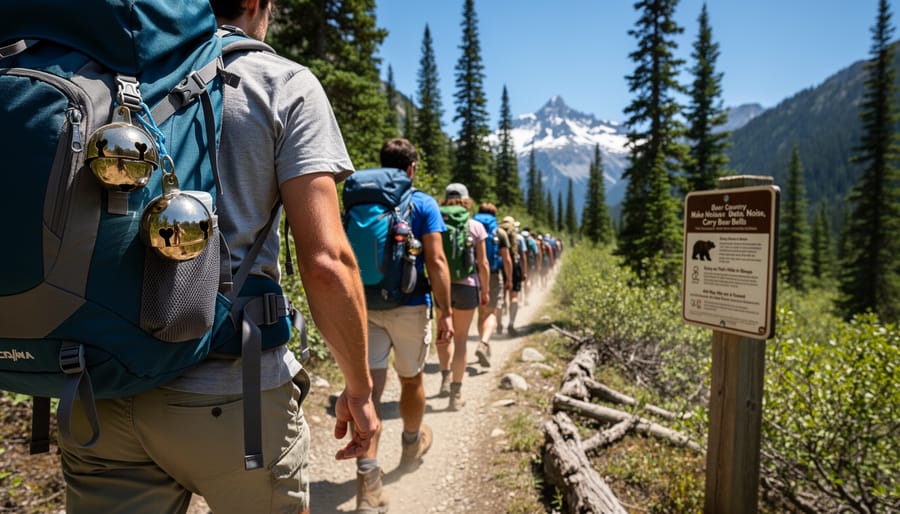
These simple tools serve a critical safety function on North American trails, particularly in regions where black bears and grizzlies roam. The constant jingling gives wildlife time to move away before you round a corner on a narrow trail or push through dense brush where visibility drops. While bear bells aren’t a substitute for awareness and proper food storage, they add an extra layer of passive deterrence that’s especially valuable when hiking solo, moving through areas with berry patches, or exploring trails near salmon streams where bears congregate.
The Canadian market offers everything from budget-friendly solid brass bells with basic Velcro straps at $9.95 to artisan sets featuring Native art designs and premium leather attachments. Understanding what makes an effective bear bell, how different mounting systems perform on actual trails, and which scenarios truly call for audible warning will help you choose the right option for your adventures, whether you’re navigating coastal rainforest paths or heading into the Rockies for a multi-day backcountry trip.
What Makes a Good Bear Bell: Key Buying Factors
Sound Volume and Carrying Distance
A bear bell’s effectiveness hinges on two factors: how loud it rings and how far that sound travels through varying terrain. You need a bell that cuts through wind, dense forest, and rushing water, the very conditions where bears might not otherwise detect your approach. A large bell typically produces a deeper, more resonant tone that carries 30 to 50 yards ahead on most trails, giving wildlife ample time to move away before you arrive.
Smaller bells generate higher-pitched sounds that fade faster, especially in thick vegetation or when competing with natural noise. They work for open meadows and groomed paths, but struggle in backcountry settings where acoustics matter most. The volume difference is noticeable: large bells often ring loud enough to be heard clearly by your hiking partners several paces behind, while compact options may barely reach beyond your own footsteps.
Consider the terrain you’ll hike most often. Forested corridors and river valleys demand the robust clang of a larger bell. If weight savings matter and you’re sticking to well-traveled day-use trails, a smaller option suffices, but don’t compromise on volume where bear encounters are genuinely possible.
Attachment Systems That Stay Secure
The attachment system determines whether your bear bell stays with you mile after mile or ends up lost on the trail. Each mechanism suits different gear setups and hiking approaches.
Velcro straps wrap around hiking sticks, trekking poles, and walking staffs, keeping the bell at ground level where its sound travels well. They adjust quickly to various pole diameters and transfer easily between gear. The solid Velcro straps found on large bear bells with native art designs attach securely to most any hiking stick or staff, making them ideal for pole users and those who frequently switch equipment between trips.
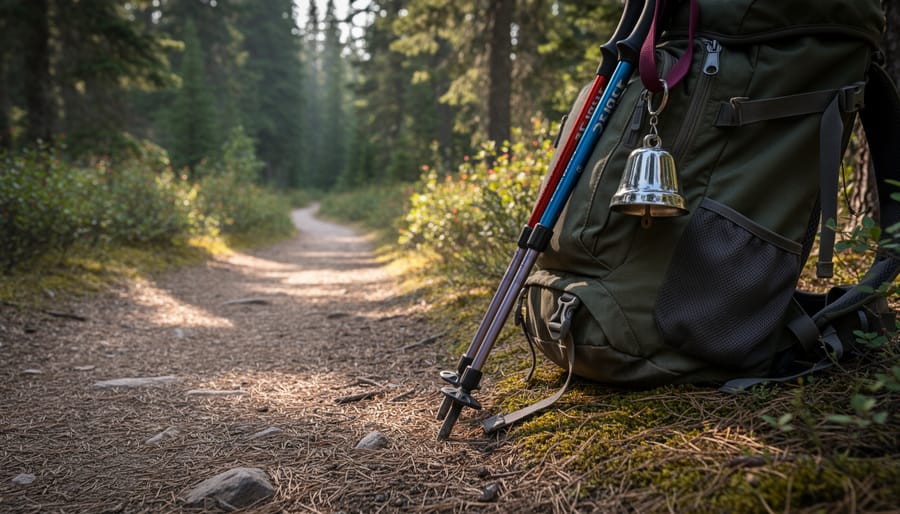
Leather straps thread through backpack loops, D-rings, and belt clips, offering a traditional attachment that withstands years of trail use. Four-set jingle bells with leather straps create louder sound coverage while distributing weight across your pack. Leather works best for backpackers who rarely remove their bells and prefer a classic look that softens and conforms over time.
Clip-on carabiners provide the fastest on-off access, attaching to any loop or ring on your pack, belt, or clothing. They’re perfect for day hikers who silence their bells frequently in busy areas or kayakers transitioning between water and trail. The trade-off: cheaper carabiners can open unexpectedly on brush contact, so choose spring-loaded gates rated for outdoor gear rather than decorative keychains.
Silencer Features for Trail Etiquette
A good silencer transforms your bear bell from a constant annoyance into a trail-appropriate tool. Magnetic closures let you snap the bell quiet with one hand when you reach a crowded trailhead or campsite, then release it instantly when you’re back in bear country. Velcro silencers work similarly but require both hands and can wear out faster in wet conditions.
You’ll want a silencer that stays secure without accidentally releasing, nothing defeats the purpose like a bell that jingles through your entire lunch break because the magnet slipped. Test the hold before you buy. Most quality options keep the clapper firmly muted until you deliberately open it.
Use your silencer when passing groups on narrow trails, during rest stops in high-traffic areas, and any time you’re in camp. Bears aren’t the only concern; constant jingling grates on other hikers who came for the quiet. In wildlife-sensitive zones like bird nesting areas, silence your bell entirely. The etiquette is simple: ring when you need wildlife to hear you, mute when people shouldn’t have to.
Types of Bear Bells Compared
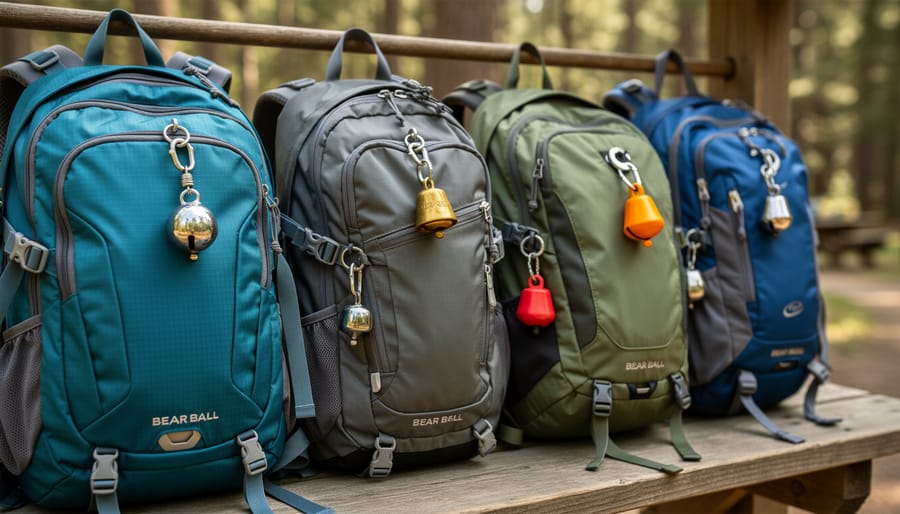
When you’re choosing a bear bell, the options divide into four main categories, each suited to different trail situations and hiking priorities. Understanding these distinctions helps you pick the right style before you even check the price tag.
Single large bells deliver the strongest sound per item. These standalone models typically feature one heavy-duty brass or steel bell that produces a deep, resonant tone carrying farther through dense forest than lighter alternatives. The large bear bells with native art designs priced around $9.95 exemplify this category, many made in Canada, these attach via solid Velcro straps to hiking sticks, staffs, or walking sticks. The advantage is simple: one loud bell means less weight and fewer parts to fail. The downside? A single bell produces a more repetitive sound pattern that some hikers find monotonous on long treks, and if the clapper breaks, you’re left with no alert system.
Multi-bell sets take a different approach. Four-set jingle bells with leather straps, like those available through Etsy Canada for CA$29.69, create a layered jingling sound as multiple smaller bells ring at different pitches. This varied tone feels less intrusive to nearby hikers while still alerting wildlife. The cluster format also provides redundancy, if one bell fails, the others keep working. However, multi-bell sets add weight and complexity. The leather attachment straps work well on backpack loops but may require more adjustment than a simple Velcro closure.
| Bell Type | Typical Price | Best Use Case | Attachment Style |
|---|---|---|---|
| Single Large Bell | $9.95, $19.99 | Solo backcountry, high-alert areas | Velcro strap or carabiner |
| Multi-Bell Set (4 bells) | CA$29.69 | Group hikes, social trails | Leather straps |
| Decorative/Native Art | $9.95+ | Cultural appreciation, day hikes | Velcro strap |
| USA/Canada-Made | $10.00, $19.99 | Supporting local, quality assurance | Varies by model |
Decorative bear bells with native art designs blend function with cultural expression. These bells, often crafted in Canada, feature Indigenous-inspired artwork on the bell housing or strap, making them appealing souvenirs that also serve a safety purpose. They perform identically to plain large bells but offer aesthetic value. Choose these if you want gear that reflects regional heritage, though don’t expect performance differences based on decoration alone.
USA and Canada-made options span all the categories above but emphasize local manufacturing. FRONTIERSMAN Bear Bells at REI, priced from $10.00 to $19.99, include both top-rated models and USA-made variants specifically marketed for hiking. Canadian-made bells similarly focus on durable construction suited to northern wilderness conditions. The premium over imported bells is modest, and you gain quality control plus the knowledge that your purchase supports North American outdoor craftspeople. For backcountry reliability, locally-made bells often use thicker metal and reinforced attachment points that withstand rough treatment better than budget imports.
Your hiking style dictates the best match. Solo travelers pushing into remote bear country benefit most from single large bells with maximum volume. Group hikers and families do well with multi-bell sets that spread the sound without overwhelming conversation. Day hikers on established trails can choose based on preference, decorative designs work fine when you’re never far from the trailhead.
Where to Buy Bear Bells in Canada: Retailers and Online Options
Outdoor Specialty Retailers
Canadian outdoor retailers offer convenient access to bear bells both in-store and online, letting you inspect quality and test sound before hitting the trail. National chains like MEC (Mountain Equipment Company) and Atmosphere stock bear safety gear year-round, with knowledgeable staff who can demonstrate volume differences between models. Specialty hiking shops in Calgary, Vancouver, and other trail-access cities often carry locally-made options alongside international brands.
Several retailer categories serve Canadian hikers:
- National outdoor chains with consistent inventory across provinces
- Regional hiking shops specializing in trail safety gear for local terrain
- Camping supply stores that bundle bear bells with other wildlife protection equipment
- Cross-border locations near US shopping areas for expanded selection
For hikers near the border, REI locations in Washington and Montana stock FRONTIERSMAN Bear Bells ranging from $10.00 to $19.99, with both top-rated models and USA-made options available. These bells meet the volume standards needed for alerting bears on backcountry trails. Keep in mind currency exchange when comparing cross-border pricing.
Closer to home, you’ll find large bear bells with native art designs priced around $9.95 at specialty retailers, many featuring Canadian craftsmanship. These attach securely with solid Velcro straps to hiking sticks, staffs, or walking poles. The advantage of shopping locally is immediate availability and supporting businesses that understand regional wildlife patterns, whether you’re preparing for coastal trails or interior forest hikes.
Online Marketplaces and Direct Sellers
Canadian hikers have excellent online options for purchasing bear bells without crossing the border. Etsy Canada offers artisan and specialty choices, including four-set jingle bell kits with leather straps for CA$29.69, ideal if you’re outfitting multiple family members or want backup bells for different packs. These multi-bell sets provide flexibility for group hikes where each person needs their own sound source.
stocks a wide range from budget-friendly single bells to premium options, with customer reviews helping you gauge real-world performance on Canadian trails. Look for sellers offering Prime shipping to avoid delays before your trip. MEC’s online store provides curated selections with detailed product specs, though inventory can vary seasonally.
For specialized options, check outdoor gear websites like or local retailer sites that ship nationally. Many smaller Canadian outdoor shops have embraced e-commerce, offering personalized customer service via email if you need advice on specific trail conditions. Compare shipping times carefully, a $2 cheaper bell loses value if it arrives after your departure date. Always verify the seller ships within Canada to avoid customs delays and extra fees that can double your cost.
Supporting Canadian-Made Products
Choosing Canadian-made bear bells supports local artisans and outdoor gear manufacturers who understand the specific needs of North American trails. Several options feature authentic native art designs, including large bells priced around $9.95, that celebrate Indigenous heritage while serving a practical safety function. These locally-crafted bells often use traditional craftsmanship techniques passed down through generations, ensuring both cultural authenticity and reliable performance.
When you purchase from Canadian makers, you’re investing in quality materials tested on the same trails you’ll hike. Local manufacturers typically use heavier-gauge metals and weather-resistant attachments suited to Canadian conditions, from coastal humidity to Rocky Mountain freeze-thaw cycles. Beyond durability, buying domestic reduces shipping distances and carbon footprint while keeping revenue within the outdoor community that maintains and advocates for the trails we all enjoy.
Many Canadian-made options arrive with detailed care instructions and direct customer support from the craftspeople themselves, a level of service you won’t find with mass-produced imports.
Recommended Bear Bells for Different Hiking Styles
Day hikers on well-traveled routes like those found along the day hike essentials trails benefit most from mid-sized bells with reliable attachment systems. A single large bear bell with Velcro strap ($9.95) works perfectly for attaching to trekking poles or pack straps, providing consistent sound without adding bulk to your gear. The Velcro design lets you quickly move the bell between equipment items as your hiking style changes throughout the day.
Backcountry adventurers heading deep into remote bear territory should consider louder options or multi-bell sets. The four-set jingle bells with leather straps (CA$29.69) deliver greater volume through combined chiming, making them ideal when you’re covering long distances where bear encounters are more likely. These sets distribute across your pack, creating sound from multiple points as you move. For overnight trips, pair your bell choice with essential safety gear like bear spray and a quality sleeping pad for protected rest after full days on the trail.
Kayakers transitioning to land exploration need bells with secure carabiner attachments that won’t slip during water-to-shore movements. The FRONTIERSMAN Bear Bells ($10.00-$19.99) offer USA-made durability with hiking-specific design features, including clip systems that handle moisture exposure. These bells attach firmly to dry bags or kayak deck rigging before you even reach the trailhead.
Family groups and beginners should prioritize user-friendly options with silencer features. A large bell with magnetic silencer lets parents control noise levels when passing other hikers or during teaching moments, while still providing full volume when needed. The native art designs available on Canadian-made bells ($9.95) also add visual appeal that helps younger hikers stay engaged with their safety equipment.
Common Mistakes to Avoid When Buying and Using Bear Bells
Most hikers make at least one critical error when selecting or using bear bells, often without realizing it until they’re already on the trail. Learning from these common pitfalls helps you maximize both your safety investment and your wildlife awareness strategy.
The most frequent mistakes include:
- Purchasing bells too small to project sound beyond 20-30 feet in windy or dense forest conditions
- Failing to test attachment systems on your actual gear before leaving the trailhead
- Treating bear bells as complete wildlife protection rather than one component of a comprehensive safety approach
- Leaving magnetic or Velcro silencers engaged during active hiking, rendering the bell useless
- Buying without considering your specific trail environment and wildlife encounter patterns
Another major error is assuming louder always means better. On sensitive trails like the North Coast Trail where wildlife corridors intersect with rugged coastal paths, constant jangling can actually habituate animals to human presence or mask important environmental sounds you need to hear. Smart hikers know when to silence their bells in camp areas, around other trail users, or when approaching blind corners where voice calls work better.
Don’t fall into the trap of buying the cheapest option without checking reviews for durability. A $9.95 bell that falls off your pack after two hikes wastes money and leaves you unprotected. Similarly, avoid choosing bells based solely on appearance, native art designs and attractive finishes matter less than reliable sound projection and secure attachment. Test your chosen bell’s volume in an open area before committing to it for backcountry use, and always carry bear spray as your primary defense tool regardless of how loud your bell rings.
Bear Bell Safety Tips for North American Trails
Bear bells work best when you understand their role in a layered safety approach. Ring them consistently on forested trails with limited sightlines, through dense brush, near streams where running water masks sound, and in any terrain where bears feed, berry patches, salmon runs, or alpine meadows during prime foraging hours. In open areas like coastal iceberg trails or above-treeline ridges where visibility extends hundreds of meters, bells matter less because you and wildlife can spot each other from a distance. Supplement your bell with periodic voice calls (“Hey bear!”) when approaching blind corners, cresting ridges, or moving through especially thick cover; the varied human sound reinforces your presence more effectively than jingling alone.
Silence your bell in campgrounds, near trailheads, and when passing other hikers to respect trail etiquette, this is where magnetic silencers prove their worth. Your bell is one element of comprehensive bear safety, not a standalone solution. Carry bear spray within instant reach (hip holster, chest strap, or shoulder harness), know how to deploy it, and practice solid backcountry planning by checking recent wildlife activity reports and trail conditions before heading out. Travel in groups when possible, store food properly, and stay alert rather than relying passively on your bell to do all the work.
Do bear bells really work?
They reduce surprise encounters by announcing your presence, but effectiveness depends on terrain, wind, and bear behavior. Bells work best as part of a multi-layered safety strategy that includes awareness, bear spray, and making additional noise in high-risk areas.
When should I silence my bell?
Silence it in campgrounds, near parking areas, when passing other hikers, and in designated quiet zones to minimize noise pollution. Engage the silencer whenever you are not actively moving through wildlife habitat.
Are bells enough on their own?
No. Bear bells complement but never replace bear spray, group travel, proper food storage, and situational awareness. Think of them as an early warning system, not complete protection.
What about other wildlife like moose or cougars?
Bells may alert moose, though they can be unpredictable and territorial regardless of warning. Cougars typically avoid human noise, but stalking cats require different tactics, face them, appear large, and back away slowly rather than relying on advance warning sounds.
Adjust your bell use to the specific landscape. In wildlife corridors connecting different ecosystems, maintain consistent ringing. On popular day-hike trails with heavy foot traffic, your bell adds little value since human presence is already constant. The goal is to hike confidently, not fearfully, bells give you one more tool to explore North American wilderness responsibly while respecting the animals that call these places home.
Choosing the right bear bell comes down to matching sound volume, attachment style, and durability to your specific hiking terrain and wildlife risk. Whether you’re exploring coastal trails with iceberg views or venturing into dense forest corridors, a well-chosen bell, purchased from Canadian outdoor retailers or trusted online sellers, gives you an affordable layer of wildlife awareness that complements your broader safety strategy.
Canadian hikers have excellent options at every price point, from $9.95 native art designs to premium sets around CA$29.69, with both locally-made and top-rated imports available. The key is selecting a bell that suits your adventure level: day hikers on popular routes need reliable volume and quick silencing, while backcountry explorers benefit from durable multi-bell sets that withstand rugged conditions.
Bear bells aren’t a substitute for awareness, bear spray, or proper trail etiquette, but they’re a simple tool that lets you focus on the scenery instead of constant worry. When you’re confident in your safety gear, you’re free to appreciate the wildlife encounters and stunning landscapes that make North American trails unforgettable. Choose wisely, hike prepared, and enjoy every step of your journey through bear country.