Category: Business

How to Choose a Wakeboarding Vest: A Buying Guide for 2026

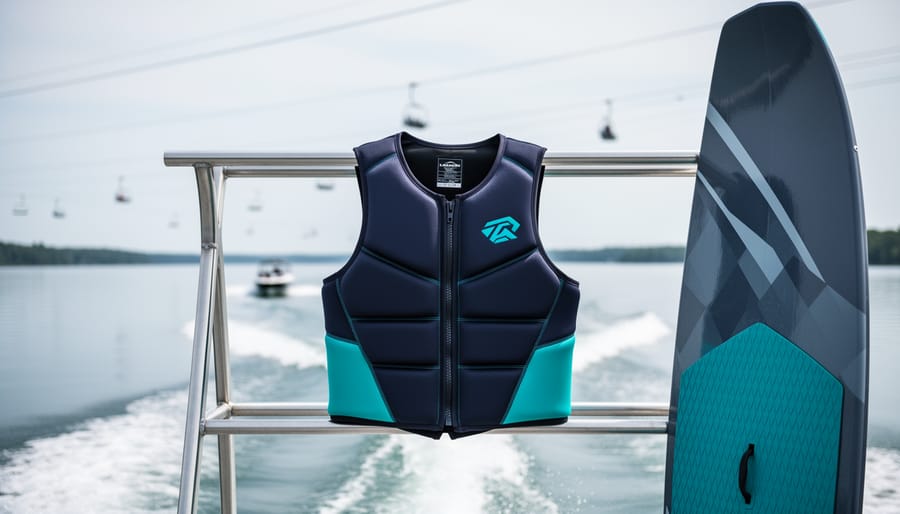
The right wakeboarding vest needs to meet Transport Canada safety certification standards while fitting snugly enough to stay secure during high-speed falls and mobile enough to let you carve, spin, and ride without restriction. For 2026, you’re choosing between Coast Guard approved impact vests with ANSI/CAN/UL 12402 certification and neoprene performance vests that prioritize flexibility, and your decision hinges on whether you’re riding recreationally on calm lakes or pushing your limits in competitive wake parks.

Most riders shopping for a vest make the mistake of prioritizing style over proper sizing. A vest that rides up during a fall or restricts your shoulder rotation will ruin your session faster than any other gear failure. The wake sports community has seen a welcome shift toward more comfortable, innovative PFD designs that riders actually want to wear all day, addressing the old problem of vests sitting unused in boat storage compartments.

Life jackets remain mandatory for wakeboarding and wake sports across Canada, but modern options bear little resemblance to the bulky orange foam blocks of previous decades. Today’s vests use segmented foam panels, stretch neoprene construction, and strategic impact zones that move with your body whether you’re cutting through boat wake or sliding rails at the cable park. With Canada-approved vests starting around $70 and premium models like the newly released 2026 Ronix CGA series offering advanced features, you can find proper protection at nearly any budget.

This guide walks you through the certification requirements you can’t skip, the fit principles that separate comfortable vests from shoulder-binding disasters, and the specific features that matter for different riding styles and skill levels.

Key Takeaway: A quality wakeboarding vest serves three critical functions: providing essential flotation during falls, absorbing impact from high-speed crashes and failed tricks, and allowing unrestricted movement for advanced maneuvers. Choose a vest that excels at all three, not just one.

Why Your Wakeboarding Vest Matters

Your wakeboarding vest isn’t just another piece of gear you toss in your boat, it’s the single most important safety decision you make on the water. Life jackets are mandatory for wakeboarding and wake sports, but the right vest does far more than keep you afloat after a fall. It protects your torso during high-speed wipeouts, cushions impacts when you’re learning new tricks, and stays secure through aggressive maneuvers without restricting the shoulder rotation and core flexibility you need for inverts and spins.

The difference between a generic life jacket and a purpose-built wake vest becomes obvious the moment you drop into the water. Traditional flotation devices bunch up around your neck, ride up when you’re being towed, and turn simple tricks into wrestling matches with foam panels. A well-fitted vest enhances comfort, mobility, and safety on the water by using segmented construction and strategic foam placement that moves with your body rather than against it.

Recent updates to safety standards have transformed what’s available to riders in 2026. Transport Canada now recognizes devices certified to updated standards that provide increased choices of more comfortable and innovative personal flotation devices, promoting constant wear instead of the “I’ll put it on later” mentality that gets people hurt. Modern materials like neoprene create form-fitting vests that provide impact protection while feeling more like a second skin than traditional bulky life jackets. This shift means you can meet legal requirements and stay safe without sacrificing the performance features that make wake sports exciting.

What to Look for in a Wakeboarding Vest
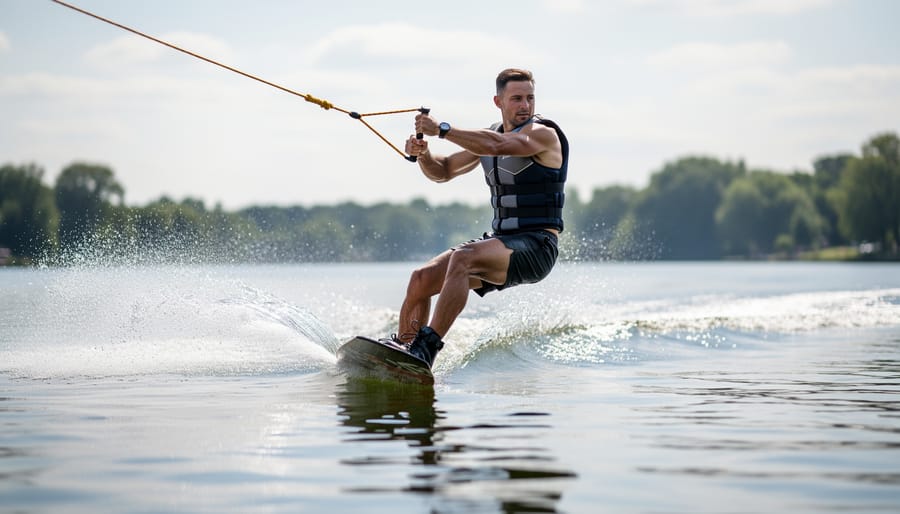
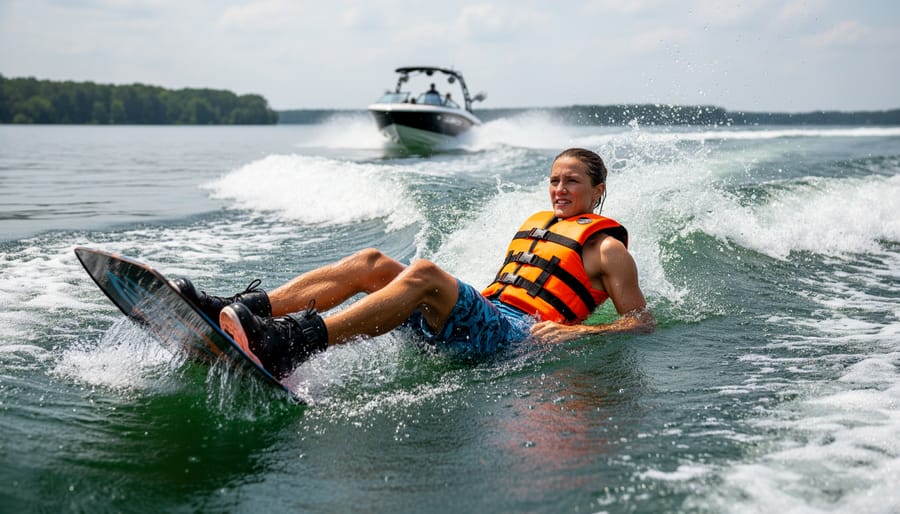
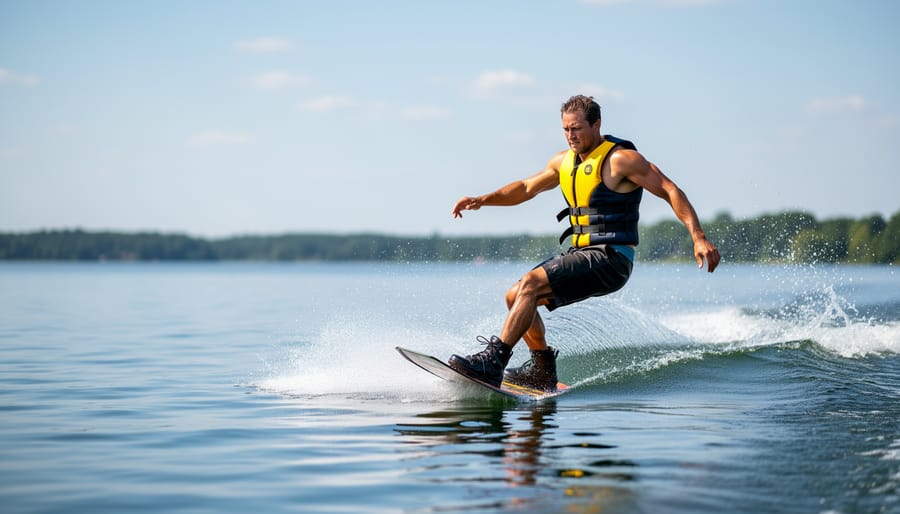
Wakeboard rider wearing a wakeboarding vest while carving across the water with spray behind them.
A wakeboard rider wearing a properly designed vest moves comfortably through the water while maintaining stability and control.

Safety Certifications and Standards

Before you even step into the water, you need to know whether your wake vest will keep you legal and, more importantly, alive. Not all vests meet the safety standards required for Canadian waters, and choosing one without proper certification can leave you both unprotected and facing fines.

Transport Canada recognizes devices tested and certified according to ANSI/CAN/UL 12402 substitutes specifically ANSI/CAN/UL-12402-4, 12402-5, 12402-6, and 12402-9 standards. These certifications indicate that your vest has been rigorously tested for buoyancy performance, meaning it provides sufficient flotation to keep an unconscious person’s face above water. A vest carrying one of these certifications qualifies as a legal substitute for lifejackets and PFDs under Canadian regulations.

The certification level determines how much buoyancy you get. Level 50 vests (12402-5) provide 50 newtons of buoyancy, suitable for competent swimmers in calm waters where rescue is nearby, exactly the scenario for most wake sports. Level 70 (12402-4) offers more flotation for rougher conditions. You’ll find these certification marks on a label inside the vest or stamped on the back panel.

Note: Always verify your wake vest displays a valid Transport Canada or ANSI/CAN/UL certification before riding, as regional water safety regulations require approved flotation devices.

Why does this matter beyond avoiding tickets? Certified vests undergo drop tests, buoyancy measurements, and durability trials that uncertified “impact vests” skip entirely. The updated standards also promote constant wear by allowing manufacturers to design more comfortable, innovative vests that riders actually want to keep on. A vest you leave in the boat because it’s uncomfortable won’t save you when you need it.

Fit and Size Guidance
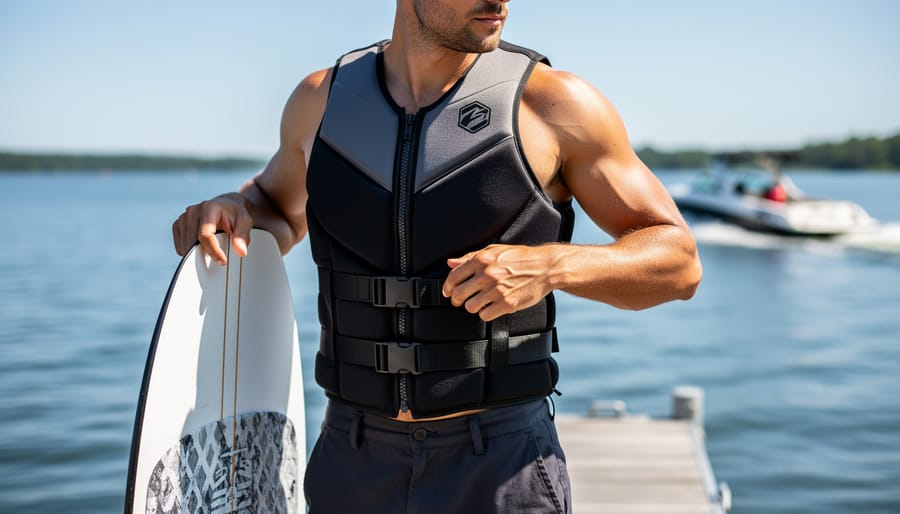
Person wearing a wakeboarding vest preparing to step into a boat at the dock.
A wakeboarding vest is shown in real-world pre-ride context, emphasizing proper fit and consistent wear before getting on the water.

A vest that doesn’t fit properly won’t protect you when it matters most. When you hit the water during a fall, a loose vest can ride up over your head or slip off entirely, leaving you without the buoyancy you’re counting on. Too tight, and you’ll restrict your breathing and movement, making every trick harder than it needs to be.

Start by measuring your chest at its widest point, typically just under your arms. Compare this measurement to the manufacturer’s size chart, never assume you’re the same size across all brands, since sizing varies significantly. Most vests come in standard chest ranges (small, medium, large) with specific inch measurements listed. A well-fitted vest enhances comfort, mobility, and safety on the water, so take the time to get this right.

When you try on a vest, it should feel snug against your torso without restricting your ability to take deep breaths or raise your arms overhead. Zip or buckle it closed, then reach your arms straight up as if grabbing a wakeboard handle. The vest shouldn’t ride up more than an inch or two. Jump a few times, if the vest shifts significantly or feels like it’s choking you, try a different size.

Look for multiple adjustment points. Quality vests feature side straps, waist cinches, or shoulder adjustments that let you dial in the perfect fit. Just like fit matters in other outdoor gear, these adjustment features transform a good vest into one that feels custom-made. Segmented panel construction adds flexibility around your core, letting you bend and twist without fighting the vest.

Test the fit with a friend pulling up on the shoulders while the vest is fastened. Minimal movement means you’ve found the right size.

Materials and Construction
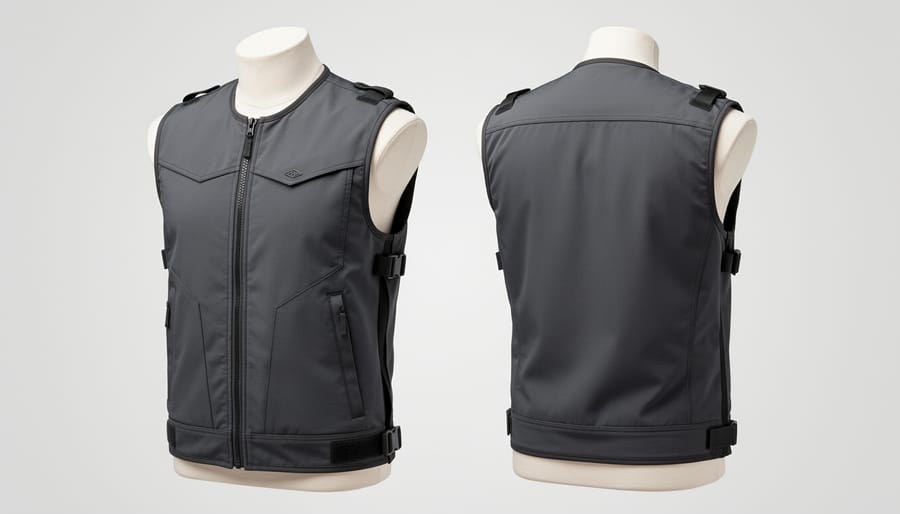
Close-up of a wakeboarding vest showing its panel construction, zipper, and adjustment straps.
The vest’s key construction details, panels, closures, and adjustments, are clearly visible to highlight what to look for when shopping.

The material composition of your wakeboarding vest directly impacts how it performs when you’re carving wakes or pushing your limits on the water. Most wake vests use neoprene, foam, or a combination of both, and understanding the differences helps you match the vest to your riding style.

Neoprene remains the top choice for serious wakeboarders. This synthetic rubber creates a form-fitting second skin that moves with your body during tricks and hard landings. Neoprene vests provide impact protection when you hit the water at speed, cushioning your ribs and torso during falls. The material also offers thermal insulation for cooler water conditions in early season Canadian lakes or coastal riding. However, neoprene costs more than foam alternatives and can feel restrictive if sized incorrectly.

Foam vests use buoyant foam blocks sewn into fabric panels. They’re lighter, more affordable, and work well for recreational riders who prioritize safety over performance features. Traditional foam vests can feel bulkier and restrict shoulder movement during aggressive riding, though 2026 designs have improved flexibility through segmented panel construction.

Panel construction matters as much as material choice. Look for vests with multiple smaller foam segments rather than large single blocks. Segmented designs flex with your torso movements, preventing the stiffness that limits your range when grabbing your board or rotating through spins. Strategic panel placement also affects drainage, keeping water from pooling in the vest after a fall.

For varying conditions, consider how you’ll ride most often. Neoprene suits aggressive wakeboarders and cooler water. Foam vests handle warm weather recreational riding and provide excellent buoyancy at lower price points. Hybrid designs combine neoprene exteriors with foam cores, balancing flexibility with cost-effectiveness for advancing riders.

Features That Enhance Performance

Beyond basic flotation, modern wakeboarding vests incorporate design elements that directly impact how well you ride. A YKK front zipper provides smoother operation and longer durability than generic options, while some 2026 models feature dual-zipper systems that let you customize compression around your torso. Look for quick-drain mesh panels along the sides and back, these prevent water from pooling inside the vest, reducing weight and maintaining flexibility during aerial maneuvers.

Buckle placement matters more than most riders realize. Side-entry buckles keep the chest clear for better board contact during pressed-out tricks, whereas front buckles offer easier on-water adjustments. Segmented foam panels, particularly around the shoulders and ribs, allow your upper body to rotate freely without the vest riding up or binding.

Rider-specific features add practical value: grab handles sewn into the shoulders help with boat re-entry after falls, while reinforced padding at the lower back and kidney zones absorbs impact from hard landings. Many vests now use articulated panel construction that moves with your body rather than against it. Competition-focused designs strip away bulk for maximum mobility, while recreational models add extra flotation and padding. Choose features that match how aggressively you ride and where you need protection most.

Types of Wakeboarding Vests Compared

The market offers four main vest categories, each designed for specific wake sports applications and rider priorities.

CGA-Approved Competition Vests deliver certified safety while maintaining the thin profile advanced riders demand. These vests meet Transport Canada’s recognized ANSI/CAN/UL standards, qualifying them as legal substitutes for traditional lifejackets under Canadian regulations. Competition-focused designs use segmented foam panels that flex with your torso during inverts and spins, yet they still provide the required buoyancy. Expect to pay more for this combination of certification and performance-oriented construction.

Recreational PFDs prioritize comfort and versatility for riders who split time between wakeboarding, wakesurfing, and kneeboarding. These typically feature thicker foam padding and simpler zipper closures, making them easy to get on and off between riders. A quality wakeboarding life jacket in this category starts around $69.99 and works well for families or beginners building confidence. The added buoyancy helps less experienced riders stay afloat after falls, though the bulkier profile limits aggressive maneuvers.

Impact Vests focus on torso protection rather than flotation. These neoprene designs absorb slams during hard landings and provide warmth in cooler water, but they don’t meet safety certification standards because they lack sufficient buoyancy. Experienced riders sometimes layer impact vests under certified PFDs in cold conditions, though this combination reduces flexibility. You’ll find impact vests popular among wakesurfers who ride close to the boat in calmer water.

Vest Type Certification Level Best Use Case Mobility
CGA Competition Transport Canada Approved Advanced wakeboarding, competitions Excellent
Recreational PFD Certified (ANSI/CAN/UL standards) Multi-sport, beginners, family use Good
Impact Vest Not certified for flotation Cold water protection, wakesurfing Excellent
Hybrid Design Varies by model Riders wanting protection plus certification Very Good

Hybrid Designs blend certified buoyancy with impact-absorbing materials, giving you legal compliance and crash protection in one vest. These combine neoprene panels in high-impact zones with foam sections that meet certification requirements. The 2026 Ronix CGA Vests represent this category’s evolution, balancing safety standards with rider-friendly features. Hybrids suit intermediate riders progressing from basic skills to more aggressive riding.

Your riding style determines the right category. Beginners benefit from recreational PFDs that provide reassurance and legal compliance. Advancing riders who launch off the wake need competition vests that move with their bodies. Remember that just as trail safety tips emphasize matching gear to terrain difficulty, wake vest selection should align with your current skill level and the challenges you’re tackling on the water.

Wakeboarding Vest Recommendations for 2026

Matching the right vest to your skill level and budget ensures you get features that enhance your riding without paying for capabilities you won’t use. Entry-level options deliver essential safety certifications and comfort for beginners, while premium vests pack in advanced materials and construction that serious riders notice on the water.

For new wakeboarders, certified vests starting around $69.99 provide the safety and mobility needed to build skills with confidence. Look for Transport Canada approved models with straightforward zipper closures, ample adjustment straps for dialing in fit, and flexible foam panels that won’t restrict your learning curve. Basic neoprene construction at this price point offers form-fitting comfort and some impact protection when you’re still mastering board control and falls happen frequently.

Mid-range vests between roughly $100 and $180 suit advancing riders who’ve moved beyond fundamentals and want features that support progression. These typically include segmented panel designs for better flexibility during aerial tricks, quick-drain systems that reduce water weight, and impact-rated padding in chest and side zones. The 2026 Ronix CGA Vests represent current quality options in this category, combining performance-oriented construction with required safety certifications.

Premium vests above $180 cater to experienced wakeboarders who demand competition-grade construction and materials. Expect multi-zone neoprene with varied thicknesses for optimized mobility, low-profile buckles that won’t interfere with handle passes, and anatomical cuts refined for aggressive riding positions.

Quick recommendations by rider type:

  • Beginners: Prioritize certified vests with secure fit and comfortable foam, focusing on value and ease of adjustment rather than advanced features
  • Intermediate riders: Target mid-range options with segmented panels and drainage systems that support trick progression without premium pricing
  • Advanced riders: Invest in competition-grade vests with anatomical cuts, impact-rated zones, and materials proven at higher performance levels

Consider the water conditions you’ll face most often when selecting materials. If you ride in colder northern lakes where hypothermia risk runs higher, thicker neoprene construction justifies the added cost even for recreational use.

Common Mistakes to Avoid When Buying a Wake Vest

The biggest mistake I see first-time buyers make is grabbing whatever looks sleek without checking if it carries proper safety certification. A vest might appear high-end with bold graphics and premium stitching, but if it doesn’t meet Transport Canada recognized standards like ANSI/CAN/UL 12402-9 or the 12402-4 through -6 series, you’re wearing nothing more than expensive foam that won’t legally count as required flotation. Always verify certification labels before considering aesthetics.

Price-driven shopping trips you up fast. Budget vests exist, with Canada Approved options starting around $69.99, but selecting purely on cost ignores whether the vest actually fits your torso and riding style. A cheap vest that rides up during a fall or restricts your backroll rotation becomes dangerous regardless of what you saved. Test the fit in-store if possible, checking that buckles hold snug without digging in and panels flex with your movements.

Size errors plague half the vests I encounter on the water. Riders assume their shirt size translates directly to vest sizing, then end up with loose straps or compressed ribs. Measure your chest circumference and weight against the manufacturer’s specific chart for each model, not generic sizing. A properly fitted vest stays put during impact while allowing full mobility for tricks.

Material choice matters more than most realize. Neoprene works beautifully in cooler northern waters where form-fitting warmth helps, but in warmer regions or for riders who overheat easily, lighter foam construction with better drainage prevents discomfort that leads to removing your vest mid-session.

Finally, don’t skip regional compliance checks. What works in one province might not satisfy requirements in another, especially if you travel to different waterways across North America.

Caring for Your Wakeboarding Vest

Your vest’s longevity depends on proper care after each water adventure. Rinse thoroughly with fresh water immediately after use, especially following saltwater sessions, to prevent salt crystals from degrading foam and fabric. Saltwater accelerates deterioration of buoyancy materials and stitching, reducing safety performance over time.

Hang your vest to air-dry in a shaded, well-ventilated area, never in direct sunlight, which breaks down neoprene and foam. Avoid machine drying or radiators, as heat damages the materials that provide both buoyancy and impact protection. Once completely dry, store the vest flat or hanging loosely in a cool, dry place away from heavy objects that could compress the foam and reduce flotation capacity.

Inspect your vest regularly for signs of wear: tears in fabric, separated seams, compressed foam that doesn’t spring back, broken zippers, or frayed straps. If buoyancy feels reduced, if you spot mold growth that won’t clean off, or if the vest no longer fits snugly due to stretched material, it’s time to replace it. A compromised vest won’t provide adequate protection when you need it most, so treat replacement as a safety investment rather than an expense.

Frequently Asked Questions

Do I need a Coast Guard approved vest for wakeboarding?

In Canada, you need a vest certified to Transport Canada standards (ANSI/CAN/UL 12402 series) to meet legal requirements on the water. These certified vests count as substitutes for lifejackets and PFDs under Canadian regulations, so look for Canada Approved or CGA certification labels.

Can I use a regular life jacket for wakeboarding?

While a standard life jacket provides buoyancy, it’s bulky and restricts the arm and torso movement you need for wakeboarding tricks and maneuvers. A wake-specific vest offers the same safety certification with segmented panels and form-fitting design that let you ride without fighting the gear.

How tight should a wake vest fit?

Your vest should fit snug against your torso without gaps, but you should still breathe comfortably and move freely through your full range of motion. Test it by raising your arms overhead and twisting at the waist; the vest shouldn’t ride up or shift position during these movements.

What’s the difference between a wake vest and a life jacket?

Both provide flotation and safety certification, but wake vests are designed with flexibility and impact protection in mind. They use segmented construction and materials like neoprene that hug your body, allow unrestricted movement for tricks, and provide some cushioning during falls, whereas traditional life jackets prioritize maximum buoyancy with bulkier foam.

How long do wakeboarding vests last?

With proper care, a quality wake vest typically lasts three to five seasons of regular use. Replace your vest sooner if you notice frayed seams, compressed foam that doesn’t spring back, damaged buckles or zippers, or any tears in the material, as these compromise both safety and performance.

These questions come up constantly because the right vest directly affects both your safety and your progression on the water. The certification piece trips up many riders who assume any flotation device works, but compliance matters for legal riding and genuine protection. Fit confusion runs a close second, since wake vests feel different from the bulky jackets most people remember from childhood boating trips.

The lifespan question deserves attention because many riders hang onto vests well past their useful life. Sun exposure, saltwater, and repeated impacts all degrade materials over time, even when the vest looks fine on the surface. Inspect your vest at the start of each season and trust your judgment if something feels off or worn.

Choosing the right wakeboarding vest isn’t about settling for just any flotation device, it’s about finding the perfect balance between certified safety, comfortable fit, and performance features that match how you ride. A vest you’ll actually wear consistently is one that meets Transport Canada standards, fits snugly without restricting your movement, and includes the features that matter for your skill level and preferred wake sports. Whether you’re exploring calm lakes or tackling challenging wakes, the right vest becomes an extension of your riding style rather than a burden.

At Stanley Kayaking, we believe the best water adventures happen when safety and enjoyment work together. From navigating iceberg trails to encountering wildlife along North America’s stunning waterways, proper gear lets you focus on the experience rather than worry about what could go wrong. Your wakeboarding vest is no different. Invest the time to find a certified option that fits well and supports your riding goals, and you’ll spend more time enjoying the water and less time thinking about your gear. That’s when the real adventure begins.
How to Choose a Wakeboarding Life Jacket: A Buying Guide for 2026

The right wakeboard life jacket balances Coast Guard or Transport Canada approval with enough mobility to let you carve, jump, and land without restriction. For 2026, most wakeboarders choose between fully approved PFDs that meet legal requirements on Canadian and U.S. waters, and low-profile impact vests that offer maximum range of motion but don’t satisfy boating regulations on their own. Your decision hinges on where you ride: if you’re launching from a boat on public waterways, you need an approved device on board, though many riders wear a thin Coast Guard-approved vest during their set and keep a backup readily accessible.

Wakeboarding creates unique flotation challenges you won’t face at Canadian kayaking destinations or while paddling calm lakes. Hard falls from cable parks and boat wakes demand impact protection across your ribs and spine, yet bulky foam restricts your ability to twist and grab. The sport’s learning curve means beginners benefit from extra buoyancy to surface quickly after crashes, while advanced riders prioritize thinner profiles that disappear under their movements.

Transport Canada recognizes three approved categories: SOLAS lifejackets, Standard Type lifejackets, and Small Vessel lifejackets. Each carries bilingual Department of Transport labels confirming legal compliance. Meanwhile, impact vests sold at wakeboard shops offer segmented foam panels and stretchy neoprene construction but lack official approval. Retail prices span from under $50 for basic approved vests to $150-$200 for premium competition models with hybrid certification and articulated panels. Understanding which features matter for your skill level and riding environment will keep you both safe and unrestricted on the water.

Key Takeaway: Prioritize Transport Canada approval for legal compliance, then assess mobility range for your riding style, and finally ensure proper fit through weight-based sizing and adjustment testing before purchase.

Understanding Wakeboarding Life Jackets vs. Standard PFDs

When you’re gearing up for wakeboarding across the countless lakes and rivers perfect for North America water adventures understanding the difference between standard personal flotation devices and wakeboarding-specific gear can be confusing. The distinction matters because it affects both your safety and your performance on the water.

Transport Canada recognizes three approved categories: SOLAS lifejackets (designed for offshore commercial vessels), Standard Type lifejackets (offering robust flotation for general recreational boating), and Small Vessel lifejackets (tailored for smaller watercraft). Each type meets specific safety standards but differs in buoyancy, bulk, and intended use. SOLAS devices provide the highest flotation and are built for extreme conditions, while Standard Type and Small Vessel options offer varying levels of protection suitable for recreational activities.

Note: You are required by law to have PFDs on board for each person on any watercraft, and all approved devices must display Department of Transport approval in both English and French.

Impact vests, which many wakeboarders prefer for their sleek profile and unrestricted movement, fall outside these approved categories. These vests prioritize flexibility for tricks and reduce bulk around the torso, but they lack official safety certification. You can use an impact vest for comfort and performance, but you still need an approved flotation device on your boat to meet legal requirements.

The approved options also include inflatable styles that activate automatically, manually, or orally. These compact designs offer serious comfort advantages, especially during long sessions, though they require careful maintenance and aren’t ideal for high-impact water sports where puncture risk increases.

Understanding these categories helps you make an informed choice that balances legal compliance, safety needs, and the freedom of movement that makes wakeboarding thrilling.

Key Factors When Choosing a Wakeboarding Life Jacket

Choosing the right flotation device for wakeboarding means weighing safety requirements against the physical demands of the sport. The equipment that keeps you legal on the water needs to work with your body during aerial tricks, hard landings, and high-speed runs across North American lakes and rivers.

Coast Guard approval sits at the top of your consideration list. Canadian law requires an approved lifejacket or PFD on board for each person, and that approval comes with a specific label in English and French showing Department of Transport certification. The three approved categories, SOLAS lifejackets, Standard Type lifejackets, and Small Vessel lifejackets, all meet legal requirements, though they vary in design and bulk. This approval matters beyond avoiding fines; it ensures the device has been tested for actual flotation performance when you hit the water unexpectedly.

Mobility directly affects your performance. Wakeboarding demands full shoulder rotation for grabs, unrestricted torso flex for spins, and freedom at the waist for inverted tricks. A vest that rides up during a fall or restricts your backside 180 costs you progression on the water. Look for designs with segmented foam panels, stretchy side panels, or strategic cutaways that balance buoyancy with range of motion. The stiffest, bulkiest approved vests keep you safest in an emergency but may limit advanced maneuvers.

Buoyancy level connects to both your weight and riding conditions. Manufacturers design vests with specific flotation ratings measured in Newtons or pounds of buoyancy. You need enough lift to keep your head above water if you’re unconscious, but excess buoyancy adds bulk that hampers movement. Match the vest’s rating to your actual weight, not your aspirations, and consider whether you typically ride in calm lakes or choppier conditions where extra flotation helps.

Sizing and fit determine whether the vest performs as designed. A loose vest rides up over your face during impact; a tight one restricts breathing and movement. Check manufacturer sizing charts based on chest measurement and weight, then test the fit by raising your arms overhead and having someone pull up on the shoulders. The vest should stay put with minimal movement. Adjustable straps at the waist and sides let you fine-tune the fit.

Durability matters when you’re taking repeated impacts against the water at speed. Quality vests use closed-cell foam that resists compression over time, reinforced stitching at stress points, and abrasion-resistant outer materials. Cheaper construction breaks down after a season of hard riding, losing both protective value and buoyancy.

Drainage features prevent the vest from becoming waterlogged and heavy. Small drain holes or mesh panels allow water to escape quickly after you surface, keeping the vest lighter and more comfortable during consecutive runs. This becomes crucial during long sessions when you’re in and out of the water repeatedly.

Price ranges from under $50 to over $200, generally reflecting the balance between certification, construction quality, and performance features. Budget vests prioritize basic approved flotation. Mid-range options add better materials and mobility features. Premium vests incorporate advanced segmented designs, high-end fabrics, and refined fit systems. Your skill level and time on the water should guide how much you invest, but never sacrifice approval status to save money.

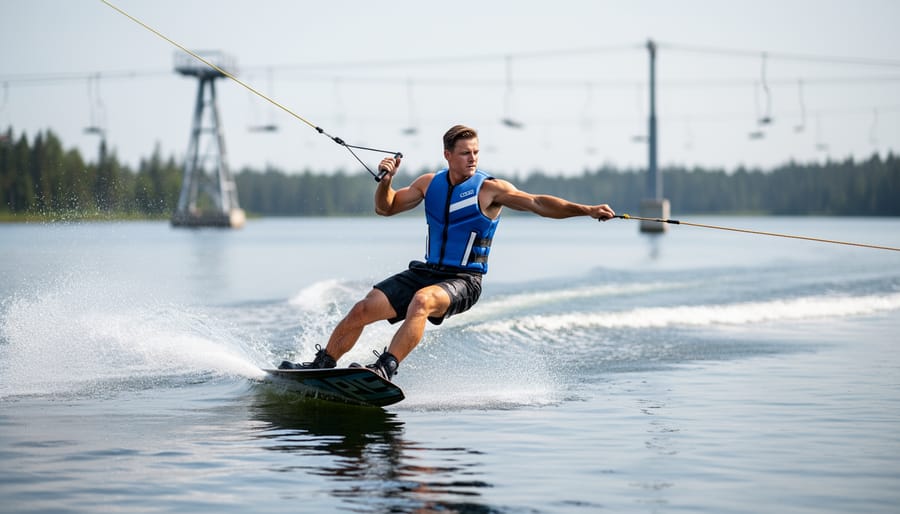
Wakeboarder wearing a blue and black life jacket on a boat wake
A wakeboarder wearing an approved life jacket shows the balance of safety and movement on open water.

Types of Flotation Devices for Wakeboarding

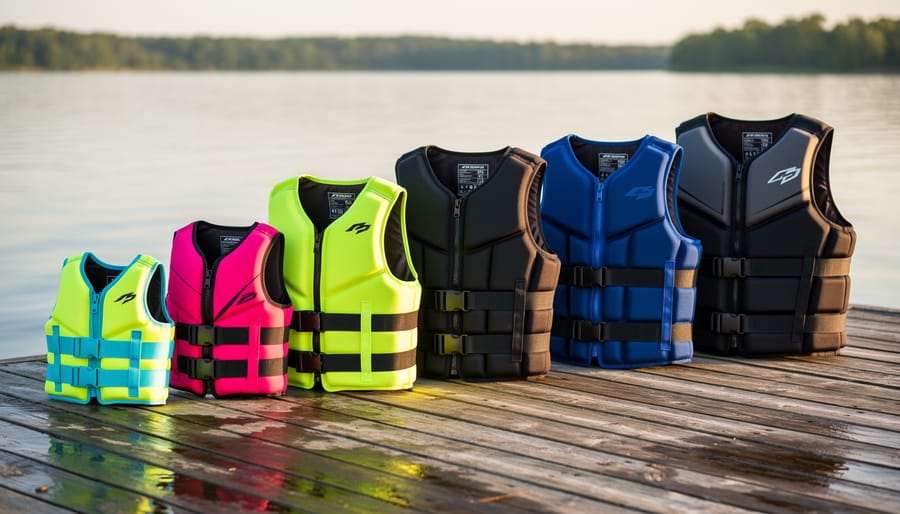
Several types of life jackets displayed on a dock without visible text
Different flotation styles laid out on a dock highlight how buoyancy and bulk can vary for wakeboarding needs.

Coast Guard-Approved PFDs for Wakeboarding

Coast Guard-approved PFDs balance legal compliance with wakeboarding performance better than many riders expect. Standard Type lifejackets deliver reliable buoyancy and meet Transport Canada requirements while allowing reasonable arm mobility for basic tricks and board control. They’re bulkier than impact vests but won’t land you in legal trouble during spot checks on North American lakes.

Small Vessel lifejackets offer a more streamlined profile, making them popular among wakeboarders who want approved flotation without excessive bulk. These devices still provide the buoyancy needed for safety while reducing restriction during rotations and grabs. Both Standard Type and Small Vessel options carry the bilingual Transport Canada approval label, your confirmation they meet federal regulations.

Look for designs with segmented foam panels rather than solid blocks. This construction flexes with your torso during aggressive movements while maintaining flotation. Mesh drainage panels speed water release after falls, and adjustable side straps let you dial in the fit for both safety and comfort. Coast Guard-approved vests won’t feel as invisible as non-approved impact vests, but they deliver peace of mind alongside performance that’s good enough for most wakeboarding sessions.

Impact Vests: Performance vs. Compliance

Impact vests have become increasingly popular among advanced wakeboarders who want maximum mobility for aerial tricks and board grabs. These low-profile designs eliminate bulk around the torso and shoulders, allowing unrestricted arm movement that higher-flotation jackets can’t match. However, here’s the critical distinction: impact vests sold for wakeboarding typically aren’t Transport Canada-approved flotation devices.

While impact vests provide some padding during hard falls and minimal flotation, they don’t meet the buoyancy standards required for legal compliance. You still need an approved lifejacket or PFD on your watercraft for each person, even if you’re wearing an impact vest. Some experienced wakeboarders use impact vests during their sessions but keep approved devices readily accessible on the boat.

This approach only works if you’re confident in your swimming ability and staying close to the boat in calm conditions. It’s not suitable for beginners, weaker swimmers, or anyone venturing far from the watercraft. The vest should supplement, never replace, proper safety equipment. Check that any impact vest you consider is clearly labeled regarding its approval status, retailers typically distinguish between Coast Guard-approved PFDs and non-approved performance vests in their product descriptions.

Inflatable Options for Comfort

Inflatable lifejackets bring a different approach to flotation for wakeboarders who value minimal bulk and unrestricted movement before activation. These compact devices remain slim and comfortable during riding, then provide buoyancy when inflated. Canada recognizes three inflation methods: automatic (triggered by water immersion), manual (pull-cord activated), and oral (blown up by mouth).

For wakeboarding scenarios, manual inflation suits the sport best. Automatic models can deploy during normal falls and splashes, leaving you with a bulky inflated jacket mid-session when you’re trying to get back on the board. Manual versions let you control deployment, inflating only when truly needed for emergency flotation. Oral inflation serves as a backup method but isn’t practical as the primary option when you’re in the water after a fall.

The trade-off? Inflatable lifejackets require careful maintenance and regular inspection of CO2 cartridges. They can be punctured by impact, which matters in a sport where you’re hitting the water repeatedly at speed. They also cost more than foam alternatives and need cartridge replacement after each use. Despite these considerations, experienced wakeboarders drawn to their minimal profile often keep them as approved on-board safety devices while wearing separate impact protection during active riding.

Recommended Life Jackets Across Price Ranges

Price plays a significant role in determining feature quality and durability, but the right investment depends on how often you wakeboard and your skill progression goals. Understanding what each tier delivers helps you balance budget constraints against performance needs on the water.

Under $50: Entry-Level Coast Guard-Approved Options

Budget-friendly vests in this range typically meet Transport Canada approval standards but use basic foam construction with minimal adjustment features. You’ll find Standard Type or Small Vessel lifejackets with simple buckle closures and limited flexibility. These work for occasional recreational wakeboarding and fulfill legal requirements, though mobility may feel restricted during tricks. Expect thicker foam panels and fewer drainage points, which can feel bulky when wet.

$50-$100: Improved Comfort and Flexibility

This mid-range tier introduces better segmented foam designs that move with your body, multiple adjustment straps for a customized fit, and improved drainage systems. Vests here often feature mesh panels, reinforced stitching at stress points, and more comfortable neoprene lining. The increase in mobility makes this range suitable for riders progressing beyond basic wakeboarding and attempting surface tricks. You’ll still find Coast Guard-approved options that balance safety compliance with reasonable performance.

$100-$150: Performance-Oriented Features

Higher-end vests incorporate advanced materials like flexible EVA foam, strategic panel placement for unrestricted arm movement, and low-profile designs. Many include quick-dry fabrics, premium buckle systems, and enhanced impact protection zones. This range appeals to frequent wakeboarders who prioritize both safety certification and the freedom to execute aerial maneuvers. Durability improves significantly, with double-stitched seams and abrasion-resistant outer shells that withstand repeated falls and board contact.

$150-$200: Premium Construction and Innovation

Top-tier vests offer the most refined balance of safety and performance, featuring ultralight materials, ergonomic shaping, maximum flexibility zones, and premium comfort fabrics. You’ll find the most secure yet least restrictive fit systems, along with advanced drainage technology that prevents water retention. These represent the best investment for dedicated wakeboarders who spend multiple days per week on the water and need equipment that keeps pace with advanced riding.

Regardless of price point, look for these quality markers:

  • Transport Canada approval labels in both English and French confirming Department of Transport certification
  • Multiple adjustable straps (shoulder, waist, side) for a secure personalized fit
  • Drainage grommets positioned at the bottom to release trapped water quickly
  • Reinforced double or triple stitching at all stress points and closure areas
  • Segmented or flexible foam panels that allow natural torso rotation and arm movement

Beginners wakeboarding a few times each season can find adequate safety and function in the $50-$100 range, while riders progressing to intermediate tricks benefit from the $100-$150 tier’s mobility improvements. Save the premium range for serious commitment to the sport, where the performance gains justify the investment across dozens of outings each season.

Common Mistakes to Avoid When Buying

Buying the wrong wakeboarding life jacket can compromise your safety and performance on the water. The most serious mistake is prioritizing appearance over certification. Many wakeboarders gravitate toward sleek, minimal impact vests without realizing these stylish options often lack Transport Canada approval. If you’re caught in an emergency without an approved flotation device on board, you’re both legally non-compliant and potentially at greater risk.

Selecting the wrong size creates dual problems. A jacket that’s too large can slip off during a hard fall, leaving you without flotation when you need it most. One that’s too tight restricts your range of motion, making tricks awkward and paddling back to the boat exhausting. Check the manufacturer’s weight and chest measurement charts rather than assuming your usual clothing size translates directly.

Another common pitfall involves misunderstanding what “approved” actually means. Not all flotation devices marketed for watersports meet Transport Canada requirements. The approval label must appear in both English and French and explicitly state Department of Transport certification. Impact vests designed purely for cushioning against board impacts don’t count as the required safety equipment, even if they provide some buoyancy.

Price-driven decisions often backfire. A bargain vest might save money initially but fail after one season of UV exposure and repeated lake dunks. Conversely, expensive doesn’t guarantee the right fit for wakeboarding if it’s designed primarily for sailing or kayaking.

The biggest mistake is skipping the try-on. Ordering online without testing how a jacket moves with your body means discovering fit issues only after you’ve already hit the water. Test arm mobility, bend at the waist, and simulate grabbing the rope before committing to any purchase.

Wakeboarder buoyed by a life jacket floating near the surface after a fall
The image conveys why proper flotation and secure fit matter when a wakeboarder goes down in rough water.

Fitting and Sizing Your Wakeboarding Life Jacket

Person adjusting straps on an orange life jacket on a marina dock
A rider checks strap fit and snugness before heading out, emphasizing comfort and safety for falls.

Sizing a wakeboarding life jacket properly ensures it stays secure during falls while allowing full mobility for tricks and maneuvers. Most manufacturers base sizing on weight ranges and chest measurements, so check both specifications before purchasing. Weight matters more than chest size for buoyancy requirements, but chest fit determines comfort and range of motion during riding.

Start with a size chart that matches your weight, then test the fit. Put on the jacket, fasten all straps and zippers, then lift your arms overhead. The jacket shouldn’t ride up past your chin or restrict shoulder movement. Next, have someone pull upward on the shoulders while you relax your arms at your sides. If the jacket slides more than a few inches, it’s too loose and could come off in a fall. A proper fit helps keep you afloat and prevents the device from shifting during impact.

Adjust all straps snugly but not constrictingly. You should be able to breathe deeply and twist your torso without restriction. Test the right fit matters approach by simulating wakeboarding movements on land: reach forward, twist side to side, and bend at the waist. If the jacket bunches, gaps, or limits these motions, try adjusting straps or sizing differently.

Before heading out on North American lakes, do a final water test in shallow areas. Wade in chest-deep and verify the jacket keeps you buoyant without riding up uncomfortably.

Frequently Asked Questions

Can I use a kayaking PFD for wakeboarding?

Yes, any Coast Guard-approved PFD that meets Transport Canada requirements works legally for wakeboarding, whether it’s designed for kayaking, paddleboarding, or general boating. However, kayaking vests often have more bulk and higher backs that can restrict the shoulder mobility you need for wakeboarding tricks, so a lower-profile design typically performs better for the sport’s range of motion demands.

Do I need an approved vest if I’m an experienced wakeboarder?

Yes. Transport Canada law requires an approved lifejacket or PFD on board for each person on a watercraft, regardless of skill level. Even if you’re comfortable using a lower-profile impact vest for performance, you must have an approved device available on the boat to comply with safety regulations.

How do I know if my vest is Transport Canada approved?

Check for a bilingual label in English and French that shows approval by the Department of Transport. All Canadian-approved lifejackets and PFDs display this label, which identifies them as meeting one of the three approved categories: SOLAS lifejackets, Standard Type lifejackets, or Small Vessel lifejackets.

What’s the difference between types and sizes of PFDs?

Types refer to approval categories and design purposes, while sizes are based on weight and chest measurements to ensure proper buoyancy and fit. The three Canadian-approved types serve different use cases, and within each type, PFDs come in various sizes and colors to match individual body dimensions.

How should I care for my wakeboarding life jacket?

Rinse it with fresh water after each outing to remove lake or river residue, then air-dry it completely before storage. Never machine-wash or use harsh detergents, and inspect straps, buckles, and flotation material regularly for wear or damage that could compromise safety performance.

Proper maintenance extends the life of your vest and ensures it performs when you need it. Store your jacket in a cool, dry place away from direct sunlight, which can degrade foam and fabric over time. If you use an inflatable style, check the CO2 cartridge before each season and replace it after any inflation. For foam-based vests, squeeze the flotation panels occasionally to confirm they haven’t compressed or developed hard spots that indicate the foam is breaking down. A well-maintained life jacket stays reliable across multiple seasons of wakeboarding adventures on North American waters.

Main Options Compared

When choosing flotation for wakeboarding, you’re weighing three main approaches, each with distinct trade-offs between legal compliance, mobility, and comfort.

Coast Guard-Approved PFDs remain the safest legal choice. Standard Type and Small Vessel lifejackets both meet Transport Canada requirements, look for the bilingual Department of Transport approval label. Standard Type models offer higher buoyancy and turn unconscious wearers face-up, making them ideal for beginners or anyone prioritizing maximum safety. Small Vessel lifejackets provide adequate flotation with a lower profile that allows better mobility for tricks and spins. Both keep you legal on Canadian waters while protecting you during falls.

Lower-Profile Impact Vests appeal to experienced riders who want unrestricted movement. These thin, flexible vests absorb impact well but aren’t approved flotation devices. You’ll still need an approved PFD on board to meet legal requirements, even if you wear the impact vest while riding. Many seasoned wakeboarders keep an approved vest in the boat and wear the impact vest for performance.

Compact Inflatable Lifejackets split the difference, they’re approved, comfortable, and less bulky than foam models. Available in automatic, manual, or oral inflation styles, they let you move freely until activated. However, they require more maintenance than foam vests and cost more upfront.

Think of your choice like packing trail-ready essentials for any outdoor adventure: the right gear balances safety with performance for the conditions you’ll face.

Recommendations by Use Case

For beginners exploring wakeboarding on calm lakes, prioritize a Coast Guard-approved Standard Type lifejacket in the $50-$100 range. These provide reliable buoyancy and legal compliance while you develop your skills. The added flotation helps build confidence during early falls, and the certification ensures you’re covered for safety requirements across all North American waters.

Intermediate riders progressing to tricks should consider approved Small Vessel lifejackets in the $100-$150 tier. These offer better mobility than Standard Type options while maintaining Transport Canada certification, striking a practical balance for riders advancing their technique without compromising legal requirements.

Experienced wakeboarders on private lakes might layer a lower-profile impact vest over a minimalist approved PFD for maximum range of motion during advanced maneuvers. Keep the certified device accessible since the impact vest alone won’t satisfy legal requirements if checked by authorities.

Budget-conscious families can find adequate Coast Guard-approved options under $50 per person. Focus on proper fit over features, a well-adjusted basic approved vest outperforms an expensive model worn incorrectly. Test adjustments at the dock before anyone enters the water to ensure each jacket stays secure during falls.

Finding the right life jacket for wakeboarding comes down to balancing legal requirements with the freedom of movement you need on the water. Throughout this guide, we’ve explored how Coast Guard-approved PFDs, including SOLAS, Standard Type, and Small Vessel lifejackets, meet Transport Canada’s legal requirements while offering varying levels of mobility for your riding style. Whether you’re carving across calm lake surfaces or pushing your limits with aerial tricks, the jacket you choose should keep you both compliant and confident.

Before every session on North American waters, take a moment to verify your device shows Transport Canada approval labels in English and French, and confirm the fit allows full range of motion without riding up during falls. The thrill of wakeboarding is most rewarding when you’re properly equipped to handle unexpected spills and make it unforgettable adventures across lakes and rivers safe ones. Your life jacket is more than gear, it’s your safety net for exploring the water with freedom and peace of mind.

Hiking Near Me With Waterfalls: 9 Best Trails Across North America

The best waterfall hikes combine moderate trail difficulty with dramatic cascades within a half-day round trip, and North America delivers dozens of these experiences across every region. Whether you’re planning a weekend escape or a spontaneous afternoon adventure, this guide ranks standout trails from coast to coast based on waterfall volume, trail accessibility, and current 2026 conditions.

Right now, thousands of hikers are typing “hiking near me with waterfalls” into search bars, phones in hand, ready to hit the trail within hours. That urgency demands current, reliable information. Parks Canada recommends checking the latest trail conditions before heading out, and conditions shift weekly with snowmelt, rainfall, and maintenance schedules. In Yoho National Park, for example, both Wapta Falls Trail and the Yoho Valley Road to Takakkaw Falls are currently open and marked in good condition, while Third Vault Falls in Gros Morne National Park continues to showcase the park’s highest single-drop waterfall at 16 meters, crashing into a rocky ravine below.

This ranked list prioritizes trails that deliver maximum reward with manageable effort. You’ll find everything from roadside cascades perfect for families to backcountry routes where you might spot black bears fishing below the falls. Each recommendation includes real-time access notes, safety callouts for slippery rocks and wildlife encounters, and packing essentials so you can move from planning to trailhead in under an hour.

Key Takeaway: North America offers waterfall hikes for every skill level, check Parks Canada trail conditions before you go, pack for wet conditions and wildlife, and prepare for an unforgettable blend of trail adventure and natural spectacle.

How We Chose These Waterfall Trails

We handpicked these nine trails by balancing drama with accessibility, ensuring every hiker finds their perfect waterfall adventure. Our selection process weighed several critical factors to deliver trails that combine breathtaking scenery with safe, reliable access across North America.

  • Waterfall impact: Height, volume, and visual drama of the cascades
  • Trail accessibility: Range of difficulty levels from roadside viewpoints to backcountry challenges
  • Current conditions: Verified 2026 trail status and seasonal reliability
  • Scenic diversity: Unique features including wildlife corridors, coastal landscapes, and opportunities to spot icebergs in certain regions
  • Safety considerations: Well-maintained paths, clear signage, and manageable hazards

We prioritized trails spanning multiple skill levels, from families seeking easy walks to experienced hikers chasing remote backcountry rewards. Geographic diversity matters too, these selections represent the best waterfall hikes from the Canadian Rockies to Atlantic shores, ensuring you’ll find options near major regions. Before you head out, always check Parks Canada’s latest trail conditions for national park destinations, as seasonal factors affect access and safety year-round.

1. Third Vault Falls Trail, Gros Morne National Park, Newfoundland’s Hidden Gem

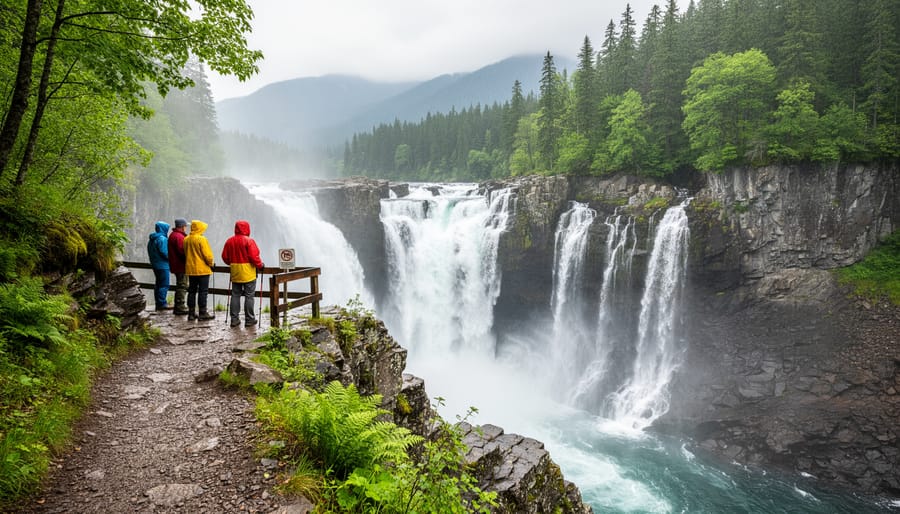
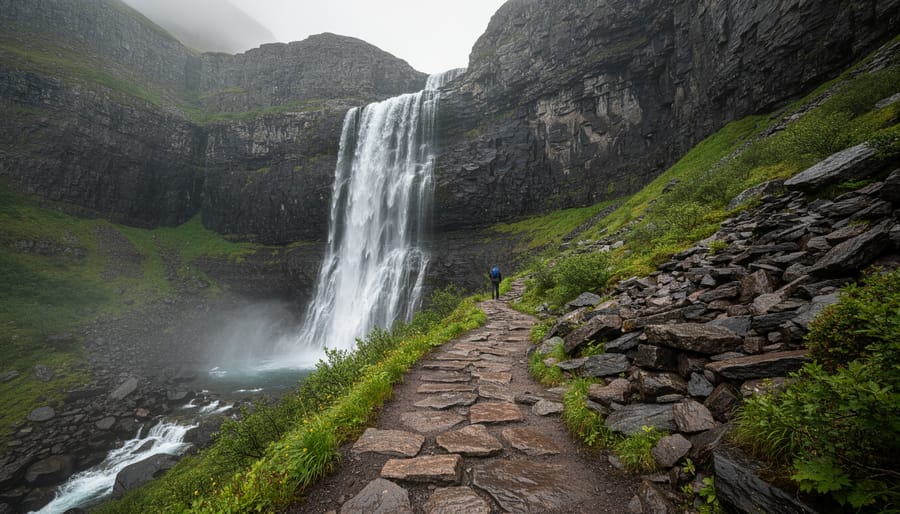
Third Vault Falls cascading into a rocky ravine with a hiker on a nearby trail at Gros Morne National Park
Third Vault Falls drops into a rocky ravine, with misty trail stones and a distant hiker emphasizing the rugged scale of this Gros Morne hike.

Tucked into Gros Morne National Park’s rugged western edge, Third Vault Falls plunges 16 meters into a dramatic rocky ravine, earning its reputation as the park’s highest waterfall. This trail delivers a remote, less-traveled experience that contrasts sharply with the park’s busier boardwalks and coastal routes.

The hike spans roughly 11 kilometers round trip with steady elevation gain through boreal forest and exposed alpine terrain. Expect uneven footing, stream crossings, and sections of loose rock requiring solid boots and attention. Moderate fitness is essential, but the payoff is a waterfall that thunders with serious power during spring and early summer runoff.

What sets Third Vault Falls apart among Gros Morne’s 100-plus kilometers of trails is the striking blend of coastal-mountain landscape. You’ll climb through dense spruce, break into windswept barrens dotted with tuckamore, and glimpse the Gulf of St. Lawrence in the distance before the ravine opens below. The falls themselves crash over layered sedimentary cliffs, carving deep into rock formed millions of years ago.

Wildlife sightings are common: watch for moose browsing trailside willows, ptarmigan exploding from undergrowth, and the occasional caribou on higher ground. Black bears inhabit the area, so carry bear spray and make noise. For a fuller Gros Morne Adventure combine this hike with the park’s coastal trails or fjord kayaking.

Check Parks Canada for current trail conditions before heading out, as weather and maintenance can shift access rapidly in this exposed Atlantic environment.

2. Wapta Falls Trail, Yoho National Park, Wide, Powerful, and Accessible

Family at a safe viewing platform looking at the wide cascade of Wapta Falls in Yoho National Park
Wapta Falls roars broadly across the rock face, with visitors enjoying the viewpoint from an easy, accessible trail area.

Wapta Falls packs serious drama with minimal effort, making it one of the Rockies’ most rewarding waterfall hikes for families and first-timers. The falls themselves span an impressive width, sending the Kicking Horse River thundering over a limestone ledge in a powerful, foaming cascade that you’ll hear long before you see it. At roughly 2.3 kilometers one-way along a well-maintained, mostly flat trail through Douglas fir forest, this hike delivers big scenery without demanding technical skills or grueling elevation gain.

Access couldn’t be easier. The Wapta Falls Road is currently open, bringing you right to the trailhead with ample parking and vault toilets. The trail itself is rated Good in Yoho National Park’s current conditions, meaning you can expect clear tread and reliable signage. Kids handle this walk comfortably, and the gentle grade suits anyone building hiking confidence or traveling with varied fitness levels.

The payoff unfolds at the viewpoint, where mist rises from the churning plunge pool and rainbow light plays across the spray on sunny afternoons. Surrounding peaks frame the scene in classic Rocky Mountain style, with layered ridges and remnant snowfields visible even in summer. Bring a rain jacket for the mist zone near the falls, and check Parks Canada’s latest trail conditions before heading out to confirm access and any seasonal updates. This trail proves that accessible doesn’t mean ordinary.

3. Takakkaw Falls, Yoho National Park, One of Canada’s Tallest

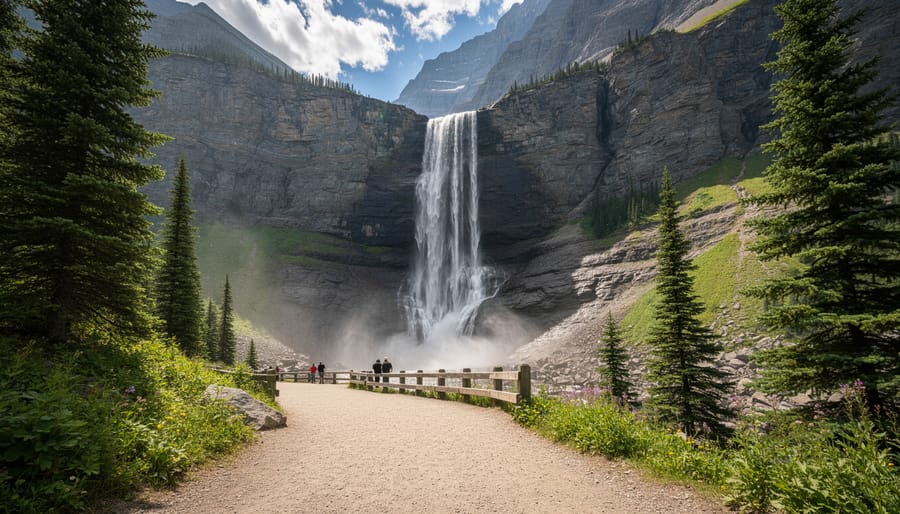
Takakkaw Falls towering above a viewpoint walkway with a person near mist in Yoho National Park
Takakkaw Falls dominates the scene, and a short walk to the viewpoint brings you close to the mist and roar of one of Canada’s tallest waterfalls.

Takakkaw Falls crashes 373 meters down a sheer rock face, making it one of Canada’s highest waterfalls and an absolute must-see on any waterfall hiking itinerary. The thundering cascade, fed by the Daly Glacier high above, sends a constant mist into the air that you’ll feel hundreds of meters away, and the roar is genuinely humbling.

Getting there requires a drive up Yoho Valley Road, which is currently open, but the actual walk from the parking area to the main viewpoint takes only 5 to 10 minutes along a flat, paved path. This accessibility makes Takakkaw perfect for families, first-time hikers, or anyone wanting maximum waterfall drama with minimum effort. The base viewpoint puts you close enough to feel the spray on your face and capture stunning photos, especially in late morning when sunlight hits the falls.

For those craving more, Takakkaw serves as the trailhead for several longer routes. The Yoho Valley Trail continues past the falls into alpine meadows and connects to backcountry destinations like Twin Falls and the Iceline Trail, turning a quick stop into a full-day or multi-day adventure. Even if you stick to the short walk, arrive early in summer, this spot draws crowds for good reason, and parking fills fast by mid-morning. The combination of jaw-dropping height, easy access, and connections to deeper wilderness makes Takakkaw a cornerstone of any waterfall hiking trip in the Rockies.

4. Johnston Canyon to Inkpots, Banff National Park, Classic Catwalks and Cascades

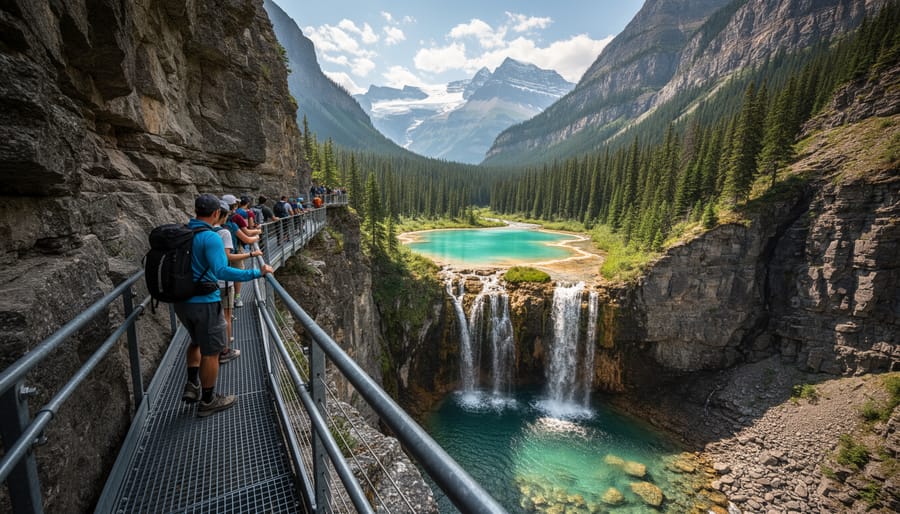
Hikers on a canyon catwalk overlooking waterfalls on the Johnston Canyon to Inkpots trail
The canyon catwalk leads hikers past cascading viewpoints toward the turquoise Inkpots landscape beyond.

Johnston Canyon to Inkpots stands as one of Banff’s most photographed trails, and for good reason. Steel catwalks cling to the canyon walls, suspending you above the rushing creek as you wind through the narrow limestone gorge. The trail delivers waterfalls at multiple points: Lower Falls at 1.1 km showcases a powerful 10-meter cascade you can walk behind through a short tunnel, while Upper Falls at 2.7 km thunders 30 meters down into a turquoise pool. Most visitors turn around here, but pushing on another 2.4 km rewards you with the Inkpots, six vivid blue-green spring-fed pools bubbling up through sandy meadows, their colour shifting with the light and minerals.

The full return trip to the Inkpots covers 11.6 km with 335 meters of elevation gain, making it a moderate half-day hike. Expect crowds, especially summer weekends when the catwalks feel like a slow-moving parade. Early morning starts (before 7 AM) or late afternoon hikes dodge the worst congestion. Winter transforms the canyon into an ice-sculpture gallery, though you’ll need microspikes for the frozen walkways.

Before you go, check Parks Canada’s trail conditions page for Banff National Park, seasonal closures for wildlife activity or catwalk maintenance happen periodically. The trailhead lies seven kilometres east of Banff townsite along the Bow Valley Parkway, with a large parking lot that fills quickly in peak season. Pack layers; the canyon stays cool and misty even on warm days.

5. Dickson Falls, Fundy National Park, Atlantic Forest Beauty

Mossy forest trail leading to Dickson Falls in Fundy National Park
Dickson Falls sits within a dense, mossy Acadian forest, offering a quick hike with a rewarding waterfall view.

Tucked into New Brunswick’s Fundy National Park, the Dickson Falls trail delivers maximum reward for minimal effort. This 1.5-kilometer loop is one of the region’s most family-friendly waterfall hikes, threading through dense Acadian forest before revealing a delicate cascade spilling over moss-draped rocks into a cool gorge.

The trail follows a boardwalk and staircase system that keeps you dry while winding through towering yellow birch, sugar maple, and balsam fir. Interpretive panels along the route explain the coastal forest ecosystem and the geological forces that shaped the falls, making this more than just a photo stop. Kids love the wooden bridges and the chance to spot salamanders in the damp understory.

The waterfall itself isn’t the tallest on this list, but it’s among the most photogenic. Water tumbles in stages through a narrow chasm lined with ferns and hemlock, creating a scene that feels straight out of a storybook. The mist keeps the surrounding rock gardens perpetually green, even in late summer.

Expect the loop to take 30 to 45 minutes at a relaxed pace. The trail is well-maintained and accessible for most fitness levels, though the stairs may challenge very young children or those with mobility concerns. Visit in spring for peak flow, or enjoy the quieter forest ambiance during fall foliage season. Check Parks Canada for current trail conditions before you go.

6. Athabasca Falls, Jasper National Park, Raw Power and Easy Access

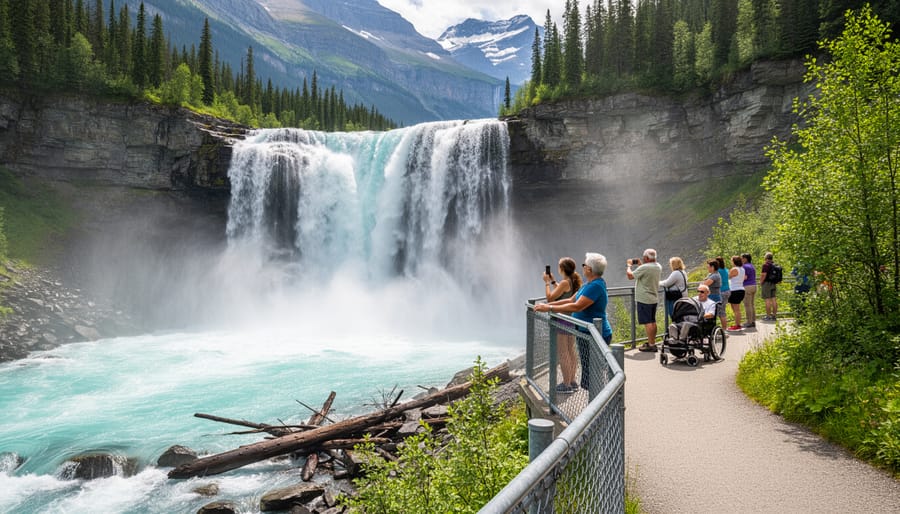
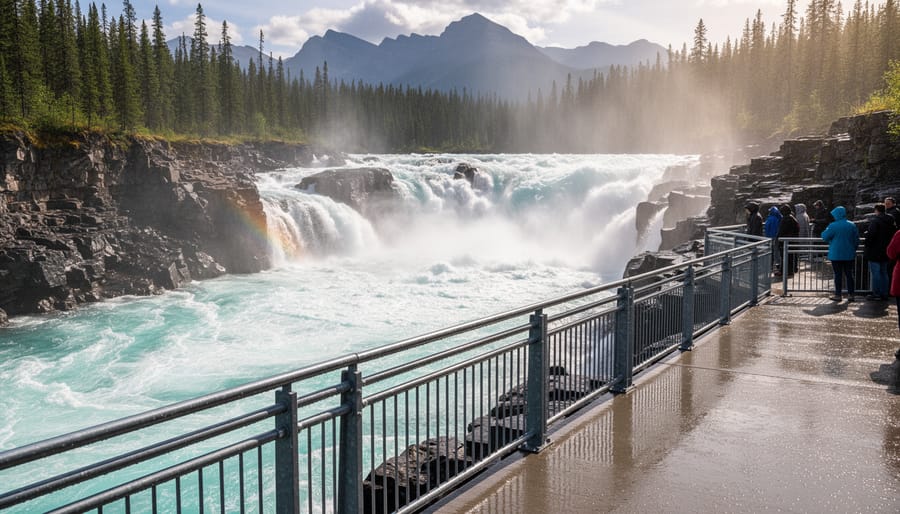
View of Athabasca Falls with safety barrier and roaring whitewater in Jasper National Park
Athabasca Falls delivers raw power with easy access from viewing platforms, where spray and sound underline the force of the river.

If you want raw waterfall power without the backcountry commitment, Athabasca Falls delivers. Located just off the Icefields Parkway in Jasper National Park, this roaring cascade is one of the most accessible waterfall experiences in the Canadian Rockies. The falls aren’t the tallest in the park, but what they lack in height they make up for in sheer force. The Athabasca River funnels through a narrow gorge of ancient quartzite, and the water hammers through the rock with a violence you can feel in your chest.

Short paved trails and multiple viewing platforms make this trail suitable for everyone, including families with strollers and visitors with mobility limitations. You can hear the thunder of the water from the parking lot. The upper viewpoints offer safe, barrier-protected perspectives on the churning whitewater, while lower platforms bring you close enough to feel the mist on your face.

The quartzite canyon walls show dramatic evidence of erosion, smoothed and carved by millennia of powerful water. You’ll notice potholes and channels sculpted into the rock, a visible reminder of nature’s patient force. Before you visit, check Parks Canada’s latest trail conditions for any seasonal updates or closures. This is a quick stop that rewards you with massive visual and sensory impact, no technical hiking required.

7. Laughing Falls, Yoho National Park, Backcountry Reward

Hiker beside a trail near the multi-tiered Laughing Falls waterfall in Yoho National Park
Laughing Falls rewards a longer trek with dramatic multi-tier cascades and a sense of quiet backcountry wilderness.

If you’re ready to leave the roadside crowds behind and earn your waterfall, Laughing Falls delivers one of Yoho’s most rewarding backcountry experiences. This multi-tiered cascade tumbles through old-growth forest roughly 11 km from the trailhead, making it a full-day commitment best suited to hikers comfortable with distance, elevation gain, and minimal company.

The trail winds through dense cedar and hemlock forest, crossing streams and climbing steadily into subalpine terrain. You’ll share the route with very few people compared to the park’s roadside attractions, which means a higher chance of wildlife encounters. Black bears forage along the trail corridor in summer, and marmots whistle from rock piles near the falls. Carry bear spray, make noise, and stay alert, this is their home.

The falls themselves justify the effort: a powerful, foaming curtain dropping in stages over moss-covered rock, the spray catching light in late afternoon. The roar echoes through the narrow canyon, and you can feel the mist from the viewing area. Plan for six to eight hours round-trip, including time to rest and take in the scene.

Check Parks Canada trail conditions before you go, as snowmelt and weather can affect creek crossings and trail stability well into summer. Pack extra layers, rain gear for the mist zone, plenty of water, and snacks for sustained energy. This is backcountry hiking with a spectacular payoff.

8. King Creek Falls, Kananaskis Country, Alberta’s Best-Kept Secret

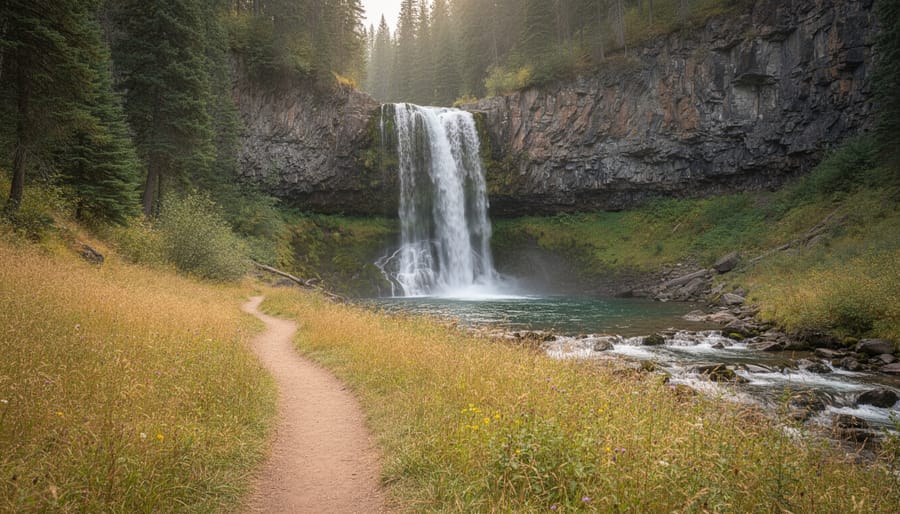
Trail leading to King Creek Falls with wildflower meadow and rocky cascade in Kananaskis Country
King Creek Falls is framed by seasonal meadow color, and the trail view feels like a quieter alternative to the more famous parks nearby.

Tucked away in Kananaskis Country, King Creek Falls offers a refreshing alternative to the shoulder-to-shoulder trails of Banff and Jasper. This moderate 7.6-kilometer out-and-back route delivers a rewarding waterfall experience without the tour buses, and the seasonal nature of the cascade makes timing your visit part of the adventure.

The falls shine brightest during late May through early July, when snowmelt swells King Creek into a thundering multi-tiered plunge. By August, the flow typically diminishes to a trickle, though the trail remains worthwhile for the wildflower meadows that explode with color throughout summer. Indian paintbrush, alpine forget-me-nots, and arnica blanket the higher elevations, creating photo opportunities that rival the waterfall itself.

The trail gains roughly 200 meters through mixed forest and subalpine meadow, making it accessible for moderately fit hikers but challenging enough to filter out casual visitors. Rocky sections near the falls can be slippery even when dry, so sturdy footwear with good tread is essential. The route crosses several creek tributaries, and spring runoff can make these crossings tricky, test the depth with a trekking pole before committing.

Grizzly and black bear sightings are common here, particularly in berry season. Travel in groups, make noise, and carry bear spray. The relative solitude that makes King Creek special also means you’re genuinely in wildlife territory, so treat it with respect.

9. Brandywine Falls, Sea-to-Sky Corridor, British Columbia, Pacific Northwest Drama

Brandywine Falls drops 70 meters into a dramatic volcanic canyon just off the Sea-to-Sky Highway between Squamish and Whistler. The short, well-maintained trail makes this one of British Columbia’s most accessible waterfall experiences, you’ll reach the main viewpoint in under 10 minutes from the parking lot.

What sets Brandywine apart is the geology. The falls plunge over ancient lava rock into a narrow chasm carved through layers of volcanic basalt. Multiple viewing platforms let you appreciate the power of the water hammering into the canyon below, surrounded by towering old-growth Douglas fir and western red cedar that somehow cling to the steep walls.

The loop trail extends beyond the main falls viewpoint, winding through coastal rainforest where moss drapes every surface and the air stays cool even on hot summer days. It’s an easy 15-minute walk total, but the scenery delivers Pacific Northwest drama without the effort required at more remote destinations.

Brandywine’s location makes it perfect for a quick waterfall fix between other adventures. Whistler sits 15 minutes north, while Squamish climbing and mountain biking areas are 20 minutes south. If you’re planning an overnight trip in the corridor, check your sleeping pad and pack solid camping food ideas for nearby provincial campgrounds like Alice Lake or Garibaldi.

What to Pack for Waterfall Hikes

Waterfall trails demand specialized gear beyond your typical day hike. Mist from cascades can soak you just as thoroughly as rain, so pack a lightweight rain jacket and waterproof pants even on sunny days. Wet rocks near falls turn into skating rinks, invest in boots with aggressive tread patterns and consider microspikes if you’re hiking early season when ice lingers on shaded ledges.

Here’s what belongs in your pack:

  • Waterproof shell and pants to handle constant spray near viewing areas
  • Boots with deep lugs and ankle support for slippery, uneven terrain
  • Bear spray and bear bells for backcountry routes where wildlife encounters are common
  • Dry bag or waterproof case to protect your phone and camera from mist
  • Two liters of water minimum, plus electrolyte mix for longer trails

Layer strategically. Temperatures drop near water, especially in shaded canyons, then spike when you climb out into open sun. A merino base layer and a fleece mid-layer give you flexibility without bulk. Stash extra socks in a ziplock, dry feet transform a miserable slog into a rewarding adventure, and that second pair pays off when you’re standing in the spray zone capturing the perfect shot.

Safety Tips for Hiking Near Waterfalls

Wet rocks near waterfalls are deceptively dangerous, mist creates a constant film of moisture that turns boulders and viewing platforms into skating rinks. Wear boots with aggressive tread, move slowly, and treat every surface near cascading water as potentially slippery, even if it looks dry. Barriers and fencing exist for a reason: the edges near waterfall drops are often unstable, undercut by erosion, and far more dangerous than they appear from a distance.

Note: Always check Parks Canada or local trail conditions before heading out, and never venture beyond barriers near waterfall edges.

Current trail conditions change rapidly with weather, snowmelt, and seasonal maintenance, what was passable last week may be closed or hazardous today. Before you drive to any trailhead, visit the Parks Canada website for real-time updates on closures, wildlife warnings, and water levels. High-flow periods make waterfall hikes spectacular but also raise the stakes: swollen creeks erase trail crossings, mist obscures footing, and the roar of the falls can mask warning shouts.

Wildlife awareness matters year-round, especially on backcountry routes like Laughing Falls where bear encounters are common. Carry bear spray, hike in groups, and make noise on blind corners. Weather shifts fast in mountain terrain, pack rain layers and extra insulation even on sunny mornings, since waterfalls create their own microclimates with sudden temperature drops and soaking spray.

Frequently Asked Questions

When is the best time of year to see waterfalls?

Late spring through early summer offers the most dramatic waterfall flow thanks to snowmelt runoff from higher elevations. You’ll see maximum volume and power during May and June, though trails can be muddy and cold.

Do I need a park pass for these waterfall hikes?

Yes, all trails in national parks like Banff, Jasper, Yoho, Fundy, and Gros Morne require a valid Parks Canada pass. You can purchase day passes at park gates or buy an annual Discovery Pass if you plan multiple visits.

Are waterfall trails suitable for kids?

It depends on the trail. Dickson Falls, Athabasca Falls, and Brandywine Falls offer short, accessible routes perfect for families with young children. Longer backcountry hikes like Laughing Falls or the full Johnston Canyon to Inkpots trek work better for older kids with hiking experience.

How do I find current trail conditions before I go?

Parks Canada recommends checking their website for the latest trail conditions before heading out, with updates listed by specific park location. Local visitor centers also provide real-time information on closures, hazards, and seasonal access restrictions.

Can I swim near these waterfalls?

Swimming is generally not recommended and often prohibited near waterfalls due to strong currents, cold water temperatures, and submerged rocks. Respect all posted signs and barriers, as the mist-slicked rocks and powerful hydraulics create serious drowning hazards even in shallow water.

These answers cover the practical questions most hikers ask when planning waterfall adventures, but conditions change with weather and season. Always double-check current information rather than relying solely on online resources from previous visits, and don’t hesitate to ask rangers for local insight when you arrive at the trailhead.

Your Next Waterfall Adventure Awaits

From the thundering 16-meter cascade of Third Vault Falls in Newfoundland to the accessible boardwalks of Johnston Canyon in Banff, these nine trails prove that waterfall hikes come in every flavour. Whether you’re after a quick roadside stop at Athabasca Falls or ready to earn your view with a backcountry push to Laughing Falls, the combination of trail challenge and cascading water delivers something no photo can fully capture.

Before you lace up, take five minutes to verify current access and conditions. Trails change with seasons, snowmelt, and weather events, and that quick check could save your trip. Pack the essentials we covered, respect the power of moving water, and give yourself time to simply stand and watch the falls do their work. The mist on your face, the roar in your ears, the knowledge that you walked here under your own power, that’s the magic we’re chasing. Your next waterfall adventure is out there waiting.

How to Choose Bear Bells for Hiking: A Canadian Buyer’s Guide

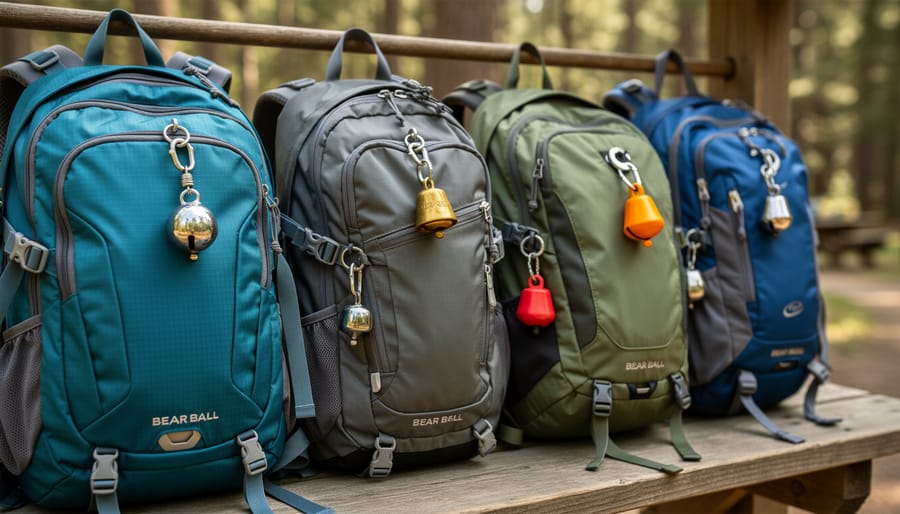
Bear bells are lightweight metal bells that clip onto your pack or walking stick to create continuous noise as you hike, alerting bears to your presence and reducing surprise encounters. In Canada, you’ll find them at major outdoor retailers like MEC and Atmosphere, online through and REI, and at specialty shops across hiking regions, with prices ranging from around $10 to $30 depending on size, design, and whether you’re buying singles or multi-packs.

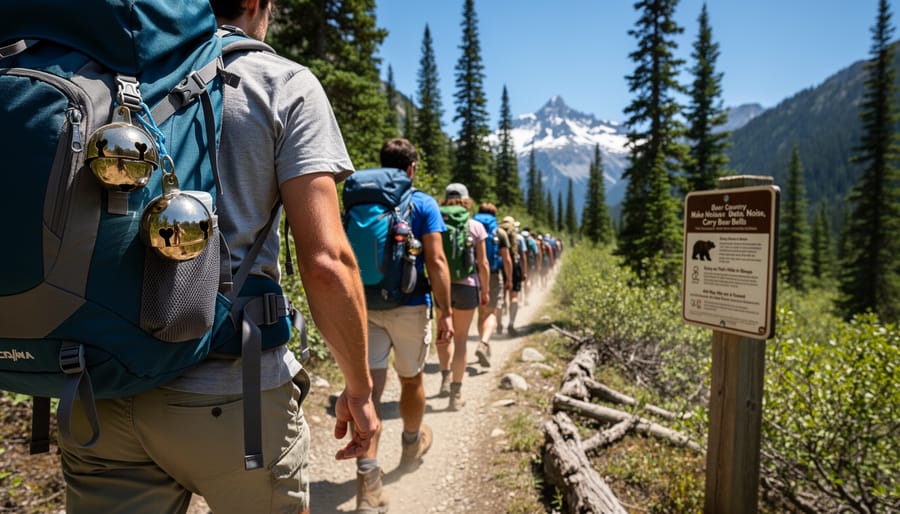
These simple tools serve a critical safety function on North American trails, particularly in regions where black bears and grizzlies roam. The constant jingling gives wildlife time to move away before you round a corner on a narrow trail or push through dense brush where visibility drops. While bear bells aren’t a substitute for awareness and proper food storage, they add an extra layer of passive deterrence that’s especially valuable when hiking solo, moving through areas with berry patches, or exploring trails near salmon streams where bears congregate.

The Canadian market offers everything from budget-friendly solid brass bells with basic Velcro straps at $9.95 to artisan sets featuring Native art designs and premium leather attachments. Understanding what makes an effective bear bell, how different mounting systems perform on actual trails, and which scenarios truly call for audible warning will help you choose the right option for your adventures, whether you’re navigating coastal rainforest paths or heading into the Rockies for a multi-day backcountry trip.

What Makes a Good Bear Bell: Key Buying Factors

Sound Volume and Carrying Distance

A bear bell’s effectiveness hinges on two factors: how loud it rings and how far that sound travels through varying terrain. You need a bell that cuts through wind, dense forest, and rushing water, the very conditions where bears might not otherwise detect your approach. A large bell typically produces a deeper, more resonant tone that carries 30 to 50 yards ahead on most trails, giving wildlife ample time to move away before you arrive.

Smaller bells generate higher-pitched sounds that fade faster, especially in thick vegetation or when competing with natural noise. They work for open meadows and groomed paths, but struggle in backcountry settings where acoustics matter most. The volume difference is noticeable: large bells often ring loud enough to be heard clearly by your hiking partners several paces behind, while compact options may barely reach beyond your own footsteps.

Consider the terrain you’ll hike most often. Forested corridors and river valleys demand the robust clang of a larger bell. If weight savings matter and you’re sticking to well-traveled day-use trails, a smaller option suffices, but don’t compromise on volume where bear encounters are genuinely possible.

Attachment Systems That Stay Secure

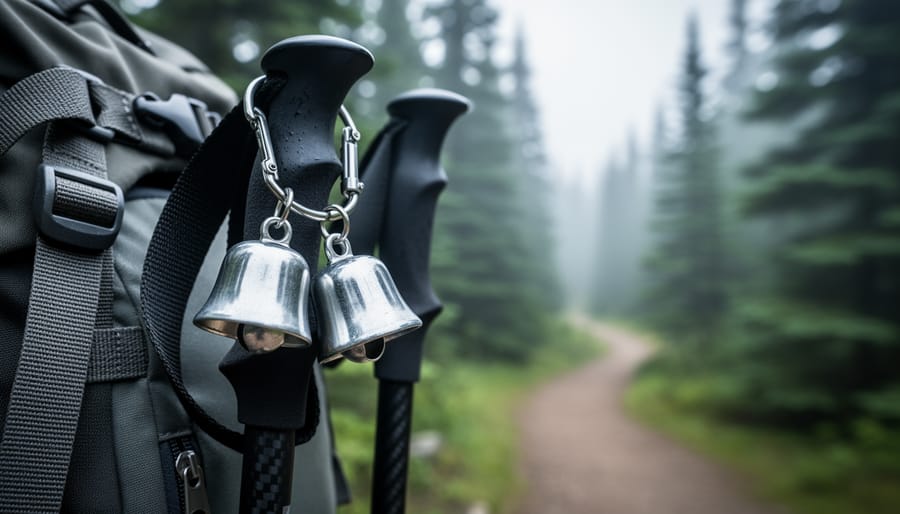
Close-up of bear bell hardware attached with Velcro strap and carabiner on hiking gear.
Close-up imagery highlights how different bear bell attachments can look on common hiking gear.

The attachment system determines whether your bear bell stays with you mile after mile or ends up lost on the trail. Each mechanism suits different gear setups and hiking approaches.

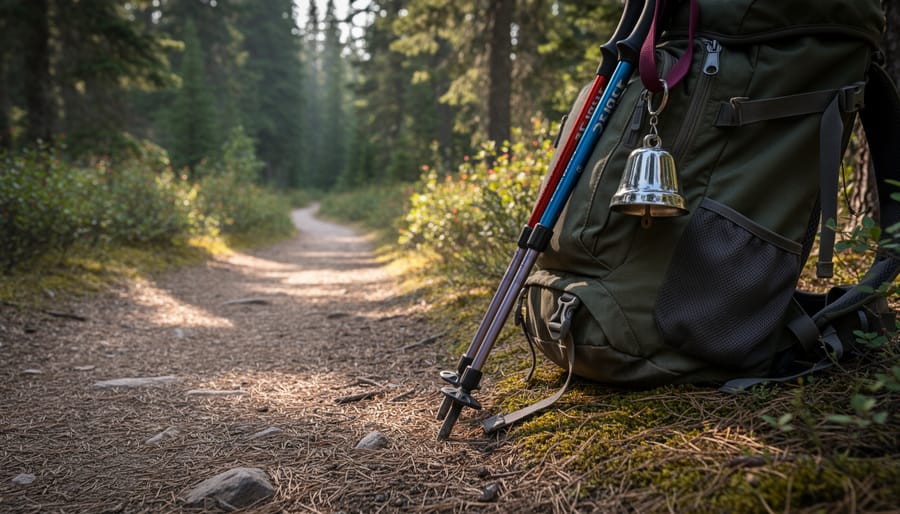
Velcro straps wrap around hiking sticks, trekking poles, and walking staffs, keeping the bell at ground level where its sound travels well. They adjust quickly to various pole diameters and transfer easily between gear. The solid Velcro straps found on large bear bells with native art designs attach securely to most any hiking stick or staff, making them ideal for pole users and those who frequently switch equipment between trips.

Leather straps thread through backpack loops, D-rings, and belt clips, offering a traditional attachment that withstands years of trail use. Four-set jingle bells with leather straps create louder sound coverage while distributing weight across your pack. Leather works best for backpackers who rarely remove their bells and prefer a classic look that softens and conforms over time.

Clip-on carabiners provide the fastest on-off access, attaching to any loop or ring on your pack, belt, or clothing. They’re perfect for day hikers who silence their bells frequently in busy areas or kayakers transitioning between water and trail. The trade-off: cheaper carabiners can open unexpectedly on brush contact, so choose spring-loaded gates rated for outdoor gear rather than decorative keychains.

Silencer Features for Trail Etiquette

A good silencer transforms your bear bell from a constant annoyance into a trail-appropriate tool. Magnetic closures let you snap the bell quiet with one hand when you reach a crowded trailhead or campsite, then release it instantly when you’re back in bear country. Velcro silencers work similarly but require both hands and can wear out faster in wet conditions.

You’ll want a silencer that stays secure without accidentally releasing, nothing defeats the purpose like a bell that jingles through your entire lunch break because the magnet slipped. Test the hold before you buy. Most quality options keep the clapper firmly muted until you deliberately open it.

Use your silencer when passing groups on narrow trails, during rest stops in high-traffic areas, and any time you’re in camp. Bears aren’t the only concern; constant jingling grates on other hikers who came for the quiet. In wildlife-sensitive zones like bird nesting areas, silence your bell entirely. The etiquette is simple: ring when you need wildlife to hear you, mute when people shouldn’t have to.

Types of Bear Bells Compared

A hiker on a forest trail with a bear bell attached to trekking gear in Canada.
A hiker’s bear bell and trekking gear are shown in context on a quiet Canadian trail, emphasizing everyday safety preparation.

When you’re choosing a bear bell, the options divide into four main categories, each suited to different trail situations and hiking priorities. Understanding these distinctions helps you pick the right style before you even check the price tag.

Single large bells deliver the strongest sound per item. These standalone models typically feature one heavy-duty brass or steel bell that produces a deep, resonant tone carrying farther through dense forest than lighter alternatives. The large bear bells with native art designs priced around $9.95 exemplify this category, many made in Canada, these attach via solid Velcro straps to hiking sticks, staffs, or walking sticks. The advantage is simple: one loud bell means less weight and fewer parts to fail. The downside? A single bell produces a more repetitive sound pattern that some hikers find monotonous on long treks, and if the clapper breaks, you’re left with no alert system.

Multi-bell sets take a different approach. Four-set jingle bells with leather straps, like those available through Etsy Canada for CA$29.69, create a layered jingling sound as multiple smaller bells ring at different pitches. This varied tone feels less intrusive to nearby hikers while still alerting wildlife. The cluster format also provides redundancy, if one bell fails, the others keep working. However, multi-bell sets add weight and complexity. The leather attachment straps work well on backpack loops but may require more adjustment than a simple Velcro closure.

Bell Type Typical Price Best Use Case Attachment Style
Single Large Bell $9.95, $19.99 Solo backcountry, high-alert areas Velcro strap or carabiner
Multi-Bell Set (4 bells) CA$29.69 Group hikes, social trails Leather straps
Decorative/Native Art $9.95+ Cultural appreciation, day hikes Velcro strap
USA/Canada-Made $10.00, $19.99 Supporting local, quality assurance Varies by model

Decorative bear bells with native art designs blend function with cultural expression. These bells, often crafted in Canada, feature Indigenous-inspired artwork on the bell housing or strap, making them appealing souvenirs that also serve a safety purpose. They perform identically to plain large bells but offer aesthetic value. Choose these if you want gear that reflects regional heritage, though don’t expect performance differences based on decoration alone.

USA and Canada-made options span all the categories above but emphasize local manufacturing. FRONTIERSMAN Bear Bells at REI, priced from $10.00 to $19.99, include both top-rated models and USA-made variants specifically marketed for hiking. Canadian-made bells similarly focus on durable construction suited to northern wilderness conditions. The premium over imported bells is modest, and you gain quality control plus the knowledge that your purchase supports North American outdoor craftspeople. For backcountry reliability, locally-made bells often use thicker metal and reinforced attachment points that withstand rough treatment better than budget imports.

Your hiking style dictates the best match. Solo travelers pushing into remote bear country benefit most from single large bells with maximum volume. Group hikers and families do well with multi-bell sets that spread the sound without overwhelming conversation. Day hikers on established trails can choose based on preference, decorative designs work fine when you’re never far from the trailhead.

Where to Buy Bear Bells in Canada: Retailers and Online Options

Outdoor Specialty Retailers

Canadian outdoor retailers offer convenient access to bear bells both in-store and online, letting you inspect quality and test sound before hitting the trail. National chains like MEC (Mountain Equipment Company) and Atmosphere stock bear safety gear year-round, with knowledgeable staff who can demonstrate volume differences between models. Specialty hiking shops in Calgary, Vancouver, and other trail-access cities often carry locally-made options alongside international brands.

Several retailer categories serve Canadian hikers:

  • National outdoor chains with consistent inventory across provinces
  • Regional hiking shops specializing in trail safety gear for local terrain
  • Camping supply stores that bundle bear bells with other wildlife protection equipment
  • Cross-border locations near US shopping areas for expanded selection

For hikers near the border, REI locations in Washington and Montana stock FRONTIERSMAN Bear Bells ranging from $10.00 to $19.99, with both top-rated models and USA-made options available. These bells meet the volume standards needed for alerting bears on backcountry trails. Keep in mind currency exchange when comparing cross-border pricing.

Closer to home, you’ll find large bear bells with native art designs priced around $9.95 at specialty retailers, many featuring Canadian craftsmanship. These attach securely with solid Velcro straps to hiking sticks, staffs, or walking poles. The advantage of shopping locally is immediate availability and supporting businesses that understand regional wildlife patterns, whether you’re preparing for coastal trails or interior forest hikes.

Online Marketplaces and Direct Sellers

Canadian hikers have excellent online options for purchasing bear bells without crossing the border. Etsy Canada offers artisan and specialty choices, including four-set jingle bell kits with leather straps for CA$29.69, ideal if you’re outfitting multiple family members or want backup bells for different packs. These multi-bell sets provide flexibility for group hikes where each person needs their own sound source.

stocks a wide range from budget-friendly single bells to premium options, with customer reviews helping you gauge real-world performance on Canadian trails. Look for sellers offering Prime shipping to avoid delays before your trip. MEC’s online store provides curated selections with detailed product specs, though inventory can vary seasonally.

For specialized options, check outdoor gear websites like or local retailer sites that ship nationally. Many smaller Canadian outdoor shops have embraced e-commerce, offering personalized customer service via email if you need advice on specific trail conditions. Compare shipping times carefully, a $2 cheaper bell loses value if it arrives after your departure date. Always verify the seller ships within Canada to avoid customs delays and extra fees that can double your cost.

Supporting Canadian-Made Products

Choosing Canadian-made bear bells supports local artisans and outdoor gear manufacturers who understand the specific needs of North American trails. Several options feature authentic native art designs, including large bells priced around $9.95, that celebrate Indigenous heritage while serving a practical safety function. These locally-crafted bells often use traditional craftsmanship techniques passed down through generations, ensuring both cultural authenticity and reliable performance.

When you purchase from Canadian makers, you’re investing in quality materials tested on the same trails you’ll hike. Local manufacturers typically use heavier-gauge metals and weather-resistant attachments suited to Canadian conditions, from coastal humidity to Rocky Mountain freeze-thaw cycles. Beyond durability, buying domestic reduces shipping distances and carbon footprint while keeping revenue within the outdoor community that maintains and advocates for the trails we all enjoy.

Many Canadian-made options arrive with detailed care instructions and direct customer support from the craftspeople themselves, a level of service you won’t find with mass-produced imports.

Recommended Bear Bells for Different Hiking Styles

Hikers pausing on a coastal trail with a bear bell attached to a backpack.
A group hike scene shows bear bells as part of broader trail etiquette in remote North American environments.

Day hikers on well-traveled routes like those found along the day hike essentials trails benefit most from mid-sized bells with reliable attachment systems. A single large bear bell with Velcro strap ($9.95) works perfectly for attaching to trekking poles or pack straps, providing consistent sound without adding bulk to your gear. The Velcro design lets you quickly move the bell between equipment items as your hiking style changes throughout the day.

Backcountry adventurers heading deep into remote bear territory should consider louder options or multi-bell sets. The four-set jingle bells with leather straps (CA$29.69) deliver greater volume through combined chiming, making them ideal when you’re covering long distances where bear encounters are more likely. These sets distribute across your pack, creating sound from multiple points as you move. For overnight trips, pair your bell choice with essential safety gear like bear spray and a quality sleeping pad for protected rest after full days on the trail.

Tip: Bear bells work best when combined with other precautions like making noise at blind corners, traveling in groups, and storing food properly away from sleeping areas.

Kayakers transitioning to land exploration need bells with secure carabiner attachments that won’t slip during water-to-shore movements. The FRONTIERSMAN Bear Bells ($10.00-$19.99) offer USA-made durability with hiking-specific design features, including clip systems that handle moisture exposure. These bells attach firmly to dry bags or kayak deck rigging before you even reach the trailhead.

Family groups and beginners should prioritize user-friendly options with silencer features. A large bell with magnetic silencer lets parents control noise levels when passing other hikers or during teaching moments, while still providing full volume when needed. The native art designs available on Canadian-made bells ($9.95) also add visual appeal that helps younger hikers stay engaged with their safety equipment.

Common Mistakes to Avoid When Buying and Using Bear Bells

Most hikers make at least one critical error when selecting or using bear bells, often without realizing it until they’re already on the trail. Learning from these common pitfalls helps you maximize both your safety investment and your wildlife awareness strategy.

The most frequent mistakes include:

  • Purchasing bells too small to project sound beyond 20-30 feet in windy or dense forest conditions
  • Failing to test attachment systems on your actual gear before leaving the trailhead
  • Treating bear bells as complete wildlife protection rather than one component of a comprehensive safety approach
  • Leaving magnetic or Velcro silencers engaged during active hiking, rendering the bell useless
  • Buying without considering your specific trail environment and wildlife encounter patterns

Another major error is assuming louder always means better. On sensitive trails like the North Coast Trail where wildlife corridors intersect with rugged coastal paths, constant jangling can actually habituate animals to human presence or mask important environmental sounds you need to hear. Smart hikers know when to silence their bells in camp areas, around other trail users, or when approaching blind corners where voice calls work better.

Don’t fall into the trap of buying the cheapest option without checking reviews for durability. A $9.95 bell that falls off your pack after two hikes wastes money and leaves you unprotected. Similarly, avoid choosing bells based solely on appearance, native art designs and attractive finishes matter less than reliable sound projection and secure attachment. Test your chosen bell’s volume in an open area before committing to it for backcountry use, and always carry bear spray as your primary defense tool regardless of how loud your bell rings.

Bear Bell Safety Tips for North American Trails

Bear bells work best when you understand their role in a layered safety approach. Ring them consistently on forested trails with limited sightlines, through dense brush, near streams where running water masks sound, and in any terrain where bears feed, berry patches, salmon runs, or alpine meadows during prime foraging hours. In open areas like coastal iceberg trails or above-treeline ridges where visibility extends hundreds of meters, bells matter less because you and wildlife can spot each other from a distance. Supplement your bell with periodic voice calls (“Hey bear!”) when approaching blind corners, cresting ridges, or moving through especially thick cover; the varied human sound reinforces your presence more effectively than jingling alone.

Silence your bell in campgrounds, near trailheads, and when passing other hikers to respect trail etiquette, this is where magnetic silencers prove their worth. Your bell is one element of comprehensive bear safety, not a standalone solution. Carry bear spray within instant reach (hip holster, chest strap, or shoulder harness), know how to deploy it, and practice solid backcountry planning by checking recent wildlife activity reports and trail conditions before heading out. Travel in groups when possible, store food properly, and stay alert rather than relying passively on your bell to do all the work.

Do bear bells really work?

They reduce surprise encounters by announcing your presence, but effectiveness depends on terrain, wind, and bear behavior. Bells work best as part of a multi-layered safety strategy that includes awareness, bear spray, and making additional noise in high-risk areas.

When should I silence my bell?

Silence it in campgrounds, near parking areas, when passing other hikers, and in designated quiet zones to minimize noise pollution. Engage the silencer whenever you are not actively moving through wildlife habitat.

Are bells enough on their own?

No. Bear bells complement but never replace bear spray, group travel, proper food storage, and situational awareness. Think of them as an early warning system, not complete protection.

What about other wildlife like moose or cougars?

Bells may alert moose, though they can be unpredictable and territorial regardless of warning. Cougars typically avoid human noise, but stalking cats require different tactics, face them, appear large, and back away slowly rather than relying on advance warning sounds.

Adjust your bell use to the specific landscape. In wildlife corridors connecting different ecosystems, maintain consistent ringing. On popular day-hike trails with heavy foot traffic, your bell adds little value since human presence is already constant. The goal is to hike confidently, not fearfully, bells give you one more tool to explore North American wilderness responsibly while respecting the animals that call these places home.

Choosing the right bear bell comes down to matching sound volume, attachment style, and durability to your specific hiking terrain and wildlife risk. Whether you’re exploring coastal trails with iceberg views or venturing into dense forest corridors, a well-chosen bell, purchased from Canadian outdoor retailers or trusted online sellers, gives you an affordable layer of wildlife awareness that complements your broader safety strategy.

Canadian hikers have excellent options at every price point, from $9.95 native art designs to premium sets around CA$29.69, with both locally-made and top-rated imports available. The key is selecting a bell that suits your adventure level: day hikers on popular routes need reliable volume and quick silencing, while backcountry explorers benefit from durable multi-bell sets that withstand rugged conditions.

Bear bells aren’t a substitute for awareness, bear spray, or proper trail etiquette, but they’re a simple tool that lets you focus on the scenery instead of constant worry. When you’re confident in your safety gear, you’re free to appreciate the wildlife encounters and stunning landscapes that make North American trails unforgettable. Choose wisely, hike prepared, and enjoy every step of your journey through bear country.