Guided kayaking and hiking trip guides, itineraries, and destination advice across Canada’s coasts, lakes, and national parks, including marquee routes like Gros Morne. Built for safe, expert-led experiences for all skill levels.
Camping at Parc National du Mont-Tremblant delivers a wilderness escape into 1,500 square kilometers of protected boreal forest, glacial lakes, and paddling routes just 30 minutes from the resort village. For the 2026 season running May 17 through October 21, rates start at $110.50 per night for two adults, with premium sites reaching $72.85. This haven of peace offers serious value for adventure seekers who want authentic backcountry access without sacrificing proximity to amenities.
What sets Mont-Tremblant camping apart is the sheer variety of water-based exploration. The park’s network of rivers and pristine lakes creates natural highways for kayakers and canoeists, from gentle morning paddles where you’ll spot loons and beavers to challenging multi-day routes through remote sections. Early-season visitors in mid-May catch spring runoff and migrating waterfowl, while summer and fall bring stable water levels perfect for beginners testing their skills.
The terrain rewards hikers and paddlers equally. Trails wind through old-growth forests where moose browse in wetlands and black bears forage along ridgelines. You’re not just camping near wilderness here; you’re sleeping in the middle of it, with night skies dark enough to see the Milky Way and morning mist rising off glassy lake surfaces.
Whether you’re planning a quick overnight to test your gear or a week-long expedition mixing paddling days with summit hikes, Mont-Tremblant’s protected status means consistent quality. The park maintains facilities without overdeveloping the landscape, so you get reliable access to truly wild places where your biggest navigation challenge might be choosing which lake to explore first.
What Makes Parc National du Mont-Tremblant Special
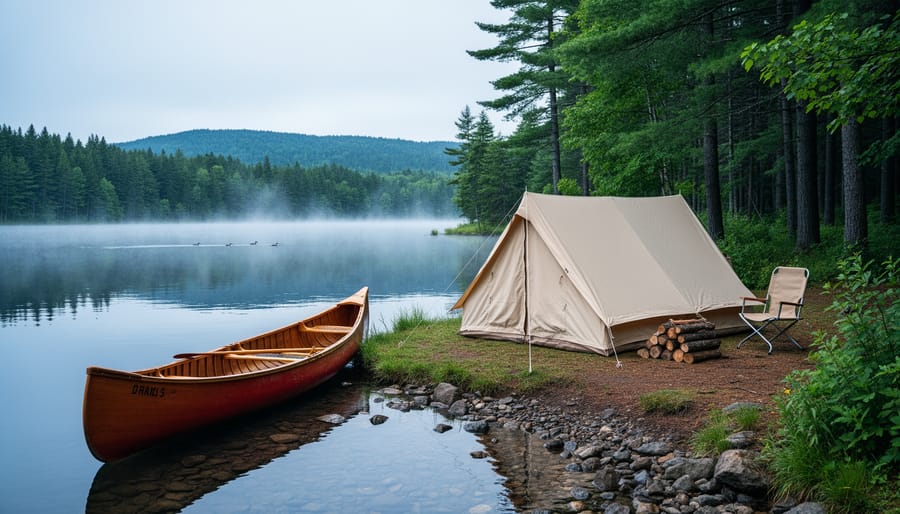
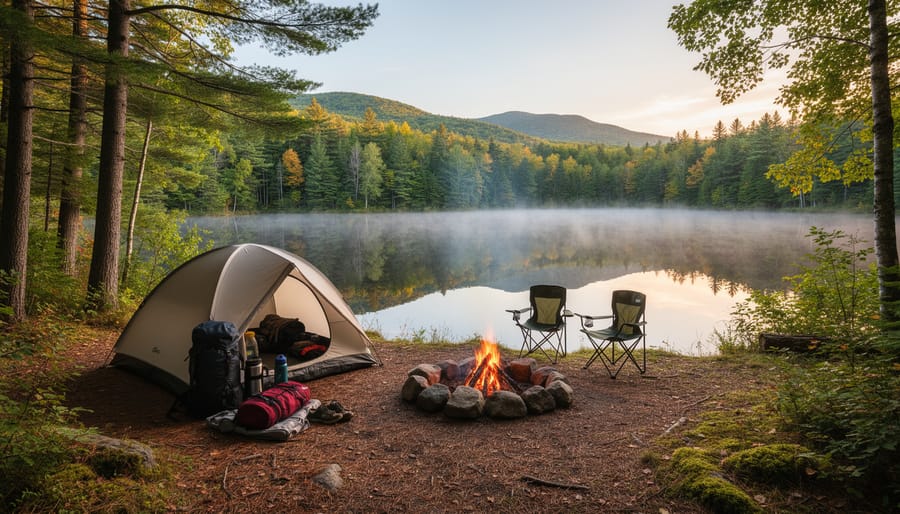
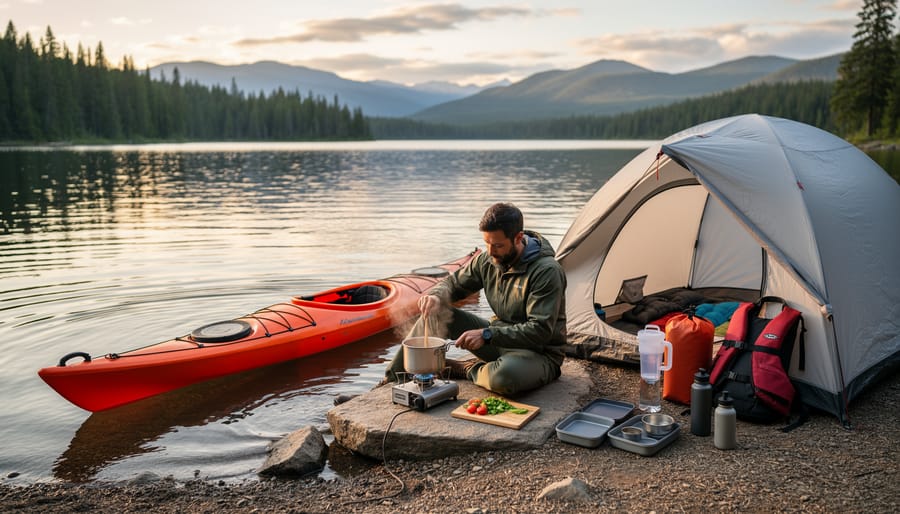
A peaceful campsite in the Mont-Tremblant wilderness sets the tone for an outdoor getaway. The lake and surrounding forest emphasize the protected natural setting.
Parc National du Mont-Tremblant stands as Quebec’s oldest provincial park, a protected wilderness spanning 1,500 square kilometres that offers a striking contrast to the bustling resort town nearby. While Mont-Tremblant village draws visitors with its alpine architecture and ski slopes, the national park preserves something rarer: true wilderness where ancient forests meet crystal-clear waterways and silence replaces crowds.
Note: The park is located just 30 minutes from Mont-Tremblant resort, making it an accessible wilderness escape that feels worlds away from the tourist village.
The park’s character as a protected haven of peace with pristine lakes, rivers, and forests creates an environment where nature dictates the rhythm. No motorboats disrupt the calm. Development stops at campsite boundaries. The landscape remains much as it was when the park was established, with dense mixed forests giving way to rocky shorelines and quiet bays ideal for kayaking.
What draws adventure seekers here is this combination of accessibility and authenticity. You can drive from the resort area in less time than it takes to watch a movie, yet find yourself paddling waters where the only sounds are your blade cutting through the surface and loons calling across the lake. The protected status means these experiences remain consistent, the ecosystems intact, the wildlife populations stable.
The park’s network of interconnected waterways creates natural corridors for exploration by kayak or canoe, while trailheads near many campsites offer immediate access to hiking routes through maple and conifer forests. It is wilderness with infrastructure thoughtfully placed to support your adventure without compromising the landscape’s wild character.
Planning Your Camping Adventure: Season and Booking
Understanding 2026 Camping Rates
Parc National du Mont-Tremblant’s 2026 camping rates for two adults start at $110.50 for a single night, with two-night packages ranging from $185.25 to $243.50 depending on site selection and amenities. The maximum nightly campsite fee caps at $72.85.
Stay Duration
Rate (2 Adults)
1 Night
$110.50
2 Nights (Standard)
$185.25
2 Nights (Premium)
$243.50
Maximum Per Night
$72.85
Pricing variations reflect several factors. Sites closer to popular lakes command higher rates due to easier kayak access and scenic waterfront positioning. The wide range between the two-night packages indicates different campsite categories, from basic backcountry spots to developed sites with electrical hookups and proximity to facilities. Shoulder season dates near the May 17 opening or October 21 closing sometimes offer better value than peak summer weekends.
The maximum nightly rate applies to premium locations with the most sought-after features: direct lake access, shelter from wind, and maintained facilities nearby. Budget-conscious campers can secure the lower rates by choosing sites further from main access points while still enjoying full park access for paddling and hiking adventures.
Water Sports Opportunities at Mont Tremblant
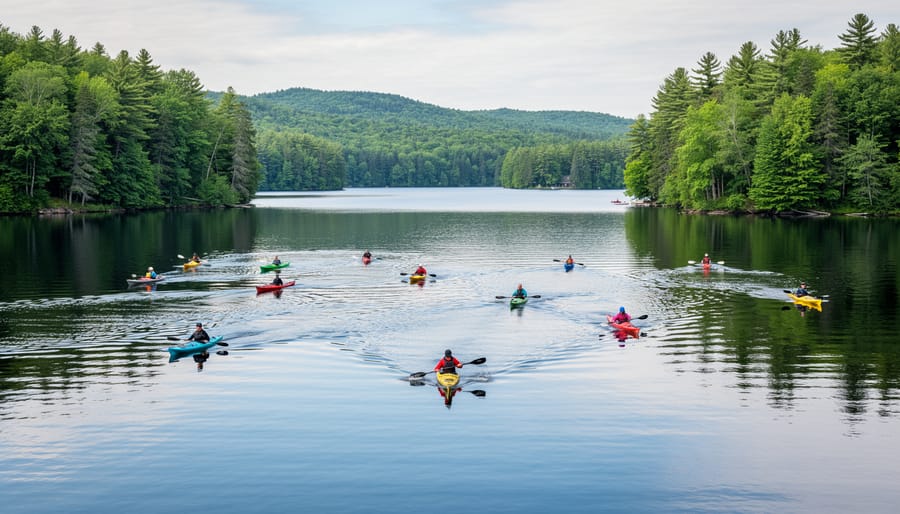
Kayakers glide across protected waters with forest views stretching along the shoreline. The scene highlights how Mont-Tremblant’s calm lakes are ideal for paddling adventures.
Kayaking Safety in Protected Waters
Paddling in protected waters demands respect for both the environment and your own limits. Start by checking weather conditions before you launch, afternoon winds can turn calm lakes rough quickly, especially on larger bodies of water. Always wear a properly fitted personal flotation device, regardless of your swimming ability or the distance you plan to cover.
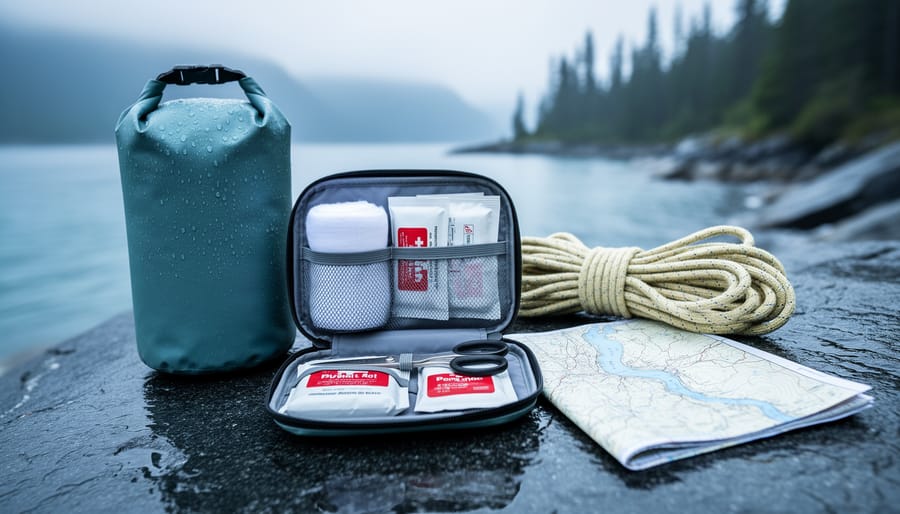
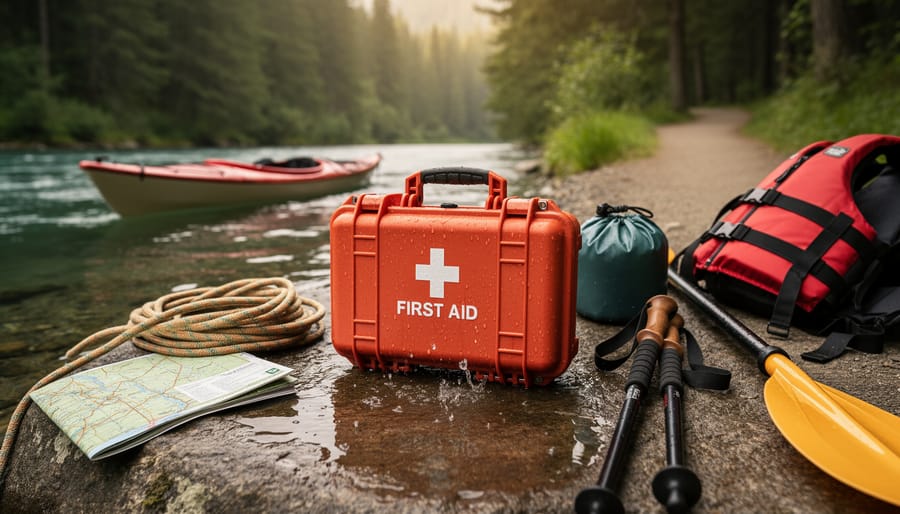
For novice kayakers, stick to shoreline routes where you can easily reach land if conditions change. Keep your paddle strokes smooth and controlled, and practice wet exits in shallow water before venturing further out. Experienced paddlers should still pack a whistle, waterproof map, and basic first aid kit, even on familiar routes.
Cold water temperatures persist through late May despite warming air, so dress in layers with synthetic or wool materials that insulate when wet. A wetsuit or drysuit becomes essential if you’re paddling during shoulder seasons. Never paddle alone in remote sections of the park, and file a float plan with someone at your campsite, noting your intended route and return time.
Respect wildlife viewing distances, approaching animals from a kayak feels non-intrusive, but you’re still entering their space. Maintain at least 100 metres from larger mammals and nesting birds. Keep your gear secured with dry bags, as capsizing means losing anything not tethered to your craft.
Hiking Trails and Wildlife Encounters
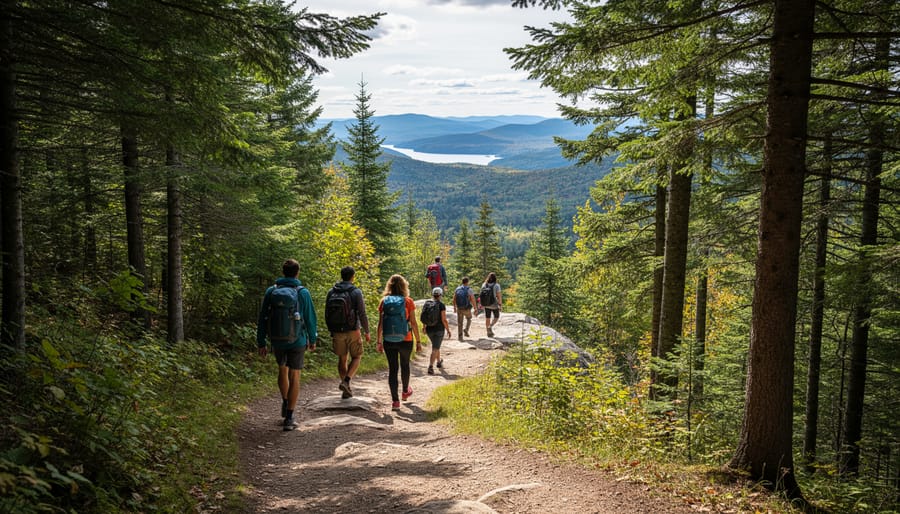
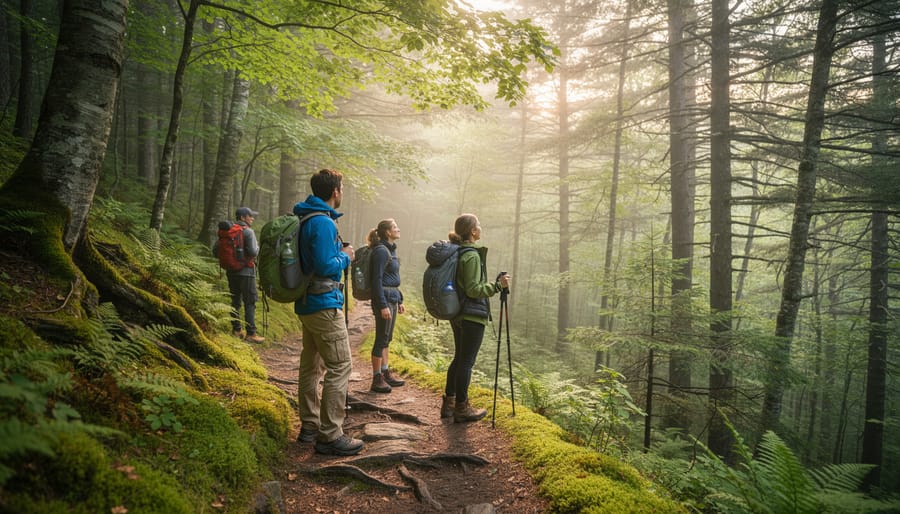
Hikers pause on a moss-covered trail leading into Mont-Tremblant’s protected forest. The image captures the inviting terrain for trails and wildlife viewing opportunities.
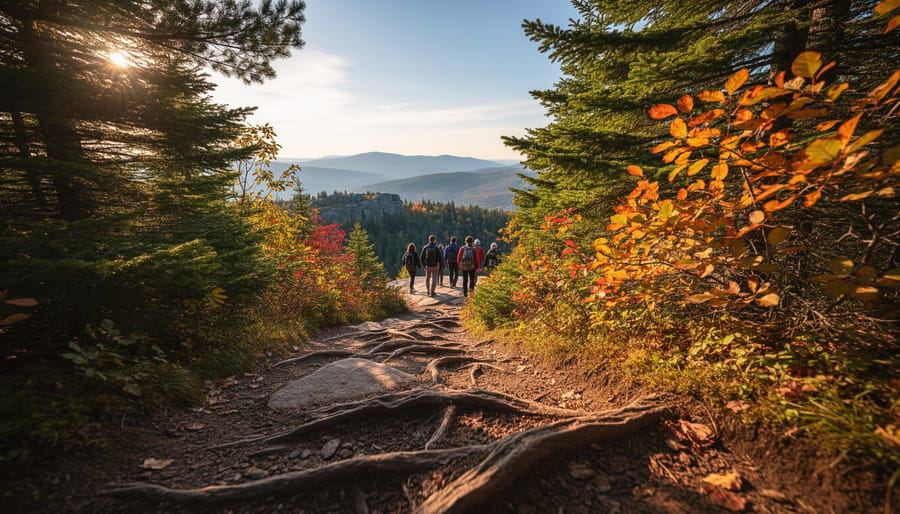
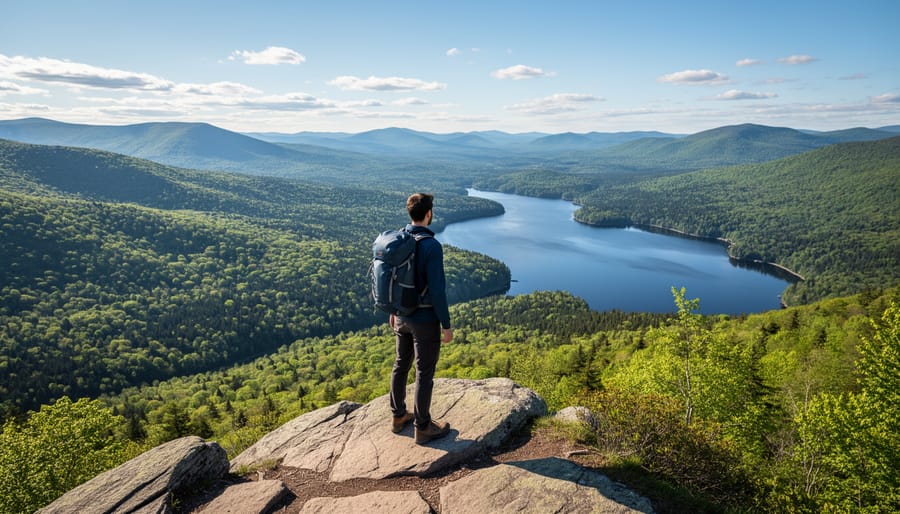
The park’s trail network offers everything from gentle shoreline walks to challenging summit routes through mixed forest and rocky terrain. You’ll navigate dense stands of sugar maple and yellow birch at lower elevations, transitioning to spruce-fir forests as you climb higher, with exposed ridgelines rewarding the effort with sweeping views across the Laurentian wilderness.
Tip: Keep a respectful distance from all wildlife, at least 30 metres for most animals, and carry bear bells for hiking to announce your presence on backcountry trails.
White-tailed deer frequently graze near campsites during early morning and dusk hours, while moose prefer wetland edges and lake shallows where you might spot them during paddle-accessible trail connections. Black bears roam throughout the park’s protected forests, and you’ll increase your chances of wildlife encounters by hiking quietly during dawn or late afternoon when animals are most active.
The terrain varies significantly between trail options. Some routes follow old logging roads with gradual grades suitable for families, while others climb steeply over granite outcrops requiring scrambling and solid footing. Trails near Lac Monroe and other major lakes tend toward moderate difficulty, offering wildlife viewing opportunities where forest meets water, prime habitat for beavers, otters, and the occasional lynx.
Birdwatchers should focus on mixed forest edges and wetland borders, where songbird diversity peaks during migration periods. The protected status means minimal human disturbance, allowing animals to maintain natural behaviours you won’t witness in more developed areas. Bring binoculars and move slowly, patience consistently outperforms distance when it comes to meaningful wildlife observation in this Quebec wilderness.
Choosing Your Campsite Experience
Parc National du Mont-Tremblant offers several campground options scattered across its protected wilderness, each providing different proximity to lakes and trail access. La Diable sector, the most developed area, places you within walking distance of multiple paddling launch points and tends to book quickly during peak summer months. If kayaking is your main focus, prioritize sites near Lac Chat or along the Diable River corridor where you can paddle directly from shore.
Consider whether you need vehicle access to your site or prefer a more remote backcountry experience. Ready-to-camp accommodations exist for those who want to skip hauling gear, or you can rent a camping trailer for added comfort without sacrificing the outdoor setting. Walk-in sites reward you with quieter surroundings and better wildlife viewing opportunities, though they require carrying equipment from the parking area.
Study the campground maps before reserving. Some sites sit in dense forest shade, ideal for hot July days but slower to dry after rain. Others offer open clearings with sunset views across the water. Check elevation too: higher sites mean fewer mosquitoes but potentially windier conditions for tent camping. The maximum nightly rate of $72.85 typically applies to premium lakefront locations, while interior sites cost less but still grant access to the same trail networks and waterways.
Essential Gear for Mont Tremblant Camping
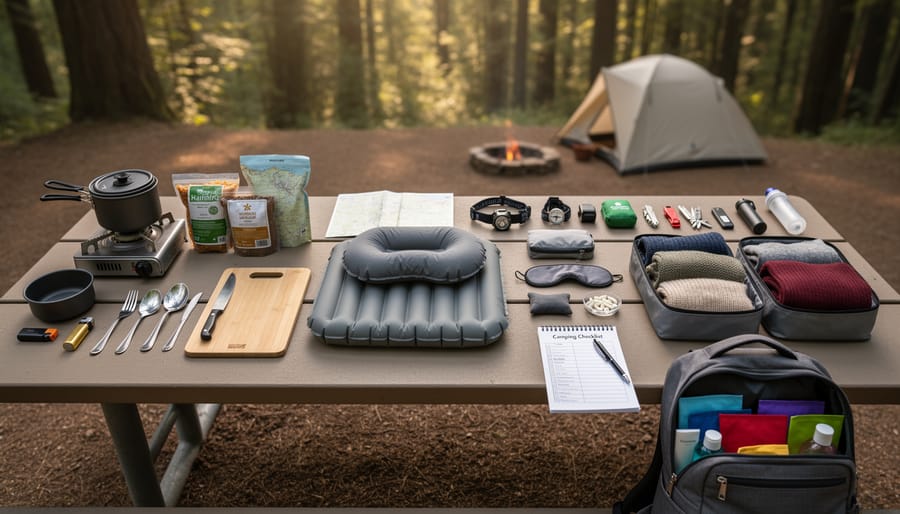
Packing for Mont Tremblant requires balancing traditional camping gear with equipment for water-based adventures. The Quebec wilderness demands preparation for variable conditions, especially during the May through October season when temperatures can shift dramatically between day and night.
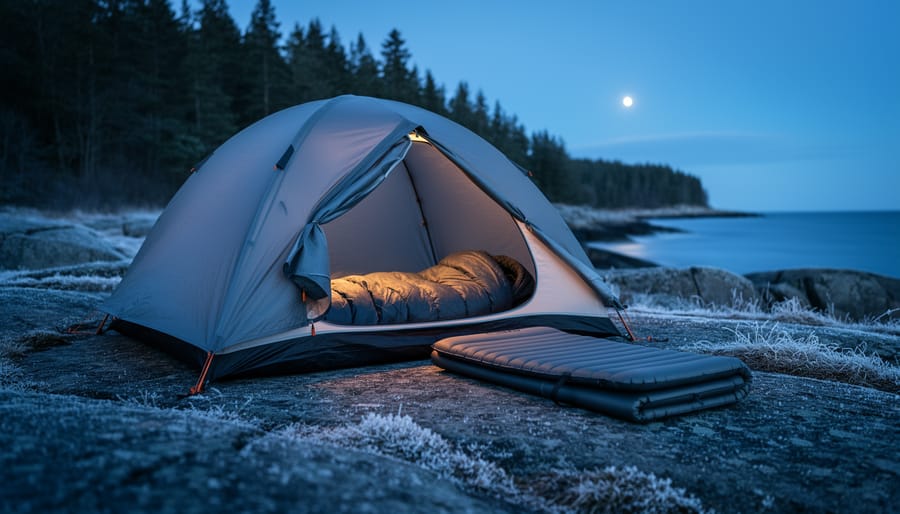
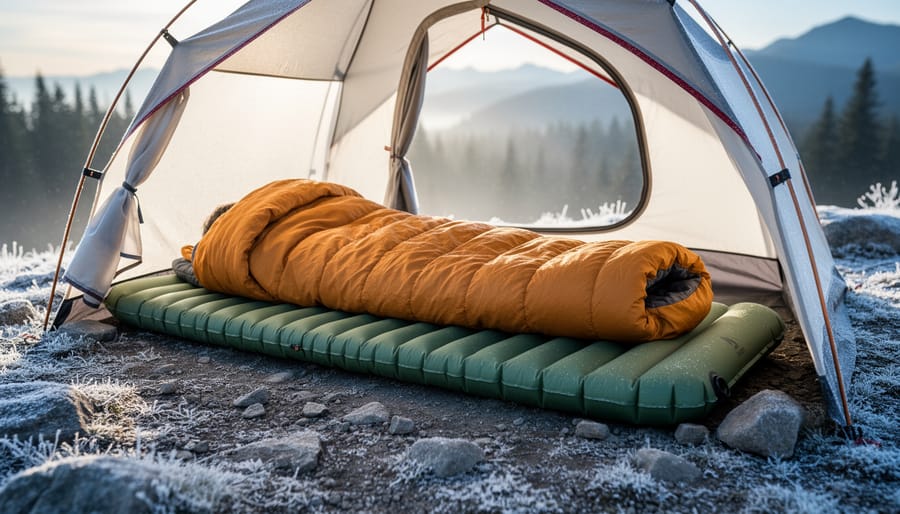
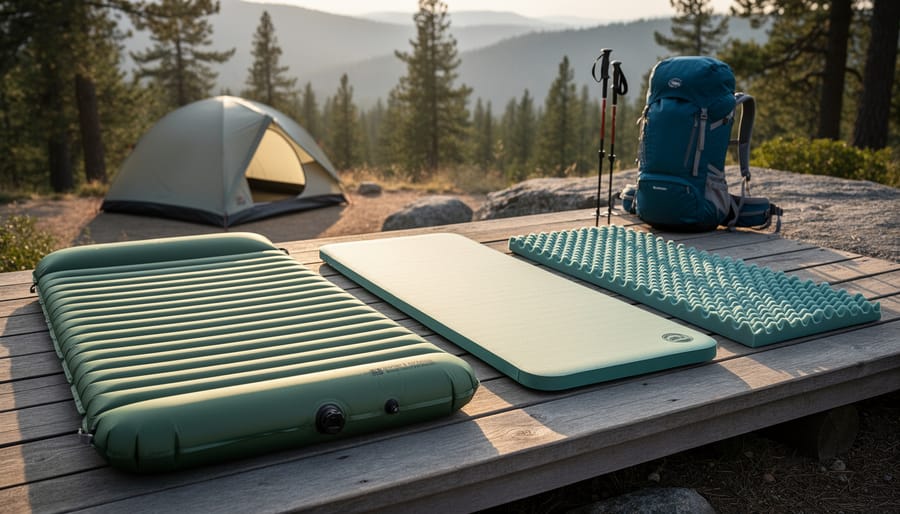
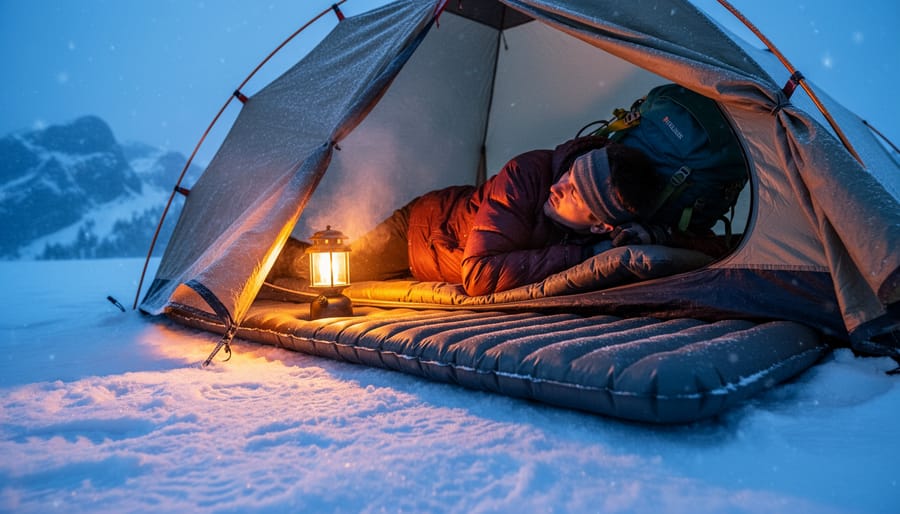
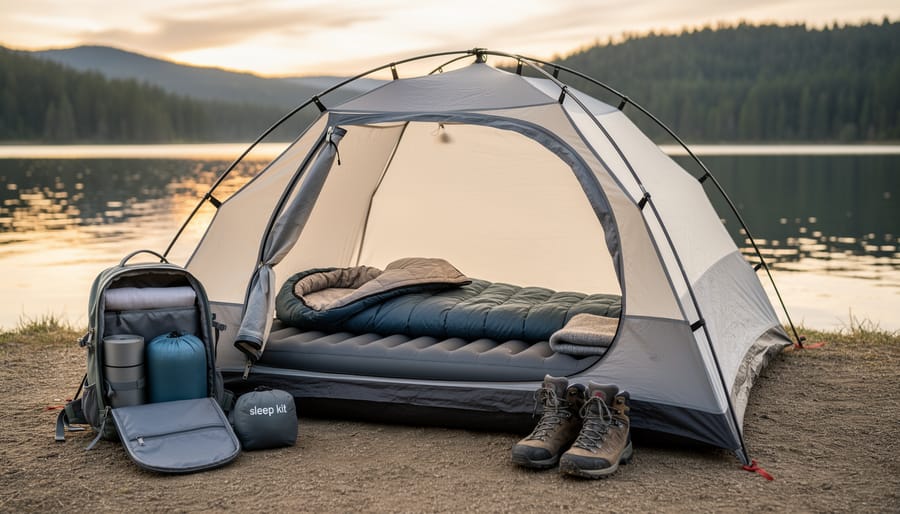
Start with shelter and sleep systems designed for cool evenings. A three-season tent handles the park’s weather patterns well, while the right sleeping pad provides crucial insulation from the ground when temperatures drop after sunset. Pack a sleeping bag rated for temperatures at least 10 degrees lower than forecast lows to stay comfortable.
For paddling the protected lakes and rivers, bring a waterproof dry bag to protect essentials like phones, keys, and extra clothing. A lightweight paddling jacket blocks wind on the water without adding bulk to your pack. Quick-dry clothing lets you transition smoothly between kayaking sessions and hiking trails without lugging multiple outfits.
Layer your clothing system: moisture-wicking base layers, insulating mid-layers, and a rain shell cover most situations you’ll encounter. The forest canopy provides some shelter, but open lake crossings expose you to weather quickly. Include sun protection too, as water reflects UV rays intensely.
Kitchen gear should be compact and efficient. A portable stove, fuel, cookware, and camping food ideas that require minimal preparation work best after a full day of activity. Bear-safe food storage is mandatory in this protected wilderness.
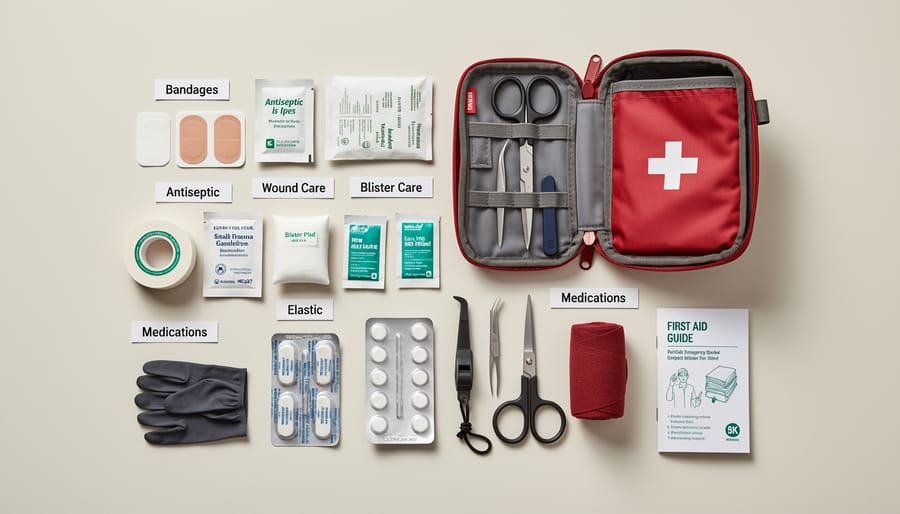
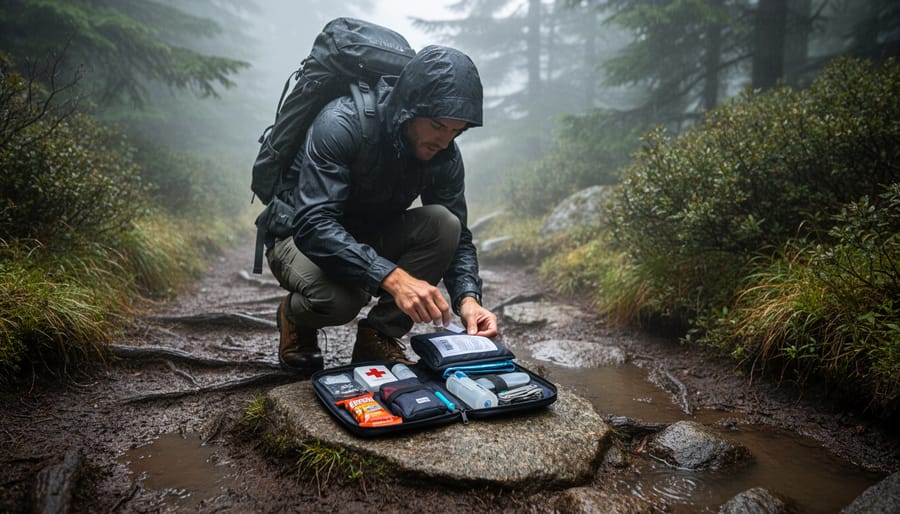
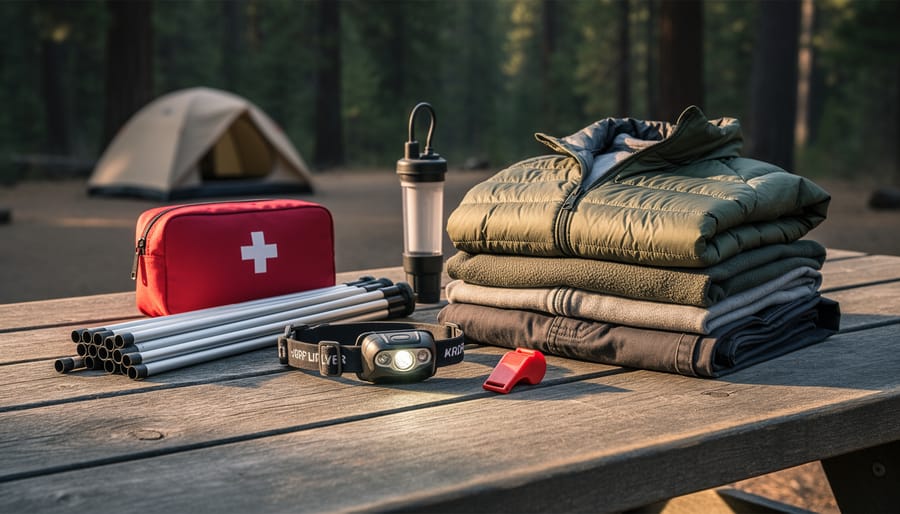
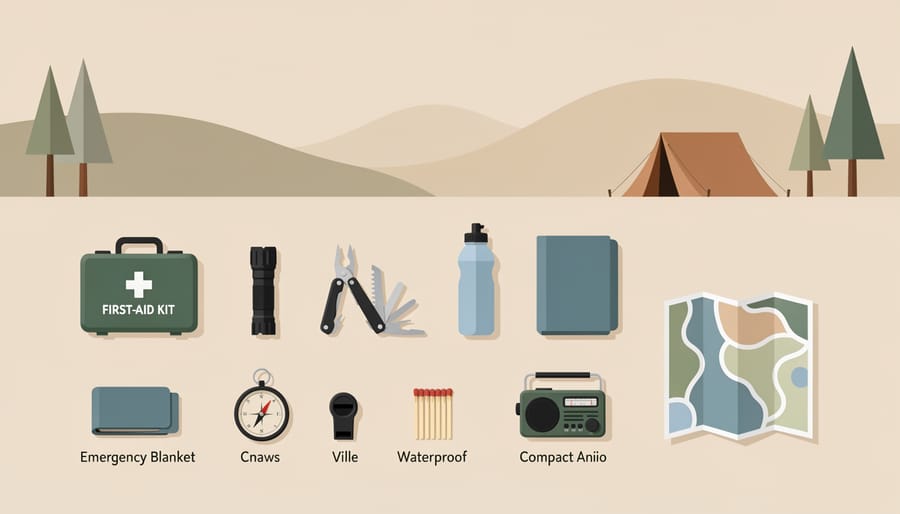
Don’t forget the small items that matter: headlamp with extra batteries, first aid supplies, navigation tools, and a water filter or purification tablets. The park’s pristine lakes provide abundant water, but proper treatment keeps you healthy throughout your stay.
Camping at Mont Tremblant in 2026 delivers exactly what adventure seekers crave: a genuine wilderness escape paired with thrilling water sports and trails that put you face-to-face with Quebec’s protected landscapes. The season window from May 17 to October 21 gives you months to experience this haven of peace, where pristine lakes and rivers meet dense forests just 30 minutes from the resort.
What sets this destination apart is how it balances accessibility with authenticity. You can paddle protected waters in the morning, hike through untouched terrain by afternoon, and return to your campsite as wildlife emerges at dusk. The protected status of Parc National du Mont-Tremblant means you’re camping in preserved wilderness, not a manicured park.
With 2026 rates starting at $110.50 per night for two adults, the experience remains surprisingly affordable for the quality of adventure you’ll find. Whether you’re an experienced kayaker seeking challenging routes or a first-time camper testing your outdoor skills, Mont Tremblant offers the right mix of challenge and reward. Start planning now to secure your spot during peak season.
Bear bells are lightweight metal bells that clip onto your pack or walking stick to create continuous noise as you hike, alerting bears to your presence and reducing surprise encounters. In Canada, you’ll find them at major outdoor retailers like MEC and Atmosphere, online through and REI, and at specialty shops across hiking regions, with prices ranging from around $10 to $30 depending on size, design, and whether you’re buying singles or multi-packs.
These simple tools serve a critical safety function on North American trails, particularly in regions where black bears and grizzlies roam. The constant jingling gives wildlife time to move away before you round a corner on a narrow trail or push through dense brush where visibility drops. While bear bells aren’t a substitute for awareness and proper food storage, they add an extra layer of passive deterrence that’s especially valuable when hiking solo, moving through areas with berry patches, or exploring trails near salmon streams where bears congregate.
The Canadian market offers everything from budget-friendly solid brass bells with basic Velcro straps at $9.95 to artisan sets featuring Native art designs and premium leather attachments. Understanding what makes an effective bear bell, how different mounting systems perform on actual trails, and which scenarios truly call for audible warning will help you choose the right option for your adventures, whether you’re navigating coastal rainforest paths or heading into the Rockies for a multi-day backcountry trip.
What Makes a Good Bear Bell: Key Buying Factors
Sound Volume and Carrying Distance
A bear bell’s effectiveness hinges on two factors: how loud it rings and how far that sound travels through varying terrain. You need a bell that cuts through wind, dense forest, and rushing water, the very conditions where bears might not otherwise detect your approach. A large bell typically produces a deeper, more resonant tone that carries 30 to 50 yards ahead on most trails, giving wildlife ample time to move away before you arrive.
Smaller bells generate higher-pitched sounds that fade faster, especially in thick vegetation or when competing with natural noise. They work for open meadows and groomed paths, but struggle in backcountry settings where acoustics matter most. The volume difference is noticeable: large bells often ring loud enough to be heard clearly by your hiking partners several paces behind, while compact options may barely reach beyond your own footsteps.
Consider the terrain you’ll hike most often. Forested corridors and river valleys demand the robust clang of a larger bell. If weight savings matter and you’re sticking to well-traveled day-use trails, a smaller option suffices, but don’t compromise on volume where bear encounters are genuinely possible.
Attachment Systems That Stay Secure
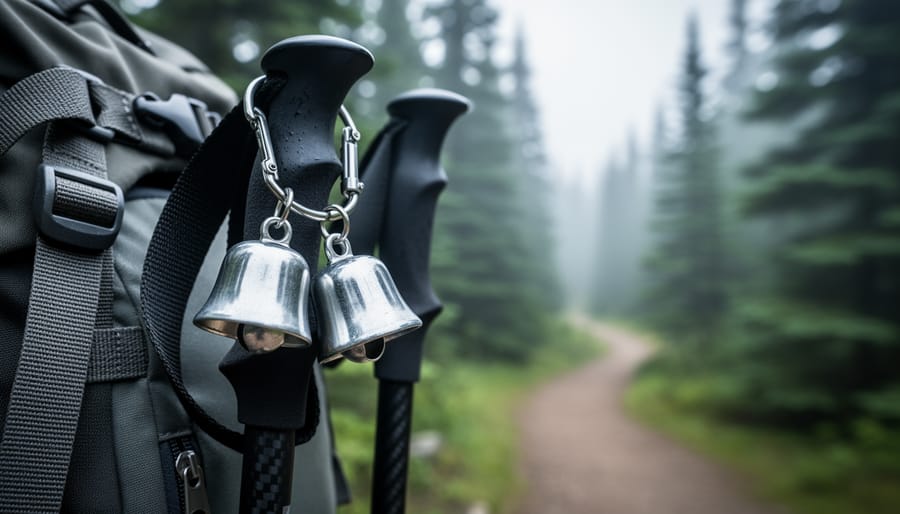
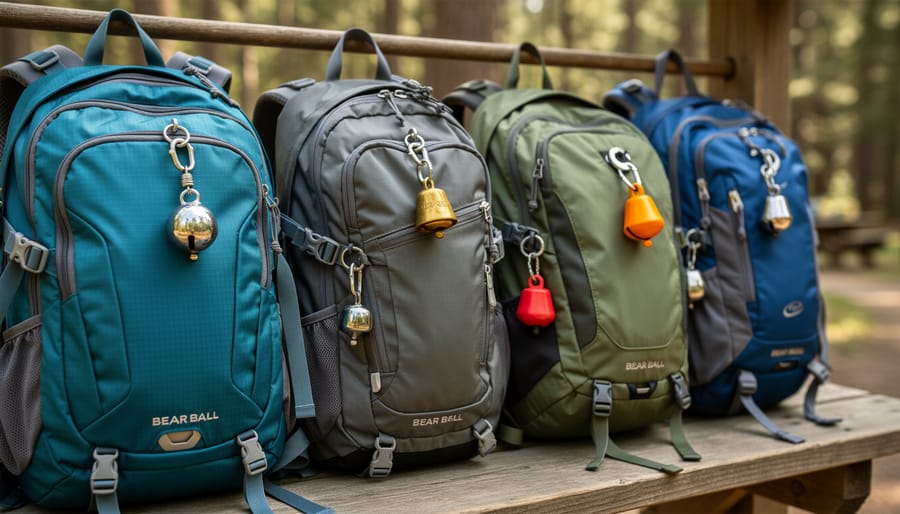
Close-up imagery highlights how different bear bell attachments can look on common hiking gear.
The attachment system determines whether your bear bell stays with you mile after mile or ends up lost on the trail. Each mechanism suits different gear setups and hiking approaches.
Velcro straps wrap around hiking sticks, trekking poles, and walking staffs, keeping the bell at ground level where its sound travels well. They adjust quickly to various pole diameters and transfer easily between gear. The solid Velcro straps found on large bear bells with native art designs attach securely to most any hiking stick or staff, making them ideal for pole users and those who frequently switch equipment between trips.
Leather straps thread through backpack loops, D-rings, and belt clips, offering a traditional attachment that withstands years of trail use. Four-set jingle bells with leather straps create louder sound coverage while distributing weight across your pack. Leather works best for backpackers who rarely remove their bells and prefer a classic look that softens and conforms over time.
Clip-on carabiners provide the fastest on-off access, attaching to any loop or ring on your pack, belt, or clothing. They’re perfect for day hikers who silence their bells frequently in busy areas or kayakers transitioning between water and trail. The trade-off: cheaper carabiners can open unexpectedly on brush contact, so choose spring-loaded gates rated for outdoor gear rather than decorative keychains.
Silencer Features for Trail Etiquette
A good silencer transforms your bear bell from a constant annoyance into a trail-appropriate tool. Magnetic closures let you snap the bell quiet with one hand when you reach a crowded trailhead or campsite, then release it instantly when you’re back in bear country. Velcro silencers work similarly but require both hands and can wear out faster in wet conditions.
You’ll want a silencer that stays secure without accidentally releasing, nothing defeats the purpose like a bell that jingles through your entire lunch break because the magnet slipped. Test the hold before you buy. Most quality options keep the clapper firmly muted until you deliberately open it.
Use your silencer when passing groups on narrow trails, during rest stops in high-traffic areas, and any time you’re in camp. Bears aren’t the only concern; constant jingling grates on other hikers who came for the quiet. In wildlife-sensitive zones like bird nesting areas, silence your bell entirely. The etiquette is simple: ring when you need wildlife to hear you, mute when people shouldn’t have to.
Types of Bear Bells Compared
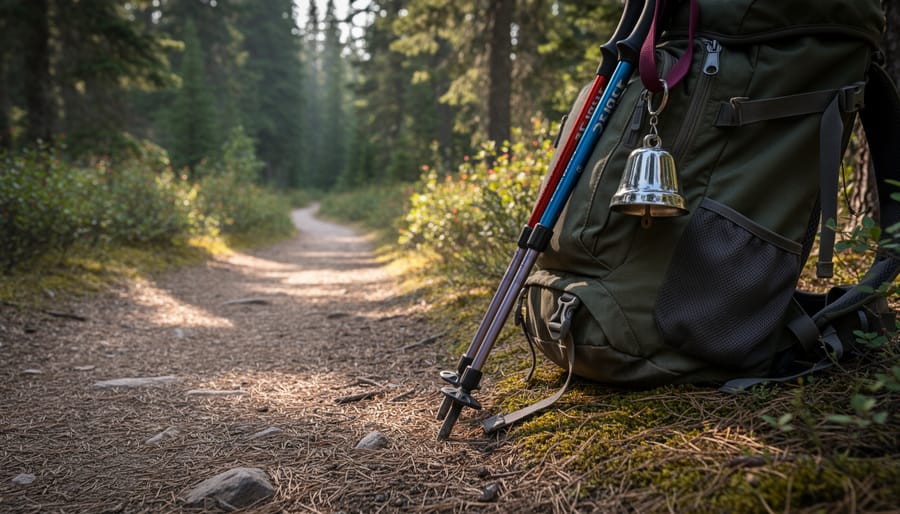
A hiker’s bear bell and trekking gear are shown in context on a quiet Canadian trail, emphasizing everyday safety preparation.
When you’re choosing a bear bell, the options divide into four main categories, each suited to different trail situations and hiking priorities. Understanding these distinctions helps you pick the right style before you even check the price tag.
Single large bells deliver the strongest sound per item. These standalone models typically feature one heavy-duty brass or steel bell that produces a deep, resonant tone carrying farther through dense forest than lighter alternatives. The large bear bells with native art designs priced around $9.95 exemplify this category, many made in Canada, these attach via solid Velcro straps to hiking sticks, staffs, or walking sticks. The advantage is simple: one loud bell means less weight and fewer parts to fail. The downside? A single bell produces a more repetitive sound pattern that some hikers find monotonous on long treks, and if the clapper breaks, you’re left with no alert system.
Multi-bell sets take a different approach. Four-set jingle bells with leather straps, like those available through Etsy Canada for CA$29.69, create a layered jingling sound as multiple smaller bells ring at different pitches. This varied tone feels less intrusive to nearby hikers while still alerting wildlife. The cluster format also provides redundancy, if one bell fails, the others keep working. However, multi-bell sets add weight and complexity. The leather attachment straps work well on backpack loops but may require more adjustment than a simple Velcro closure.
Bell Type
Typical Price
Best Use Case
Attachment Style
Single Large Bell
$9.95, $19.99
Solo backcountry, high-alert areas
Velcro strap or carabiner
Multi-Bell Set (4 bells)
CA$29.69
Group hikes, social trails
Leather straps
Decorative/Native Art
$9.95+
Cultural appreciation, day hikes
Velcro strap
USA/Canada-Made
$10.00, $19.99
Supporting local, quality assurance
Varies by model
Decorative bear bells with native art designs blend function with cultural expression. These bells, often crafted in Canada, feature Indigenous-inspired artwork on the bell housing or strap, making them appealing souvenirs that also serve a safety purpose. They perform identically to plain large bells but offer aesthetic value. Choose these if you want gear that reflects regional heritage, though don’t expect performance differences based on decoration alone.
USA and Canada-made options span all the categories above but emphasize local manufacturing. FRONTIERSMAN Bear Bells at REI, priced from $10.00 to $19.99, include both top-rated models and USA-made variants specifically marketed for hiking. Canadian-made bells similarly focus on durable construction suited to northern wilderness conditions. The premium over imported bells is modest, and you gain quality control plus the knowledge that your purchase supports North American outdoor craftspeople. For backcountry reliability, locally-made bells often use thicker metal and reinforced attachment points that withstand rough treatment better than budget imports.
Your hiking style dictates the best match. Solo travelers pushing into remote bear country benefit most from single large bells with maximum volume. Group hikers and families do well with multi-bell sets that spread the sound without overwhelming conversation. Day hikers on established trails can choose based on preference, decorative designs work fine when you’re never far from the trailhead.
Where to Buy Bear Bells in Canada: Retailers and Online Options
Outdoor Specialty Retailers
Canadian outdoor retailers offer convenient access to bear bells both in-store and online, letting you inspect quality and test sound before hitting the trail. National chains like MEC (Mountain Equipment Company) and Atmosphere stock bear safety gear year-round, with knowledgeable staff who can demonstrate volume differences between models. Specialty hiking shops in Calgary, Vancouver, and other trail-access cities often carry locally-made options alongside international brands.
Several retailer categories serve Canadian hikers:
National outdoor chains with consistent inventory across provinces
Regional hiking shops specializing in trail safety gear for local terrain
Camping supply stores that bundle bear bells with other wildlife protection equipment
Cross-border locations near US shopping areas for expanded selection
For hikers near the border, REI locations in Washington and Montana stock FRONTIERSMAN Bear Bells ranging from $10.00 to $19.99, with both top-rated models and USA-made options available. These bells meet the volume standards needed for alerting bears on backcountry trails. Keep in mind currency exchange when comparing cross-border pricing.
Closer to home, you’ll find large bear bells with native art designs priced around $9.95 at specialty retailers, many featuring Canadian craftsmanship. These attach securely with solid Velcro straps to hiking sticks, staffs, or walking poles. The advantage of shopping locally is immediate availability and supporting businesses that understand regional wildlife patterns, whether you’re preparing for coastal trails or interior forest hikes.
Online Marketplaces and Direct Sellers
Canadian hikers have excellent online options for purchasing bear bells without crossing the border. Etsy Canada offers artisan and specialty choices, including four-set jingle bell kits with leather straps for CA$29.69, ideal if you’re outfitting multiple family members or want backup bells for different packs. These multi-bell sets provide flexibility for group hikes where each person needs their own sound source.
stocks a wide range from budget-friendly single bells to premium options, with customer reviews helping you gauge real-world performance on Canadian trails. Look for sellers offering Prime shipping to avoid delays before your trip. MEC’s online store provides curated selections with detailed product specs, though inventory can vary seasonally.
For specialized options, check outdoor gear websites like or local retailer sites that ship nationally. Many smaller Canadian outdoor shops have embraced e-commerce, offering personalized customer service via email if you need advice on specific trail conditions. Compare shipping times carefully, a $2 cheaper bell loses value if it arrives after your departure date. Always verify the seller ships within Canada to avoid customs delays and extra fees that can double your cost.
Supporting Canadian-Made Products
Choosing Canadian-made bear bells supports local artisans and outdoor gear manufacturers who understand the specific needs of North American trails. Several options feature authentic native art designs, including large bells priced around $9.95, that celebrate Indigenous heritage while serving a practical safety function. These locally-crafted bells often use traditional craftsmanship techniques passed down through generations, ensuring both cultural authenticity and reliable performance.
When you purchase from Canadian makers, you’re investing in quality materials tested on the same trails you’ll hike. Local manufacturers typically use heavier-gauge metals and weather-resistant attachments suited to Canadian conditions, from coastal humidity to Rocky Mountain freeze-thaw cycles. Beyond durability, buying domestic reduces shipping distances and carbon footprint while keeping revenue within the outdoor community that maintains and advocates for the trails we all enjoy.
Many Canadian-made options arrive with detailed care instructions and direct customer support from the craftspeople themselves, a level of service you won’t find with mass-produced imports.
Recommended Bear Bells for Different Hiking Styles
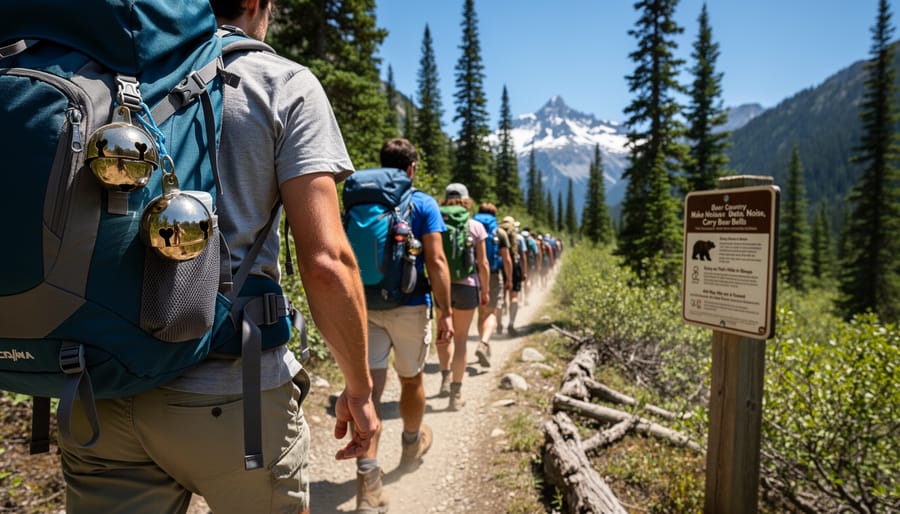
A group hike scene shows bear bells as part of broader trail etiquette in remote North American environments.
Day hikers on well-traveled routes like those found along the day hike essentials trails benefit most from mid-sized bells with reliable attachment systems. A single large bear bell with Velcro strap ($9.95) works perfectly for attaching to trekking poles or pack straps, providing consistent sound without adding bulk to your gear. The Velcro design lets you quickly move the bell between equipment items as your hiking style changes throughout the day.
Backcountry adventurers heading deep into remote bear territory should consider louder options or multi-bell sets. The four-set jingle bells with leather straps (CA$29.69) deliver greater volume through combined chiming, making them ideal when you’re covering long distances where bear encounters are more likely. These sets distribute across your pack, creating sound from multiple points as you move. For overnight trips, pair your bell choice with essential safety gear like bear spray and a quality sleeping pad for protected rest after full days on the trail.
Tip: Bear bells work best when combined with other precautions like making noise at blind corners, traveling in groups, and storing food properly away from sleeping areas.
Kayakers transitioning to land exploration need bells with secure carabiner attachments that won’t slip during water-to-shore movements. The FRONTIERSMAN Bear Bells ($10.00-$19.99) offer USA-made durability with hiking-specific design features, including clip systems that handle moisture exposure. These bells attach firmly to dry bags or kayak deck rigging before you even reach the trailhead.
Family groups and beginners should prioritize user-friendly options with silencer features. A large bell with magnetic silencer lets parents control noise levels when passing other hikers or during teaching moments, while still providing full volume when needed. The native art designs available on Canadian-made bells ($9.95) also add visual appeal that helps younger hikers stay engaged with their safety equipment.
Common Mistakes to Avoid When Buying and Using Bear Bells
Most hikers make at least one critical error when selecting or using bear bells, often without realizing it until they’re already on the trail. Learning from these common pitfalls helps you maximize both your safety investment and your wildlife awareness strategy.
The most frequent mistakes include:
Purchasing bells too small to project sound beyond 20-30 feet in windy or dense forest conditions
Failing to test attachment systems on your actual gear before leaving the trailhead
Treating bear bells as complete wildlife protection rather than one component of a comprehensive safety approach
Leaving magnetic or Velcro silencers engaged during active hiking, rendering the bell useless
Buying without considering your specific trail environment and wildlife encounter patterns
Another major error is assuming louder always means better. On sensitive trails like the North Coast Trail where wildlife corridors intersect with rugged coastal paths, constant jangling can actually habituate animals to human presence or mask important environmental sounds you need to hear. Smart hikers know when to silence their bells in camp areas, around other trail users, or when approaching blind corners where voice calls work better.
Don’t fall into the trap of buying the cheapest option without checking reviews for durability. A $9.95 bell that falls off your pack after two hikes wastes money and leaves you unprotected. Similarly, avoid choosing bells based solely on appearance, native art designs and attractive finishes matter less than reliable sound projection and secure attachment. Test your chosen bell’s volume in an open area before committing to it for backcountry use, and always carry bear spray as your primary defense tool regardless of how loud your bell rings.
Bear Bell Safety Tips for North American Trails
Bear bells work best when you understand their role in a layered safety approach. Ring them consistently on forested trails with limited sightlines, through dense brush, near streams where running water masks sound, and in any terrain where bears feed, berry patches, salmon runs, or alpine meadows during prime foraging hours. In open areas like coastal iceberg trails or above-treeline ridges where visibility extends hundreds of meters, bells matter less because you and wildlife can spot each other from a distance. Supplement your bell with periodic voice calls (“Hey bear!”) when approaching blind corners, cresting ridges, or moving through especially thick cover; the varied human sound reinforces your presence more effectively than jingling alone.
Silence your bell in campgrounds, near trailheads, and when passing other hikers to respect trail etiquette, this is where magnetic silencers prove their worth. Your bell is one element of comprehensive bear safety, not a standalone solution. Carry bear spray within instant reach (hip holster, chest strap, or shoulder harness), know how to deploy it, and practice solid backcountry planning by checking recent wildlife activity reports and trail conditions before heading out. Travel in groups when possible, store food properly, and stay alert rather than relying passively on your bell to do all the work.
Do bear bells really work?
They reduce surprise encounters by announcing your presence, but effectiveness depends on terrain, wind, and bear behavior. Bells work best as part of a multi-layered safety strategy that includes awareness, bear spray, and making additional noise in high-risk areas.
When should I silence my bell?
Silence it in campgrounds, near parking areas, when passing other hikers, and in designated quiet zones to minimize noise pollution. Engage the silencer whenever you are not actively moving through wildlife habitat.
Are bells enough on their own?
No. Bear bells complement but never replace bear spray, group travel, proper food storage, and situational awareness. Think of them as an early warning system, not complete protection.
What about other wildlife like moose or cougars?
Bells may alert moose, though they can be unpredictable and territorial regardless of warning. Cougars typically avoid human noise, but stalking cats require different tactics, face them, appear large, and back away slowly rather than relying on advance warning sounds.
Adjust your bell use to the specific landscape. In wildlife corridors connecting different ecosystems, maintain consistent ringing. On popular day-hike trails with heavy foot traffic, your bell adds little value since human presence is already constant. The goal is to hike confidently, not fearfully, bells give you one more tool to explore North American wilderness responsibly while respecting the animals that call these places home.
Choosing the right bear bell comes down to matching sound volume, attachment style, and durability to your specific hiking terrain and wildlife risk. Whether you’re exploring coastal trails with iceberg views or venturing into dense forest corridors, a well-chosen bell, purchased from Canadian outdoor retailers or trusted online sellers, gives you an affordable layer of wildlife awareness that complements your broader safety strategy.
Canadian hikers have excellent options at every price point, from $9.95 native art designs to premium sets around CA$29.69, with both locally-made and top-rated imports available. The key is selecting a bell that suits your adventure level: day hikers on popular routes need reliable volume and quick silencing, while backcountry explorers benefit from durable multi-bell sets that withstand rugged conditions.
Bear bells aren’t a substitute for awareness, bear spray, or proper trail etiquette, but they’re a simple tool that lets you focus on the scenery instead of constant worry. When you’re confident in your safety gear, you’re free to appreciate the wildlife encounters and stunning landscapes that make North American trails unforgettable. Choose wisely, hike prepared, and enjoy every step of your journey through bear country.
Old MacDonald camping brings together the joy of farm-themed outdoor adventures with traditional camping activities, creating a family-friendly experience where children can meet barnyard animals, participate in agricultural activities, and sleep under the stars. This concept transforms standard campgrounds into interactive learning environments where kids engage with livestock, explore working farms, and develop outdoor skills in a supervised, approachable setting.
The appeal is straightforward: families who love the outdoors but want something beyond backcountry hiking or challenging paddling routes can introduce young children to camping through familiar farm imagery and activities. Picture waking up to collect fresh eggs, spending afternoons feeding goats and sheep, then gathering around an evening campfire. The experience removes some of the intimidation first-time camping families face while delivering genuine wilderness connection.
Old MacDonald’s Resort on Buffalo Lake’s south shore between Edmonton and Calgary has pioneered this model in Western Canada, offering waterfront camping combined with petting zoos, pony rides, and seasonal farm programming. Similar operations across North America blend agricultural tourism with RV sites, tent platforms, and cabins, making the transition to outdoor recreation smooth for families accustomed to more structured environments.
Beyond dedicated farm campgrounds, the concept extends to DIY approaches. Families visiting working farms with camping provisions or joining agritourism stays that include outdoor sleeping arrangements create their own versions. The key is balancing animal encounters and farm chores with core camping fundamentals: fire safety, wildlife awareness beyond domestic animals, and respect for natural spaces. For adventurous families ready to expand beyond the barnyard, these experiences build confidence for future trips to wilder settings where moose and bears replace cows and chickens.
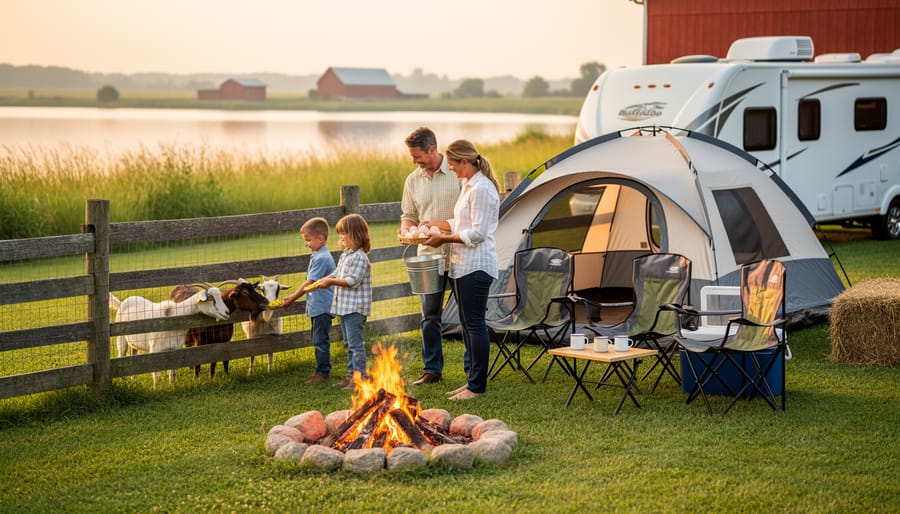
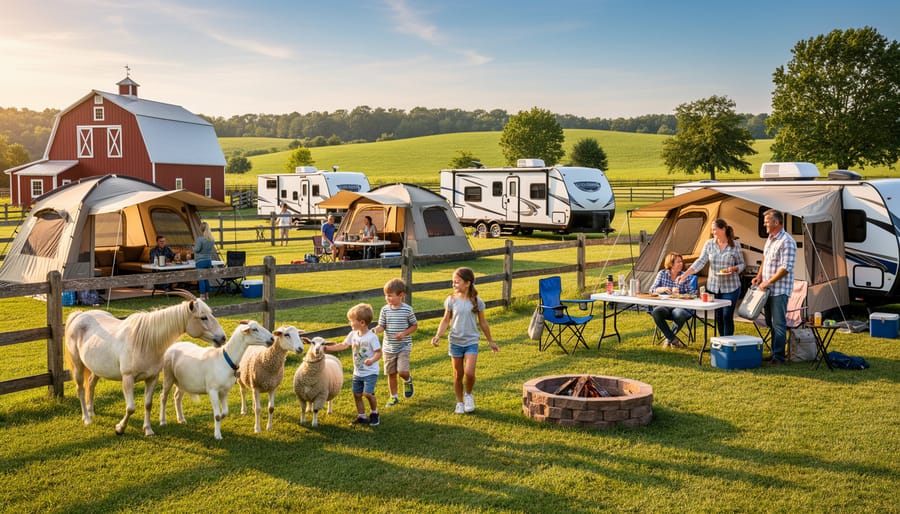
A farm-themed campground scene shows families settling in while kids meet friendly animals near their campsite.
What Makes Old MacDonald Camping Different from Traditional Family Camping
Traditional family camping often throws parents into the deep end, pitching tents in unfamiliar wilderness, managing anxious children in completely new environments, and balancing safety concerns with the desire for authentic outdoor experiences. Farm-themed camping flips this script by anchoring the adventure in something children already understand and love: animals, songs, and the comforting rhythms of farm life.
The animal encounters form the backbone of what makes this approach distinct. Instead of hoping to glimpse wildlife from a distance, families interact with friendly goats, chickens, and ponies throughout their stay. Children learn to feed animals, collect eggs, and observe farm routines, experiences that build confidence and create natural conversation starters around responsibility and animal care. These structured interactions provide predictable touchpoints during the day, reducing the uncertainty that can overwhelm camping newcomers.
Agricultural education elements weave seamlessly into the outdoor experience. Kids discover where food comes from, how gardens grow in different conditions, and the relationship between weather patterns and farm work. These lessons happen organically, planting seeds before a morning hike, comparing wild plants to cultivated crops, understanding why farmers watch the same weather systems that affect camping conditions. The farm context transforms abstract outdoor concepts into tangible, relatable experiences.
The sing-along tradition, rooted in the familiar “Old MacDonald” song, creates evening rituals that feel less daunting than sitting around a campfire in silent wilderness. Families gather for musical storytelling that celebrates the animals they’ve met during the day, building community among campers while maintaining the outdoor atmosphere.
This hybrid model bridges the gap between heavily programmed recreation and unstructured wilderness time. The farm activities provide a comfortable home base, familiar reference points that make venturing into trails, exploring nearby waterways, or simply sitting under stars feel like natural extensions rather than intimidating leaps. Families gain camping skills without the all-or-nothing pressure of pure backcountry experiences.
The 2026 Old MacDonald Camping Movement: Real Events Bringing Families Together
Community organizations are stepping up in 2026 to make farm-themed camping accessible to families who might never have considered outdoor recreation. The Beaumont-Banning Nepali Society’s Overnight Family Camping event on June 17 and 18, 2026, exemplifies how grassroots groups are using the Old MacDonald camping concept to welcome diverse communities into nature. These community-led initiatives matter because they remove the intimidation factor that keeps many families from taking that first camping trip.
Note: Contact the Beaumont-Banning Nepali Society directly for specific location, registration, and participation details for this event.
When cultural organizations host farm-themed camping experiences, they create bridges between traditions. Families who grew up in urban environments or who recently immigrated find common ground through universally recognizable farm imagery and songs. The agricultural element provides structure and familiarity, while the overnight camping component introduces essential outdoor skills in a supported environment.
Community-organized events also build networks that outlast the weekend. Parents connect with other families facing similar questions about camping gear, child safety in nature, and how to balance cultural comfort with new experiences. First-time campers gain confidence from shared challenges, whether learning to pitch a tent or managing a campfire. These events prove that outdoor recreation belongs to everyone, not just those who grew up hiking and fishing.
The real value lies in how these gatherings transform abstract interest into concrete action. Families leave with actual camping experience, a network of fellow adventurers, and the realization that nature exploration fits their lives. Many participants go on to plan independent camping trips, having discovered that the outdoors welcomes them.
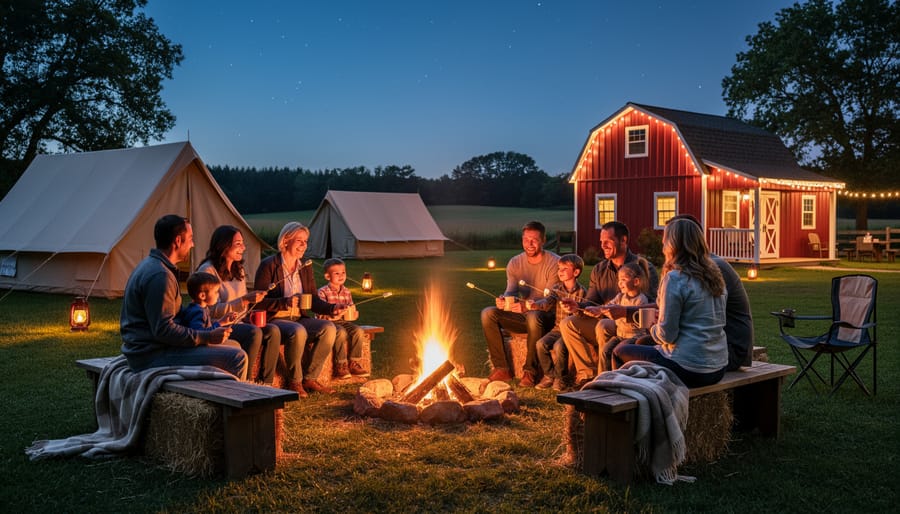
Warm campfire lighting captures the community feel of farm-themed camping where families sing, connect, and relax together.
Planning Your Own Old MacDonald-Style Camping Adventure
Choosing the Right Setting: Farm Campgrounds vs. Traditional Sites
Dedicated farm campgrounds offer built-in agricultural experiences but aren’t essential for creating an Old MacDonald-style adventure. Your choice depends on how much structure your family needs versus how adventurous you want to be with DIY farm elements.
Agritourism camping facilities provide convenience, on-site animals, scheduled feeding times, hayrides, and educational programs designed for children. These properties handle the logistics of animal care and safety protocols, letting you focus on enjoying the experience rather than coordinating it. The trade-off is less flexibility in your schedule and typically higher costs than traditional campgrounds.
Traditional campgrounds near working farms offer more independence. Research sites within a short drive of pick-your-own farms, agricultural education centers, or petting zoos that welcome day visitors. This approach lets you spend mornings fishing or hiking, then visit a dairy farm for afternoon milking demonstrations. You control the pace and choose which agricultural elements to include.
Consider proximity carefully. A campground fifteen minutes from a working farm gives you authentic agricultural access without being surrounded by early-morning rooster calls or manure smells that some families find overwhelming. Look for sites near rural landscapes where farm visits complement rather than dominate your outdoor experience.
State parks in agricultural regions often provide the best balance, established camping infrastructure with nearby agritourism operations. Check whether your chosen campground is near seasonal operations like corn mazes, berry farms, or educational ranches that align with your trip dates.
Packing Essentials for Farm-Themed Family Camping
Farm-themed camping demands gear that transitions smoothly between muddy barnyard visits and evening campfire comfort. Closed-toe boots with good tread protect feet during animal encounters while remaining comfortable for trail walks, rubber barn boots work well but lack hiking support, so pack trail shoes separately. For children, waterproof hiking boots handle both environments without constant changes.
Open agricultural landscapes offer little shade, making sun protection critical. Wide-brimmed hats shield faces during daytime farm activities, while lightweight long-sleeve shirts prevent sunburn without overheating. Pack reef-safe sunscreen for frequent reapplication, especially before transitioning from shaded barn areas to exposed fields.
Layer your clothing system to handle temperature swings between sunny pastures and cool evenings. Quick-dry fabrics manage sweat during active farm chores, then layer under fleece when temperatures drop. Bring designated “barn clothes” separate from sleeping attire to maintain camp hygiene after animal contact.
Standard camping gear applies, tent, sleeping bags, cooking equipment, but add hand sanitizer stations, wet wipes for immediate cleanup after farm visits, and sealed containers to protect food from curious farm animals that wander near campsites. A small daypack keeps essentials accessible during structured farm activities without returning to your tent repeatedly.
Safety Considerations for Farm and Outdoor Hybrid Experiences
Farm-themed camping brings together two environments with distinct safety challenges. While children might approach barnyard animals with the same familiarity they have for stuffed toys, real livestock demands respect and clear boundaries. Always supervise young campers during animal interactions, keeping hands away from mouths and eyes during visits. Teaching kids to let animals approach them rather than chasing or cornering creatures prevents both scratches and genuine fear responses from the animals.
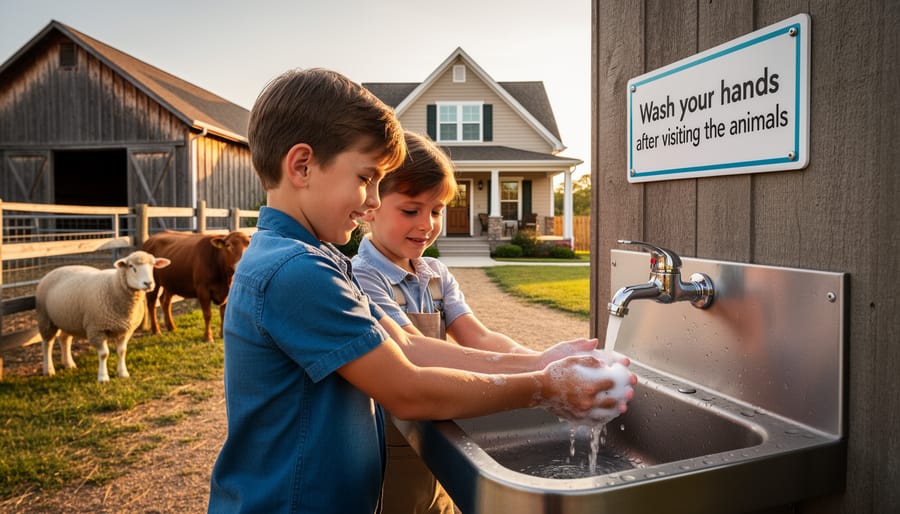
Warning: Always wash hands thoroughly with soap and clean water immediately after touching farm animals and before preparing or eating food, as bacteria from livestock can cause serious illness.
The transition between farm areas and camping spaces requires deliberate hygiene protocols. Designate specific footwear for barnyard visits that never enters your tent, and establish a cleaning station at the boundary between agricultural and sleeping areas. Pack antibacterial wipes as backup when water sources aren’t immediately accessible, though soap and water remains the gold standard for removing pathogens picked up from animal contact.
Open agricultural landscapes present weather exposure that differs from forested campsites. Without tree cover to break wind or absorb lightning strikes, farm settings demand heightened awareness of approaching storms. Check forecasts before your trip and understand lightning safety outdoors protocols. Have a solid-structure shelter plan identified before you need it, because barns and equipment sheds beat tents but may not always be accessible.
Food storage takes on dual importance when camping near farms. Your easy camping food must stay secured from both wild animals drawn to agricultural areas and curious livestock that will investigate anything new in their territory. Use hard-sided coolers with latches rather than soft bags, and never assume that domesticated animals nearby means an absence of raccoons, bears, or coyotes.
Farm-themed camping isn’t wilderness-lite. It simply adds agricultural hazards to traditional camping risks rather than replacing them. Maintain the same vigilance about fire safety, first aid readiness, and navigation awareness you’d apply anywhere outdoors. The farm elements provide structure and familiarity, but they don’t eliminate the need for fundamental outdoor safety practices.
This safety moment emphasizes hygiene after interacting with farm animals before heading back to relax or sleep.
Adding Water Sports and Active Adventures to Your Farm Camping Trip
Farm camping’s strategic rural location naturally opens doors to waterways and trails most urban families rarely encounter. Many agricultural areas nestle beside quiet lakes, rivers, and conservation lands perfect for extending your visit beyond barnyard boundaries.
Kayaking transforms quickly from exotic adventure to accessible family activity when you start from calmer rural waters. Farm campgrounds near slow-moving rivers or protected lake inlets provide ideal launching points for first-time paddlers. The gentle current and minimal boat traffic let kids develop confidence without overwhelming them. Pack waterproof bags for snacks and first aid kits plan for afternoon sessions when waters warm up, and choose routes where you can easily turn back if younger paddlers tire.
Hiking through agricultural landscapes offers distinctly different lessons than mountain trails. Rural paths wind through changing environments, pasture edges give way to woodlots, creek crossings reveal beaver activity, and open fields let you spot hawks hunting. These transitions teach kids to notice landscape variety and understand how wild spaces connect. Morning farm chores followed by afternoon hikes create natural rhythm, giving energetic children productive outlets while teaching them that outdoor recreation takes many forms.
Wildlife observation gains extra dimensions when you compare domestic and wild species. Watching chickens scratch for insects prepares kids to spot wild turkeys doing the same thing in wooded clearings. The dairy cows grazing peacefully make an excellent contrast to white-tailed deer browsing at dawn. This comparison sharpens observation skills and helps children understand animal behaviour patterns that cross the domestic-wild divide.
Build itineraries that alternate between guided farm activities and self-directed exploration. Schedule structured morning programs, then leave afternoons open for spontaneous creek wading or trail following. This balance prevents overscheduling while ensuring everyone gets both comfort and challenge.
Making Old MacDonald Camping Work for All Skill Levels
Farm-themed camping creates natural scaffolding for every experience level. First-time campers appreciate the predictable structure, meals happen near the barn, bathrooms are clearly marked, and friendly animals provide comforting distractions when kids feel uncertain about sleeping outdoors. Meanwhile, seasoned outdoor enthusiasts discover new dimensions: teaching their children animal husbandry basics, photographing wildlife in mixed agricultural-natural settings, or planning multi-day trips that weave farm stops into backcountry routes.
Age-appropriate activities span the entire developmental spectrum:
Toddlers (18 months, 3 years)
Supervised petting of gentle animals like rabbits and chickens in enclosed areas, with constant adult presence for safety and hygiene. Daytime-only visits work best, with naps taken in familiar camping trailers rather than tents.
Preschoolers (4-5 years)
Feeding smaller livestock under supervision, short nature walks between barnyard and campsite, and participating in group sing-alongs. These children need structured rest periods and clear boundaries between farm and camping zones.
Elementary Age (6-11 years)
Collecting eggs, learning basic camping skills like fire safety around controlled cooking areas, and exploring farther trails independently with check-in schedules. This age thrives on responsibility, caring for animals, helping younger campers, and documenting experiences through journals or photos.
Teens (12+ years)
Advanced camping techniques, longer hikes to nearby waterways for kayaking, and leadership roles in group activities. Farm settings provide service-learning opportunities like trail maintenance or assisting with evening programs.
Families anxious about pure wilderness can rent camping trailers positioned near farm facilities, creating a gradual transition from car camping to tent experiences. The visible farmhouse lights, accessible staff, and proximity to help demystify outdoor nights for nervous parents and children alike, building confidence before attempting more remote sites.
Old MacDonald camping bridges the gap between the familiar and the wild, transforming what might feel intimidating into something welcoming for families taking their first steps into outdoor recreation. By wrapping camping traditions in playful farm themes, this approach removes barriers without sacrificing authentic nature experiences. The Beaumont-Banning Nepali Society’s June 17 & 18, 2026 event shows how communities are embracing this model to bring diverse families together outdoors.
Whether you join organized events or create your own farm-themed adventure at a rural campground, the framework remains powerful: interactive elements that engage children, educational opportunities disguised as fun, and the gradual transition from structured comfort to wilderness confidence. Pack thoughtfully, starting with our sleeping pad guide for comfortable nights under the stars, and prioritize safety through proper preparation and supervision around both animals and natural landscapes.
View farm-themed camping as your launching point, not your destination. The skills families develop, setting up shelter, reading weather, respecting wildlife, translate directly to backcountry hiking, kayaking expeditions, and deeper wilderness exploration. Start with the songs and the barnyard, then let curiosity lead you further into North America’s remarkable outdoor spaces.
Camping trailers transform multi-day kayaking expeditions across Canada from logistical puzzles into comfortable, strategic adventures by serving as mobile base camps you can position within minutes of launch sites. You can rent these trailers from national chains like Fraserway RV and CanaDream, or regional outfitters near premier paddling zones, with daily rates typically ranging from $75 to $200 depending on size and season. The booking process is straightforward: reserve online 2-3 months ahead for summer dates, confirm tow capacity with your vehicle, and plan your route to connect campgrounds near put-in points for destinations like Georgian Bay, the Saguenay Fjord, or Algonquin’s network of lakes.
The real advantage isn’t just shelter. A well-positioned trailer lets you dry gear overnight, store food safely away from wildlife, and shift your camp as conditions or curiosity dictate. Paddlers heading to remote stretches where grizzlies or black bears are active appreciate hard-sided security after a day navigating open water. Morning fog over iceberg trails in Newfoundland or glassy dawn starts on Lake Superior become simpler when your coffee and warm layers are steps away rather than buried in a wet tent.
Choosing the right trailer depends on your group size, towing experience, and campground accessibility near your target waterways. Compact teardrops work for solo kayakers or couples hitting backcountry-adjacent sites, while families tackling week-long circuits through British Columbia’s Gulf Islands benefit from larger units with slide-outs and full kitchens.
Why Camping Trailers Are Perfect for Multi-Day Kayaking Trips
After hours on the water battling wind and waves, the last thing you want is a damp tent and cold meal. Camping trailers solve the fundamental challenge of multi-day kayaking trips: they give you a dry, secure home base no matter what conditions you face on the water.
The gear storage advantage alone changes everything. Your drysuits, PFDs, paddles, and electronics need protected space between paddling sessions, and trailers provide dedicated compartments that keep saltwater spray and morning dew away from expensive equipment. You’ll also have room to organize fishing rods, camera gear, and the layers you swap out as weather shifts throughout the day.
Comfort matters more than you might think when you’re paddling consecutive days. Sore shoulders and core muscles recover faster when you choose a sleeping pad that properly supports your body on a real mattress platform instead of deflating on uneven ground. Trailers offer climate control too, which means you can warm up quickly after cold-water immersion and actually sleep through the night instead of shivering in a sleeping bag.
The mobility factor opens up paddling opportunities that fixed campsites can’t match. You can position your trailer near different launch points throughout your trip, following wildlife migration patterns or moving to calmer bays when wind forecasts change. This flexibility proves essential when chasing iceberg trails along Newfoundland’s coast or tracking whale pods through British Columbia’s channels, you’re not locked into one spot for your entire adventure.
Remote access becomes feasible when your sleeping quarters and kitchen travel with you, letting you explore launch sites far from established campgrounds without sacrificing safety or basic comfort.
A camping trailer sets up a comfortable base at a Canadian campground, with kayaks staged for an early paddle.
Top Rental Companies Serving Canadian Kayaking Regions
Fraserway RV: Western Gateway to Coastal Paddling
Fraserway RV operates as Canada’s largest RV rental company with two strategically positioned locations that serve as perfect launching points for western kayaking adventures. Their Vancouver depot puts you within striking distance of the Salish Sea’s island-studded channels, where you can paddle alongside orcas and harbor seals through protected waters near the Gulf Islands. Launch from Tofino or Ucluelet on Vancouver Island’s rugged west coast for multi-day expeditions through Clayoquot Sound’s ancient rainforest inlets.
The Calgary location opens access to Alberta’s turquoise mountain lakes, Maligne Lake in Jasper and Moraine Lake in Banff offer glacier-fed paddling surrounded by dramatic peaks. Both depots stock a range of trailer sizes suitable for hauling kayaks, and their Canadian ownership means staff understand the specific challenges of accessing remote launch sites on logging roads and gravel campground approaches. Plan your pickup timing around coastal tides or alpine weather windows, knowing you have a dry base camp waiting after cold Pacific paddles or high-altitude lake crossings.
RVezy: Flexible Peer-to-Peer Options with Delivery
RVezy operates differently from traditional rental companies, it’s a peer-to-peer platform connecting kayakers directly with local trailer owners across Canada. This model opens up rental inventory in smaller communities and regions that major chains don’t serve, which matters when you’re planning a paddle trip to remote coastal areas or backcountry lake systems.
The delivery option solves a practical challenge for fly-in paddlers. Instead of navigating unfamiliar highways in a rented RV, you can arrange delivery directly to your campsite, home, or other approved destination. Your host brings the trailer to you, sets it up, and explains the systems before your trip begins. This service is particularly valuable when you’re flying into Halifax for a maritime kayaking expedition or landing in St. John’s to paddle among icebergs, you step off the plane and find your base camp waiting at the trailhead.
Every RVezy rental includes insurance coverage and roadside assistance, which provides essential peace of mind when you’re camping in areas with limited cell service. If something goes wrong mechanically while you’re parked at a remote launch site on Vancouver Island or along the Bay of Fundy, help is just a call away.
When booking through RVezy, you choose between pickup from a local host or delivery to your starting point. Browse listings in your target kayaking region, compare trailer sizes and amenities, then coordinate directly with the owner about your specific needs, like whether there’s exterior storage for paddles or roof rack capacity for your boats.
CanaDream: Nationwide Coverage for Cross-Country Expeditions
CanaDream operates an extensive network of rental depots stretching from British Columbia to the Atlantic provinces, making them a strong choice for kayakers planning ambitious cross-country paddling expeditions. Their widespread coverage means you can pick up a trailer in one region and drop it off in another, which is particularly valuable if you’re plotting a multi-week journey from, say, the Rocky Mountain lakes through the prairies to Ontario’s Thousand Islands.
This flexibility allows paddlers to design progressive itineraries without backtracking, imagine starting with alpine lake kayaking in Alberta, moving east to paddle the boreal shield lakes of Ontario, then finishing with coastal adventures in Nova Scotia. Each leg of your trip has a nearby CanaDream location for support. Their fleet includes various trailer sizes suitable for solo adventurers through family groups, with options that can handle the gear loads kayakers accumulate on extended trips. The company’s established presence across Canada also means they’ve refined their understanding of regional camping infrastructure and can offer location-specific advice on RV-friendly campgrounds near paddling launch sites.
How to Book Your Camping Trailer for a Kayaking Adventure
Booking a camping trailer for your kayaking expedition requires more planning than a typical RV trip, but the process is straightforward once you know what matters for paddlers. Start early, popular rental units near prime water access points fill up fast during Canada’s short paddling season.
Choose your kayaking destination and firm up your travel dates, accounting for weather windows and water conditions at your target launch sites.
Decide between pickup from a rental location or delivery directly to your campsite, delivery costs more but saves you the hassle of towing if you’re flying in or prefer to focus on paddling rather than driving.
Select your trailer size based on gear volume. Solo kayakers or couples can manage with smaller units, but groups hauling multiple boats, paddles, dry bags, and safety equipment need adequate storage space.
Verify that insurance coverage and roadside assistance are included in your rental agreement, RVezy includes both, which provides essential peace of mind on remote routes.
Confirm your booking and prepare for either pickup from your chosen location or coordinate delivery logistics with your host.
The pickup-versus-delivery decision matters significantly for kayakers. If you’re renting from Fraserway RV’s Vancouver or Calgary locations, pickup works well when your paddling destinations are within reasonable driving distance. RVezy’s delivery option shines for fly-in adventures or when you want your base camp waiting at a specific campground near your launch point.
Trailer size deserves careful thought. A couple planning camping Chenal du Moine trips might rent a compact unit, while groups tackling multi-day expeditions need room for wet gear storage separate from sleeping quarters. Consider where you’ll stash paddles, life jackets, dry suits, and cooking equipment, plus all your camping food ideas for the week.
Ask about vehicle specifications if you’re towing kayak trailers behind the rental RV. Some units handle additional weight better than others, and you need to know towing capacity before you show up with a loaded kayak trailer. Clarify what’s included beyond the basics, some rentals provide camping chairs and kitchen supplies, while others expect you to bring everything except the vehicle itself.
Strategic Camping Trailer Bases for Prime Canadian Kayaking Spots
Secure loading and quick access make a trailer-based setup ideal for multi-day kayaking trips.
West Coast: Vancouver Island and BC Mainland Waters
British Columbia’s protected waterways offer some of North America’s most spectacular paddling, with Vancouver Island serving as the crown jewel. Position your camping trailer at Rathtrevor Beach Provincial Park near Parksville for quick access to the Strait of Georgia’s calm channels, or head to Tofino’s Bella Pacifica Campground to launch into Clayoquot Sound’s maze of islands where sea otters fish among kelp forests just metres from your kayak.
For mainland adventures, Porpoise Bay Provincial Park in Sechelt gives you a comfortable base to explore Desolation Sound’s warm waters. The park’s RV-friendly sites accommodate larger trailers while keeping you twenty minutes from multiple launch points. Paddlers consistently report orca encounters in Johnstone Strait when kayaking from Telegraph Cove, though you’ll need to plan carefully since the nearest full-service RV park sits thirty kilometres south in Port McNeill.
Wildlife timing matters here. June through September brings humpback whales to the west coast of Vancouver Island, while orcas follow salmon runs through inside passages from July into October. Your camping trailer lets you wait out weather and adjust your paddling schedule when marine conditions shift, a crucial advantage when targeting wildlife-rich waters that demand respect and patience.
East Coast: Maritime Provinces and Iceberg Trails
Newfoundland and Labrador deliver kayaking experiences unlike anywhere else in Canada. Paddling through cold Atlantic waters past towering icebergs requires serious preparation, and a camping trailer parked at a nearby RV site becomes essential infrastructure rather than luxury. The warmth of a trailer after hours on frigid water isn’t just comfort, it’s safety.
Prime launch points cluster around the Northern Peninsula and along the coast near Twillingate, where paddlers encounter whales and icebergs during late spring and early summer. RV-friendly campgrounds at Gros Morne National Park and private sites near St. Anthony provide heated sleeping quarters within minutes of put-in locations. You’ll appreciate a hot shower and dry storage for neoprene gear after a day navigating around ice formations the size of buildings.
The short kayaking season here, typically late May through July when icebergs drift south, means advance booking matters. Secure your camping trailer rental for these months well ahead, and confirm your campground can accommodate your unit size while providing the water access serious cold-water paddling demands.
Central Canada: Lake Systems and River Routes
Ontario and Quebec offer some of Canada’s most accessible freshwater kayaking, with calm lake systems and gentle river routes that suit paddlers just starting out. The region’s well-developed RV infrastructure means you’ll find campgrounds with full hookups within easy reach of popular launch points like Algonquin Park’s interior lakes, the Thousand Islands waterways, and Quebec’s Mauricie region.
These destinations work beautifully for families. Kids can practice paddling skills on protected bays while you dock your camping trailer at sites offering swimming beaches and interpretive trails. The short portages and well-marked routes eliminate the guesswork that intimidates newer kayakers, and you’re never more than a day’s paddle from your base camp.
Summer temperatures make Central Canada’s waters far more forgiving than coastal expeditions. You’ll spot loons, beavers, and painted turtles rather than navigating tidal currents or cold ocean swells. Provincial park campgrounds typically accommodate trailers up to 35 feet, with many offering kayak rentals on-site if you’re testing the sport before investing in your own gear. Book early for July and August, these family-friendly spots fill quickly during school holidays.
What Kayakers Need to Know Before Renting
Before you book a camping trailer for your kayaking adventure, understanding the practical logistics will ensure your rental unit can handle your gear and itinerary. Most rental RVs aren’t designed to tow additional trailers, so if you’re bringing multiple kayaks, confirm roof rack availability and weight limits with the rental company during booking, many standard RV roofs can safely carry two kayaks, but exceeding capacity creates dangerous driving conditions. Securing boats properly matters: invest in quality foam blocks and cam straps rather than relying on bungee cords, and double-check all tie-downs after the first hour of driving and at every fuel stop.
Note: Always verify your rental RV’s towing capacity before booking if you’re bringing a kayak trailer, ensure watercraft are secured with proper straps and padding, and choose campgrounds with direct water access or nearby launch sites to avoid long portages.
Wet gear storage is a constant challenge on multi-day paddle trips. Look for rental units with exterior storage compartments where you can stash dripping life jackets, paddles and spray skirts without soaking the interior living space. Some kayakers pack collapsible drying racks or paracord to string up gear outside the trailer at camp, which works well in good weather but requires secure storage once dried. Consider the campground’s infrastructure when selecting your base: RV sites located near boat launches save you from hauling kayaks across the park each morning, and facilities with fish-cleaning stations or outdoor showers let you rinse saltwater gear before it corrodes zippers and hardware.
Pack essential safety items including first aid kits sized for both paddling emergencies and general camping needs, and store them in accessible locations rather than buried in external compartments. Check that your chosen campground offers cell coverage or emergency communication options, particularly in remote coastal areas where weather can change rapidly. Finally, familiarize yourself with the rental RV’s systems before leaving the pickup location, knowing how to troubleshoot the water pump or reset a tripped breaker prevents frustration when you’re tired after a long day on the water.
After a day on the water, a rented camping trailer offers warm shelter and easy access to your gear.
Renting a camping trailer opens up Canada’s kayaking destinations in ways that hotel-hopping or backpacking can’t match. You get a warm, dry place to return to after cold-water paddles through iceberg trails, secure storage for expensive gear, and the freedom to chase the best conditions from British Columbia’s coastal channels to Newfoundland’s wildlife-rich waters. Whether you’re a beginner planning your first overnight paddle or an experienced kayaker mapping out a multi-week expedition, the rental options we’ve covered, from Fraserway RV’s western locations to RVezy’s delivery-to-campsite convenience and CanaDream’s nationwide reach, make it easier than ever to build your adventure around paddling, not logistics.
The combination works because it removes the either-or choice between comfort and remote access. Park your trailer at a lakeside campground, launch at dawn, and return to hot showers and a real bed. Move your base camp when you’re ready to explore the next waterway. For 2026 trips, start your planning early, book your trailer with kayak transport in mind, and get ready to experience Canada’s paddling landscapes with a home on wheels as your launching point.
Inn to inn hiking in Scotland lets you trek the country’s legendary trails over multiple days while sleeping in real beds and enjoying hot meals each evening, with your luggage transported ahead. This self-guided approach combines the freedom of wilderness walking with the comfort of warm hospitality, making multi-day adventures accessible even if you’re not ready to carry camping gear through the Highlands.
The concept is straightforward: book a series of accommodations along your chosen route, arrange for a luggage transfer service to move your main bag between stops, and walk with just a daypack. You cover 10 to 15 miles per day depending on terrain and fitness, arriving at your inn or guesthouse by late afternoon. Scotland’s established walking routes like the West Highland Way make this particularly easy to plan, with villages spaced at walkable intervals and transfer companies operating year-round.
Planning an inn to inn trek differs from both day hikes and backpacking expeditions. You need to coordinate bookings months ahead during peak season (May through September 2026), confirm luggage transfer schedules, and pack strategically since you won’t have everything with you during the day. Weather in the Scottish Highlands shifts rapidly, so your daypack must carry layers, navigation tools, and emergency supplies even though you’re sleeping indoors.
This guide walks through selecting your route based on experience level, booking accommodations and transfers efficiently, packing the right gear for both trail and inn, staying safe in changeable mountain conditions, and knowing what each day actually feels like on the ground.
What Inn to Inn Hiking in Scotland Offers
Inn to inn hiking in Scotland removes the logistical burden from multi-day trekking while keeping you immersed in the landscape. Instead of hauling everything on your back or pitching a tent each night, you stay in hand-picked B&Bs, guesthouses, and small hotels chosen for their comfort, character, and proximity to the trail. Your main luggage moves door to door for you, so you carry only a light daypack with water, snacks, and layers.
Key Takeaway: Inn to inn hiking combines the freedom of self-guided adventure with practical support, luggage transfers mean you walk with just a daypack, comfortable accommodations await each evening, and you choose your own dates and pace to match your fitness and interests.
The self-guided format gives you control over timing and tempo. You pick your dates, decide how many kilometers feel right for each day, and customize your itinerary around what matters most, whether that’s wildlife photography stops, lingering over lunch in Highland villages, or pushing harder to cover more ground. There’s no group to keep up with and no fixed departure schedule beyond your own.
The Scottish Highlands stand out as a premier destination for this style of hiking. Trails like the West Highland Way are very well-marked, reducing navigation stress while still offering the satisfaction of finding your own way. You walk through dramatic landscapes, past Loch Lomond’s wooded shores, across the open expanse of Rannoch Moor, into the mountains rising toward Fort William, without needing a support vehicle or constant coordination.
This model suits first-timers testing their stamina on a multi-day route and experienced walkers who prefer solitude over group dynamics. You get the structure of confirmed accommodations and transferred luggage without sacrificing the autonomy that makes self-guided hiking appealing. Each evening, you arrive at a real bed, a hot meal, and the chance to recover properly before the next day’s walk.
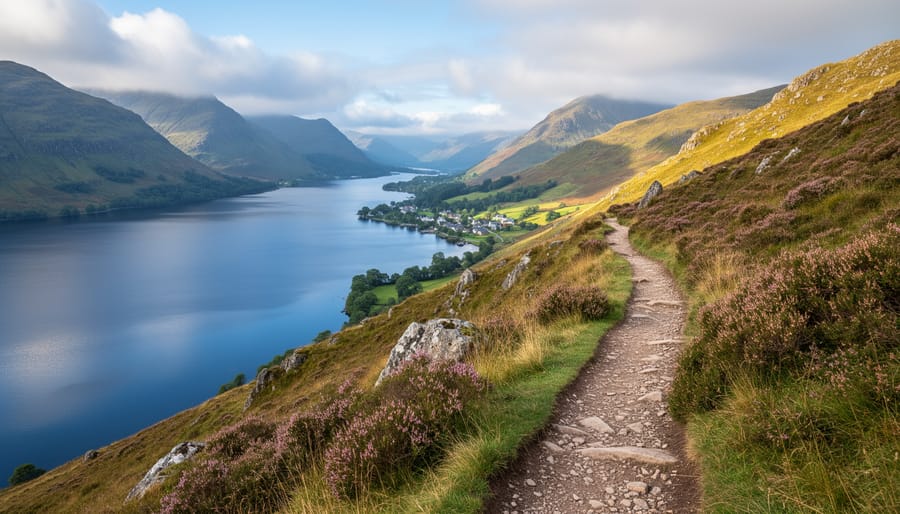
A scenic Highlands trail beside Loch Lomond captures the rugged beauty you’ll hike through on an inn to inn route.
Choosing Your Route and Dates
The West Highland Way: Scotland’s Premier Inn to Inn Route
The West Highland Way runs 152 kilometers from Milngavie on Glasgow’s outskirts to Fort William in the Highlands, making it Scotland’s most popular route for self-guided inn to inn hiking. The trail is exceptionally well-marked with thistle waymarkers and clear signage at junctions, which means you can walk it confidently without advanced navigation skills. You’ll pass iconic Scottish landscapes, the eastern shore of Loch Lomond, the wild expanse of Rannoch Moor, and dramatic Highland glens, while sleeping each night in comfortable B&Bs or guesthouses with your luggage waiting for you.
Most walkers complete the West Highland Way length and route in six to eight days, covering between 15 and 25 kilometers per stage depending on where you book accommodations. The trail surface varies from forest paths and lakeside tracks to rocky moorland sections, but it’s all well-maintained and doesn’t require technical scrambling. Because the route is so established, you’ll find plenty of accommodation options along the way, easy luggage transfer logistics, and reliable facilities in the villages you pass through.
This combination of stunning scenery, excellent infrastructure, and manageable daily distances makes the West Highland Way ideal for first-time inn to inn hikers or anyone wanting a self-guided Scottish adventure without navigational stress.
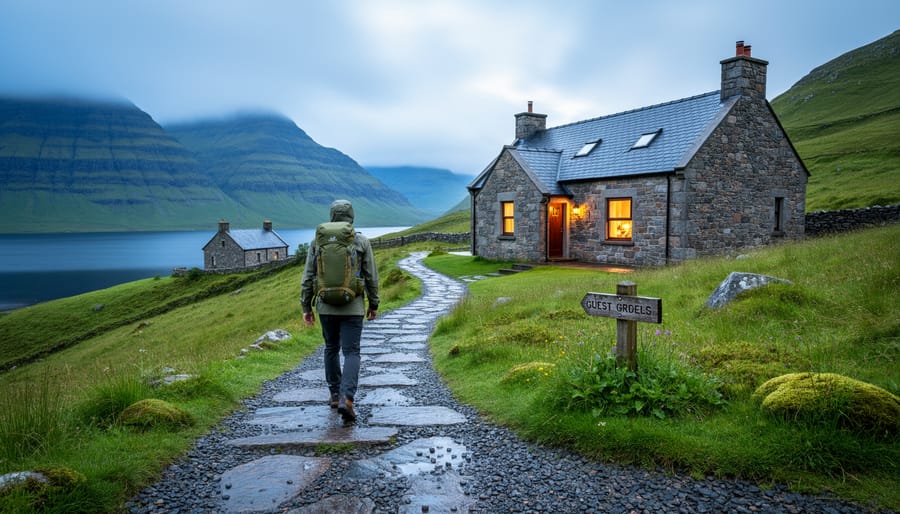
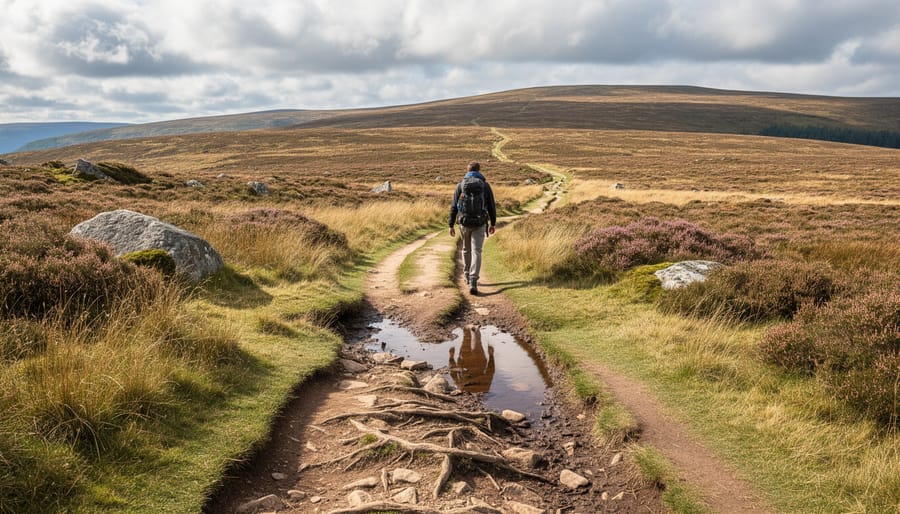
Trail conditions and terrain variety are part of the charm, this scene shows what a day’s hiking can feel like across moorland.
Other Scottish Highlands Routes
Beyond the West Highland Way, the Scottish Highlands offer several self-guided inn to inn routes that vary in scenery and difficulty. The Great Glen Way connects Fort William to Inverness, following the Caledonian Canal through gentle terrain suitable for less experienced walkers. You’ll pass lochs and forests while enjoying comfortable accommodations at day’s end with your luggage transferred ahead.
For coastal drama, the Fife Coastal Path delivers clifftop views and fishing villages along Scotland’s eastern shore. It’s moderately challenging with well-marked sections perfect for self-guided hiking. The Rob Roy Way crosses through the Trossachs, offering a quieter alternative with rolling hills and woodland stretches.
Each route lets you travel at your own pace and choose your own dates, just like the West Highland Way. You can customize your itinerary around your fitness level and interests, whether you prefer mountain vistas, coastal paths, or gentle glens. Hand-picked B&Bs, guesthouses, and small hotels await at each stage, with door-to-door luggage transfers removing the burden of carrying your full pack across the Highlands.
Booking Accommodations and Services
Start your booking process 6-8 months ahead if you’re planning a summer trek on popular routes like the West Highland Way, or 3-4 months for shoulder seasons. Early planning secures the hand-picked B&Bs, guesthouses, and small hotels that make inn to inn hiking comfortable, especially in high-demand areas near Loch Lomond and Fort William.
Most self-guided tours are packaged by specialist operators who handle both accommodation and logistics. This approach simplifies your booking strategy considerably, you deal with one provider rather than coordinating multiple properties yourself. These operators curate accommodations for quality, location, and walker-friendly amenities.
Research your chosen route’s accommodation options through specialist operators or independent properties along the trail. Focus on providers experienced with multi-day walkers.
Confirm availability for your preferred dates, checking whether your start and end dates align with property opening seasons. Spring and autumn bookings often have more flexibility than peak summer weeks.
Arrange luggage transfer service, which is typically included in packaged tours but must be confirmed. Your bags move door to door between accommodations while you carry only a daypack.
Receive confirmation documents and route materials, maps, roadbooks, GPS tracks, and emergency contacts. Verify you have accommodation addresses, phone numbers, and transfer pickup times.
When booking, confirm exactly what’s included: breakfast is standard, but some packages include packed lunches or evening meals. Ask about transfer cutoff times, you’ll need to leave your luggage ready by a specific morning hour, usually 8:30 or 9:00 AM.
Request detailed arrival instructions for your first night’s accommodation, including parking if you’re driving to the trailhead. For the West Highland Way starting near Glasgow, many walkers use public transport; confirm whether your operator provides transfer information from airports or train stations.
Double-check the luggage weight limit, typically 15-20 kilograms per bag. Pack a separate daypack with essentials since you won’t see your main luggage until evening. Get written confirmation of every accommodation address, mobile signal can be patchy in the Highlands, so printed or downloaded documents are essential.
If you’re customizing your itinerary, confirm whether the provider supports shorter or longer daily stages. Self-guided formats allow flexibility, but accommodation availability may limit how much you can adjust standard routes.
Essential Tools and Materials for Your Trek
Since your main luggage travels door to door between accommodations, your daypack carries only what you need on the trail each day. Keep it light but comprehensive: you’ll rely on these items from morning departure to evening arrival at your next inn.
Start with navigation. Most providers supply maps, roadbooks, or downloadable GPS tracks for well-marked routes like the West Highland Way. Carry the day’s route description and a backup paper map even on signposted trails, mobile signal drops in remote glens. A fully charged phone serves double duty for navigation apps and emergency contact.
Footwear and clothing layers matter more than any gadget. Waterproof boots with ankle support handle Scotland’s wet, rocky terrain. Pack a waterproof jacket and trousers regardless of forecast, Highland weather shifts fast. Add a warm mid-layer, sun protection, and a spare pair of socks in a dry bag.
Your daypack essentials checklist:
Navigation tools: route description, paper map, charged phone with offline maps
Waterproof jacket and trousers, warm mid-layer, sun hat, gloves
Two liters of water and high-energy snacks (trail mix, energy bars, sandwiches)
First aid kit with blister treatment, pain relief, bandages, and personal medications
Portable charger, headlamp, whistle, and emergency contact card
Optional: CBD tinctures or topical balms for post-hike muscle recovery
Water is critical, carry at least two liters and refill at cafés or public taps in villages. Pack calorie-dense snacks since you’ll burn 2,500-3,500 calories on a full walking day. Basic hiking first aid kits should include blister plasters, which you’ll appreciate after 20 kilometers.
Many trekkers now include wellness aids in their packing essentials. CBD tinctures or roll-on topicals fit easily in a daypack’s side pocket and help with evening recovery after steep climbs over Rannoch Moor. Keep everything in waterproof stuff sacks, Scottish rain doesn’t ask permission.
Comfort is built into the experience, this shows luggage waiting as you arrive at your accommodation each evening.
Safety Considerations for Self-Guided Hiking
Self-guided hiking in Scotland hands you freedom, and responsibility. The West Highland Way and similar routes are very well-marked, which dramatically reduces your chance of getting lost, but you still need to prepare for the Scottish Highlands environment. Weather changes rapidly here, sometimes within minutes. Carry waterproof layers, pack extra food, and check the forecast every morning before you set out. Scottish Mountain Rescue provides emergency and preparedness advice that applies whether you’re tackling a multi-day trek or a shorter outing.
Warning: Highland weather can shift from sunshine to heavy rain and fog in under an hour, always carry full waterproof gear and check forecasts daily before setting out.
Stay on the marked trail. The West Highland Way is clearly signposted, but shortcuts or unmarked detours can lead you onto rough terrain or into poor visibility zones. If you’re new to multi-day walking, review general day hike tips to build your confidence with navigation and pacing. Physical preparation matters. Walk regularly in the weeks before your trip, ideally with a loaded daypack, to condition your legs and test your footwear.
Communication is essential. Share your daily itinerary with your accommodation providers and a contact back home. Carry a fully charged mobile phone, though signal can be patchy in remote sections. Know the emergency number (999 in the UK) and have it saved. Pack a basic first-aid kit and know how to use it for blisters, sprains, and minor cuts.
Fuel your body properly. Bring high-energy snacks and plenty of water, dehydration and low blood sugar impair judgment. Solid trail food ideas keep you alert and steady on long stages. Start early each day to give yourself buffer time, and don’t push through pain or exhaustion just to reach your inn on schedule. Your luggage will be waiting, but you need to arrive safely.
Walking Your Route Day by Day
Your daily hiking rhythm becomes familiar by the second day. You wake in a comfortable inn, enjoy a hearty Scottish breakfast, and set out with just your daypack, your main luggage has already been collected for transfer to that night’s accommodation. The route ahead is yours to walk at your own pace, following provided maps, roadbooks, or GPS tracks.
On well-marked trails like the West Highland Way, navigation is straightforward. You’ll spot waymarkers and follow clear paths across moorland, through forests, and along lochs. Your roadbook provides turn-by-turn descriptions, and you can cross-reference with a map when needed. Most hikers cover each stage in five to seven hours of walking, depending on terrain and fitness level.
Morning departure: Leave after breakfast carrying only your daypack with water, snacks, rain gear, and the day’s navigation materials.
Follow trail markings: Use waymarkers, your roadbook, or GPS track to stay on route through varied Highland terrain.
Lunch break: Stop at a scenic spot or village pub to refuel and rest your legs.
Afternoon hiking: Cover the remaining distance at a comfortable pace, taking photo breaks as the landscape shifts.
Arrival at your inn: Check in, verify your luggage has arrived, and claim your room.
Evening rest and recovery: Shower, relax, explore the village, enjoy dinner featuring local ingredients, and prepare for tomorrow.
When you arrive each evening, confirm your luggage is waiting, it should be there before or shortly after you check in. Unpack what you need for the night and tomorrow’s hike. Most inns serve dinner on-site or can recommend nearby restaurants where you’ll taste Scottish salmon, venison, or hearty stews. The evening is yours to soak tired muscles in a hot bath, chat with other walkers, or simply rest with a book before the next day’s adventure.
Verifying Your Trip Logistics
Before you set off into the Scottish Highlands, run through a systematic check of every logistical piece. Start two weeks ahead: confirm each night’s accommodation by email or phone, verify your luggage transfer company has the correct pick-up and drop-off addresses for every stage, and ensure you’ve received or downloaded all route materials, maps, roadbooks, or GPS tracks. Save emergency contact numbers for your accommodation provider, luggage transfer service, and local mountain rescue (112 works throughout Scotland) directly into your phone, not just in a document you might not access offline.
Your pre-trip verification checklist should cover:
Written confirmation for every booked accommodation along your route
Luggage transfer schedule with exact pick-up times and drop-off locations
Downloaded or printed maps, roadbooks, and any GPS files provided
Emergency contact numbers saved in your phone and written on paper
Travel insurance policy details and claim procedures accessible offline
Physical readiness confirmed through training hikes with your actual pack weight
During your trek, check your luggage arrives at each new accommodation before you head out for dinner. If it doesn’t show within an hour of your arrival, contact the transfer company immediately, they can often redirect it same-day. Keep accommodation confirmations and the next day’s route details accessible in your daypack, not in your transferred luggage. When weather turns severe or you’re struggling physically, don’t push through: contact your next accommodation to arrange transport ahead or an extra rest day. Most B&Bs and guesthouses along established routes like the West Highland Way have seen it all and will help you adjust plans rather than risk your safety for the sake of a schedule.
CBD and Outdoor Recovery for Multi-Day Hikers
Adventure enthusiasts planning multi-day Scottish Highlands treks increasingly incorporate CBD into their recovery routines, treating it as another wellness tool alongside proper hydration and stretching. Tinctures offer a compact, measured dose option for evening use at your B&B or guesthouse, while topical creams and balms target specific areas of muscle soreness after a long day walking past Loch Lomond or across Rannoch Moor. Capsules provide pre-measured convenience but take longer to absorb than sublingual tinctures.
The self-guided nature of inn to inn hiking makes CBD integration straightforward. Since luggage transfers move your main bag door to door each day, you can pack full-size bottles in your transferred luggage rather than cramming everything into your daypack. Many hikers apply topicals before bed to address knee or calf discomfort, then take a tincture dose to support sleep quality in unfamiliar accommodations along the West Highland Way or other Scottish routes.
Tip: Transfer CBD products to leak-proof travel containers in your main luggage, and check your accommodation’s house rules if you plan to use products with any THC content, though most B&Bs have no restrictions on legal wellness supplements.
Practical considerations matter when hiking 15 to 20 kilometers per day across varied terrain. Keep a small topical in your daypack if you want midday application for developing hot spots or joint stiffness, but leave tinctures and capsules in your transferred bag to reduce weight. The flexibility of self-guided itineraries means you control your pace and rest days, allowing you to adjust CBD use based on how your body responds rather than keeping up with a group schedule. Most hikers find this combination of physical challenge, comfortable evening accommodations, and thoughtful recovery practices enhances their overall Scottish Highlands experience.
A quiet post-hike recovery moment illustrates how some hikers incorporate wellness routines during multi-day treks.
Frequently Asked Questions
What fitness level do I need for inn to inn hiking in Scotland?
Most routes like the West Highland Way suit moderately fit walkers comfortable with 5-8 hours of daily hiking over varied terrain. You can adjust daily distances when you customize your itinerary around your goals, making it accessible for those who prefer shorter stages.
What are the best months for inn to inn hiking in Scotland?
May through September offers the longest daylight and most stable weather, though rain is possible year-round in the Highlands. Early autumn delivers stunning colors and fewer crowds, while spring can be muddier on the trails.
What happens if my luggage doesn’t arrive at my accommodation?
Contact your tour operator immediately using the emergency number provided in your trip documents. Door-to-door luggage transfers are highly reliable on established routes, and operators maintain backup plans for delays.
Can I hike solo safely on these routes?
Yes, very well-marked trails like the West Highland Way make solo hiking straightforward with proper preparation. Carry maps or GPS tracks, share your itinerary with someone at home, and stay aware of weather conditions throughout your trek.
The self-guided format offers real flexibility. You choose your own dates and travel at your own pace, unlike group tours locked to fixed schedules. If you’re feeling strong, cover more ground; if you want an extra rest day to explore a village or recover tired muscles, most operators can adjust your booking. Hand-picked accommodations such as B&Bs and guesthouses are scattered along popular routes, giving you options for both longer and shorter daily stages. Weather in the Scottish Highlands changes quickly, so pack waterproofs and layers even during summer months. The well-marked nature of trails means navigation rarely poses challenges, but carrying backup maps alongside any provided roadbooks adds security. This combination of structure and autonomy makes inn to inn hiking work for both cautious planners and spontaneous adventurers.
Inn to inn hiking in Scotland delivers exactly what adventure seekers want: the freedom to explore dramatic Highland trails without sacrificing a comfortable bed or hot meal at day’s end. You walk at your own rhythm, choosing routes that match your fitness and interests, while your luggage arrives ahead of you and hand-picked accommodations await. Whether you’re tackling the 152-kilometer West Highland Way or customizing a shorter Highland itinerary, the self-guided format gives you structure when you need it and flexibility when you don’t.
The combination of well-marked trails, reliable logistics, and genuine Scottish hospitality turns multi-day trekking into something sustainable and enjoyable rather than a survival test. Modern hikers are also weaving wellness practices into these journeys, some carry CBD tinctures or topicals to support recovery after long stages on uneven terrain.
Choose your route, confirm your accommodations, verify your luggage transfers, and set your own pace across some of the most stunning landscapes in Britain. Scotland’s inn to inn hiking network is ready when you are.
Shopping for a hiking first aid kit in Canada for multi-day kayaking trips requires balancing comprehensive medical supplies with waterproof protection and weight constraints. The best approach for 2026 is to purchase a quality base kit from retailers like MEC, Atmosphere, or Amazon Canada, then customize it with wilderness-specific additions like blister treatment, water purification tablets, and emergency shelter materials tailored to Canadian backcountry conditions.
Remote paddling routes through areas like Newfoundland’s coastal trails or British Columbia’s fjords present unique medical challenges. You’re hours or even days from professional care, traveling in wet conditions that compromise standard bandages, and facing wildlife encounters that demand specialized wound care. A drugstore kit won’t cut it.
The transactional reality is straightforward: Canadian outdoor retailers stock dedicated wilderness first aid kits from proven brands like Adventure Medical Kits and Lifesystems, typically ranging from 95 to 250 dollars depending on group size and trip duration. But availability varies significantly by region and season, with coastal outfitters often carrying superior marine-grade options compared to prairie sporting goods chains.
What separates adequate preparation from dangerous under-preparation isn’t just having gauze and tape. Multi-day kayakers need waterproof packaging that survives capsizes, medical supplies that address both paddle injuries and hiking trauma when you portage between put-ins, and enough redundancy to handle multiple incidents when extraction takes days, not hours. This guide examines what works, what Canadian paddlers can actually buy right now, and how to avoid the common mistakes that leave adventure enthusiasts stranded with useless supplies when emergencies strike far from civilization.
What Makes a Great Hiking First Aid Kit for Canadian Multi-Day Trips
Canadian wilderness demands more from your first aid kit than a typical backyard camping trip ever will. When you’re navigating iceberg trails or paddling remote waterways far from help, your kit becomes a critical lifeline, not just a precaution.
Standard home first aid kits fail in backcountry scenarios because they’re designed for convenient access to medical care. Drop one in a kayak hatch or expose it to a sudden rainstorm, and you’ll quickly discover why waterproof construction isn’t optional, it’s fundamental. The difference between water-resistant and truly waterproof can mean the gap between sterile supplies and soggy, contaminated bandages when you actually need them.
A great hiking first aid kit for multi-day Canadian adventures balances several competing demands. It must be comprehensive enough to handle genuine emergencies miles from civilization, yet compact and light enough that you’ll actually carry it on grueling portages or tight kayak storage. The Adventure Medical Kits Ultralight Watertight .7, which remains a top pick among experts, demonstrates this balance perfectly with its practical, waterproof design that doesn’t sacrifice essential contents.
Waterproof or water-resistant construction that protects contents from immersion and moisture
Weight and size appropriate for multi-sport trips where every ounce counts
Comprehensive supplies suitable for treating injuries far from medical facilities
Intuitive organization system for quick access during emergencies
Durable materials that withstand rough handling on rugged terrain and rocky shores
The contents matter as much as the container. Look for kits stocked with supplies that address wilderness-specific scenarios: blister treatment for long hikes, wound care beyond basic bandages, supplies for managing sprains or fractures until evacuation, and medications with appropriate shelf life for Canadian temperature extremes. The Adventure Medical Kits Mountain Series Backpacker Kit earns praise specifically for its thoughtful layout and high-quality supplies, features that prove invaluable when you’re dealing with an injury while fighting fatigue or harsh weather.
Wildlife encounters and environmental challenges unique to Canadian landscapes, from insect swarms to cold-water exposure, require preparation beyond what suburban kits offer. Your first aid kit should reflect the reality that help might be a day or more away, not a quick ambulance ride.
A waterproof first aid kit set up for a combined hiking and kayaking outing shows how gear stays protected in wet conditions.
Key Buying Factors: Choosing the Right Kit for Your Adventure
An organized first aid kit layout helps multi-day adventurers quickly find supplies when conditions change.
Trip Duration and Group Size
Trip duration is your first sizing consideration. A weekend outing for two people requires far less than a week-long expedition with a group of six. For solo kayaking and hiking trips lasting two to three days, a compact kit with 40-60 pieces covers essential wound care, blister treatment, and basic medications. These ultralight options, typically weighing under half a pound, won’t burden you when portaging between lakes or scrambling along iceberg trails.
Multi-day trips extending beyond four days need more comprehensive supplies. Plan for at least 100-150 pieces if you’re heading into remote Canadian wilderness where resupply isn’t an option. Factor in group size by adding extra bandages, pain relievers, and blister treatments for each additional person beyond yourself. A party of four on a five-day trip should carry significantly more gauze, tape, and antiseptic than a solo adventurer covering the same timeframe.
Group expeditions introduce another variable: skill level. If you’re leading less experienced paddlers or hikers, expand your kit to account for the higher likelihood of minor injuries. Include extra moleskin, elastic bandages for sprains, and additional supplies for treating blisters, since beginners often push through discomfort longer than they should.
Waterproof vs. Water-Resistant: Why It Matters for Kayakers
When you’re paddling across remote Canadian lakes with your gear, understanding the difference between waterproof and water-resistant could mean the difference between usable medical supplies and soggy gauze when you need them most. Water-resistant kits can handle splashes and light rain, repelling moisture to some degree, but they’re not designed for immersion. If your kayak tips or a wave crashes over your pack, water will eventually seep through zippers and seams.
Waterproof construction means the kit is sealed against full submersion. Quality watertight first-aid kits use welded seams, gasket-sealed closures, or drybag-style roll-tops that create a genuine barrier against water penetration. For kayakers tackling multi-day trips where you’re constantly loading and unloading gear near water, this protection isn’t optional. A truly waterproof kit floats if it goes overboard and keeps contents dry even after prolonged exposure.
The trade-off is usually weight and accessibility. Waterproof cases tend to be slightly heavier and may require more effort to open quickly. For combined kayaking-hiking adventures in Canadian wilderness, prioritize waterproof over water-resistant. Your emergency supplies are too critical to compromise when conditions turn rough on the water.
Weight and Portability Considerations
When you’re paddling across a pristine Canadian lake with your hiking boots strapped to your kayak deck, every ounce matters. Multi-sport adventures demand ruthless prioritization, and your first aid kit shouldn’t weigh you down or consume precious waterproof bag space.
Ultralight kits typically weigh between 4 to 8 ounces and pack down to the size of a smartphone. The Adventure Medical Kits Ultralight Watertight .7, for instance, delivers essential coverage without the bulk that drags on longer portages. For kayakers, this compact design means you can secure the kit in an easily accessible dry bag compartment rather than burying it deep in your gear.
However, don’t sacrifice critical supplies for minimal weight savings. A kit that’s too sparse leaves gaps in your preparedness. Look for designs that use space efficiently, flat packaging, modular organization, and dual-purpose items help maximize contents without expanding volume.
Consider your carry method too. Kayakers benefit from flat, rectangular kits that nestle into hull spaces, while hikers might prefer a slightly bulkier kit that attaches externally to a pack. Test how the kit fits your specific gear setup before committing to a multi-day wilderness trip.
Contents Quality and Shelf Life
Quality matters more in remote Canadian wilderness than anywhere else. When you’re days from help on an iceberg trail or deep in backcountry, expired bandages or deteriorated medications can turn a manageable incident into a serious problem.
Start by checking expiration dates before you buy. Medications lose potency over time, and adhesives fail in extreme conditions. Most quality kits display clear expiration dates on individual items, not just the package. Avoid kits where supplies are jumbled loose, you need to see what you’re getting. The best kits, like those from Adventure Medical Kits, organize supplies in labeled sections so you can quickly verify contents and dates at a glance.
Canadian climate presents unique challenges. Temperature swings between seasons affect adhesive strength and medication stability. Store your kit in a climate-controlled space between trips, not a garage or vehicle trunk. Cold doesn’t just affect performance, repeated freeze-thaw cycles break down elastic bandages and compromise waterproof packaging.
Plan to inspect and restock twice yearly, ideally before spring and fall adventure seasons. Replace any items within six months of expiration, and swap out supplies that show moisture damage or compromised packaging. Budget-friendly options may require more frequent attention than premium kits with individually sealed components, but both need regular maintenance to keep you safe when wildlife encounters or trail accidents occur.
Types of Hiking First Aid Kits Compared
Understanding your options helps you make a smart investment in wilderness safety. Canadian adventurers shopping for hiking first aid kits face three main categories, each designed for different trip profiles and priorities.
Ultralight Kits
These minimalist options prioritize weight savings for fast-and-light adventures. Ultralight kits typically weigh under 200 grams and include only essentials: bandages, blister treatment, pain relievers, and basic wound care. They work best for experienced hikers on well-traveled routes who can reach help quickly if needed. The Adventure Medical Kits Ultralight Watertight .7 exemplifies this category with its compact, waterproof design that doesn’t add bulk to your kayak’s dry bag.
For solo kayakers tackling challenging routes like the Long Range Traverse ultralight kits offer peace of mind without compromising paddling efficiency. The trade-off? Limited supplies for extended emergencies or multiple injuries.
Comprehensive Multi-Day Kits
Built for serious backcountry expeditions, these kits contain extensive supplies for treating a wider range of injuries and illnesses over several days. They typically weigh 300-600 grams and include medications for allergic reactions, gastrointestinal issues, and wound irrigation systems. The Adventure Medical Kits Mountain Series Backpacker Kit has the best layout and contains high-quality supplies, making it ideal for groups exploring remote wilderness where evacuation takes time.
These kits suit multi-day kayaking and hiking combinations in areas with limited rescue access. You’ll carry more weight, but gain the capability to manage serious situations until help arrives.
Budget-Friendly Options
Value-oriented kits deliver essential coverage without premium pricing. The HART Outdoor Weekend First-Aid Kit and First Aid Only 298 Piece All-Purpose First Aid Kit (FAO-442) both earned recognition for balancing cost and functionality. These kits contain adequate supplies for weekend adventures and straightforward injuries.
Budget options work well for beginners building their first wilderness safety system or groups needing multiple kits across several kayaks.
Your choice depends on trip length, group size, remoteness, and your medical training. A solo kayaker paddling established routes needs different coverage than a group tackling week-long backcountry expeditions through iceberg trails.
Water beading on the kit’s outer fabric conveys how waterproof design protects supplies during creek crossings and wet weather.
Top Hiking First Aid Kit Recommendations for 2026
Best Overall: Adventure Medical Kits Ultralight Watertight .7
The Adventure Medical Kits Ultralight Watertight .7 earns its reputation as GearJunkie’s best overall pick for solid reasons that matter to Canadian kayakers and hikers. This kit weighs just 5.6 ounces and packs down to roughly the size of a smartphone, making it nearly unnoticeable in your kayak or pack. The waterproof construction uses a DryFlex bag with watertight zipper, crucial when you’re paddling iceberg trails or crossing streams on multi-day routes where immersion isn’t a question of if, but when.
Inside, you’ll find 30 carefully selected items covering the most common wilderness injuries: adhesive strips in multiple sizes, butterfly closures, blister treatments, medications for pain and inflammation, and basic wound care supplies. The kit handles blisters from long portages, cuts from sharp rocks, and minor scrapes from brush contact. Its streamlined contents prioritize the injuries you’re actually likely to encounter rather than padding the piece count with items you’ll never use.
Best Layout and Quality: Adventure Medical Kits Mountain Series Backpacker Kit
The Adventure Medical Kits Mountain Series Backpacker Kit stands out for its exceptional organization system, which Wirecutter recognizes as the best layout among tested options. This compact yet well-stocked kit excels at multi-day trips where you need quick access to supplies without digging through a jumbled mess. The clear compartmentalization means you can locate what you need during an emergency, whether you’re treating a blister on an iceberg trail or addressing a cut after a wildlife encounter.
What sets this kit apart is the quality of its contents. Every item meets higher standards than typical budget kits, giving you confidence that bandages will actually stick in humid conditions and medications haven’t degraded. For kayakers planning extended Canadian wilderness trips, this reliability matters when you’re days away from help and can’t afford supply failures.
Best Budget Options
Budget-conscious adventurers don’t need to sacrifice safety for affordability. Two kits stand out as excellent value options for Canadian wilderness trips.
The HART Outdoor Weekend First-Aid Kit earned recognition from expert testing as a budget award winner, offering essential supplies in a compact package that won’t strain your wallet. It’s particularly suitable for weekend kayaking trips where you need basic coverage without extensive specialized gear.
For those wanting more comprehensive contents at an affordable price, the First Aid Only 298 Piece All-Purpose First Aid Kit (FAO-442) provides exceptional bang for your buck. While it includes 298 pieces, making it more extensive than ultralight options, the trade-off is slightly more bulk. This kit works well for car camping or base camp scenarios where weight matters less than having a broad range of supplies.
Both options provide reliable protection for multi-day adventures without the premium price tag of specialized wilderness kits. They’re smart choices for newer adventurers building their gear collection or experienced kayakers looking for a backup kit.
Runner-Up Worth Considering: Hart Outdoor Multiday First Aid Kit
The Hart Outdoor Multiday First Aid Kit stands out as Wirecutter’s runner-up choice for good reason. This kit bridges the gap between ultralight options and comprehensive expedition kits, making it particularly well-suited for Canadian kayakers planning three to five-day wilderness trips. It offers more supplies than the minimalist Ultralight Watertight .7 without the bulk of larger systems, striking a practical balance for extended adventures where space matters but comprehensive coverage is essential. The kit’s organization allows quick access during emergencies on remote iceberg trails or after wildlife encounters, and its durable construction holds up well to the demanding conditions of multi-sport trips combining paddling and hiking.
Where to Buy: Canadian Availability Guide for 2026
National Outdoor Retailers
Canada’s major outdoor retail chains remain reliable starting points for wilderness first aid kit shopping. MEC (Mountain Equipment Company) stores across the country typically maintain dedicated first aid sections with both pre-packaged kits and individual components for customization. Their staff often have wilderness experience and can offer guidance on selecting appropriate supplies for multi-day kayaking and hiking trips.
Canadian Tire locations stock first aid kits in their camping and outdoor departments, though selection varies considerably by store size. Larger urban locations tend to carry comprehensive hiking-specific options, while smaller branches may focus on basic emergency kits.
Atmosphere stores, found primarily in Western Canada, cater specifically to outdoor enthusiasts and usually maintain stronger first aid kit selections than general sporting goods retailers. Their inventory often includes waterproof options suited for kayaking adventures.
Bass Pro Shops and Cabela’s locations offer outdoor first aid supplies alongside their broader camping gear. These stores benefit from seasonal stock refreshes before peak hiking months, making spring the optimal time for in-store selection. Always call ahead to confirm specific kit availability before making the trip.
Online Options for Canadian Shoppers
Online shopping offers Canadian adventurers convenient access to a broad selection of hiking first aid kits without geographic limitations. Major platforms like Amazon.ca typically carry the recommended kits, including the Adventure Medical Kits Ultralight Watertight .7 and Mountain Series Backpacker Kit, alongside budget options like the First Aid Only 298 Piece All-Purpose First Aid Kit.
Cross-border shopping from U.S. retailers can expand your options, but factor in currency exchange, customs duties, and potentially longer shipping times, especially problematic when preparing for imminent multi-day kayaking trips. Some outdoor specialty sites ship internationally, though availability fluctuates.
Before purchasing online, compare prices across multiple platforms and read recent reviews to confirm product quality matches your expectations. Check return policies carefully, since first aid kits purchased sight-unseen may differ in size or contents from what you envisioned. For time-sensitive trip preparation, verify estimated delivery dates and consider paying for expedited shipping to avoid last-minute scrambles before heading to iceberg trails or remote wilderness destinations.
Regional Outdoor Specialty Shops
Beyond big-box chains and e-commerce giants, independent outdoor specialty shops across Canadian provinces offer distinct advantages for first aid kit purchases. These locally-owned retailers near adventure hubs, think Banff, Whistler, the Laurentians, or Newfoundland’s coastal regions, employ staff who actually use the gear they sell on local trails and waterways.
Walk into a shop near Gros Morne or Georgian Bay, and you’ll get personalized advice from someone who kayaks those exact waters and understands the specific challenges of multi-day trips in that region. They can recommend kit modifications for local conditions, suggest reliable restocking sources, and often carry region-appropriate supplies that national chains overlook.
These shops typically stock quality brands like Adventure Medical Kits and Hart Outdoor, sometimes with better selection depth than larger retailers. You’ll pay a bit more than online, but you’re supporting the local paddling and hiking community while getting hands-on access to kits before buying. For adventurers planning trips near established outdoor towns, stopping by a regional specialty shop before departure lets you verify waterproof seals, check expiration dates, and grab last-minute additions based on current trail conditions.
Common Mistakes to Avoid When Buying Your First Aid Kit
Buying your first wilderness first aid kit might seem straightforward, but several common missteps can compromise your safety on multi-day trips through Canadian backcountry. Understanding these pitfalls helps you invest wisely in a kit that genuinely protects you when you’re hours or days from emergency services.
The most critical mistake is purchasing a standard home or car first aid kit and assuming it’ll work for backcountry adventures. These kits lack the specialized supplies needed for wilderness scenarios, where you might need to stabilize an injury for extended periods before reaching help. Home kits typically include basic bandages and antiseptic wipes but omit items like splinting materials, blister treatment, or supplies for managing hypothermia on exposed iceberg trails.
Other frequent errors include:
Ignoring waterproofing requirements when planning kayaking trips where your kit faces potential water immersion
Selecting kit size based solely on the lowest price rather than matching contents to trip duration and group size
Forgetting to customize for personal medical needs like prescription medications or specific allergies
Neglecting to check expiration dates on included supplies before purchasing
Overlooking long-term restocking requirements and replacement costs
Many adventurers also underestimate the importance of training. Buying an extensive kit means nothing if you don’t know how to use its contents during an actual emergency. Take a wilderness first aid course before heading into remote areas where wildlife encounters and rugged terrain create unique risks.
Another subtle mistake involves choosing kits with excessive bulk for your actual needs. If you’re a solo kayaker doing weekend trips, you don’t need a 200-piece family kit designed for basecamp use. Conversely, going ultralight for a week-long expedition with three people leaves your group dangerously under-supplied. Match your kit’s comprehensiveness to your specific adventure profile rather than assuming bigger always means better.
Real backcountry conditions, cold damp terrain and rough footing, highlight why a ready-to-use kit matters on multi-day hikes.
Customizing Your Kit for Canadian Wilderness Conditions
Store-bought hiking first aid kits provide a solid foundation, but Canadian wilderness demands specific additions that mass-market kits don’t typically include. The unique challenges of our environment, from black bear country to sub-zero temperatures on iceberg trails, require thoughtful customization.
Start by assessing the wildlife risks in your destination. Tick removal tools are non-negotiable for forested regions across Ontario, Quebec, and the Maritime provinces where Lyme disease cases have climbed. Add a fine-tipped tweezer or dedicated tick remover, plus antiseptic wipes specifically for tick bites. For mosquito and blackfly-heavy areas like the boreal forest, include extra antihistamine cream beyond what your kit provides.
Cold-weather expeditions need protection standard kits overlook. Pack chemical hand warmers, which can prevent frostbite during emergency situations when you’re stationary. An emergency thermal blanket designed for sub-zero temperatures (not just the ultra-thin foil type) can be lifesaving if you’re delayed overnight. Include petroleum jelly or specialized balm for windburn and chapped skin, conditions that worsen quickly in exposed alpine environments.
Your Canadian wilderness kit should also include:
Tick removal tool with magnifying attachment for proper identification
Moleskin or hydrocolloid blister patches (larger quantities than standard kits provide)
Heavy-duty emergency blanket rated for Canadian winter temperatures
Sterile saline for flushing wounds or eyes after bear spray exposure
Instant cold packs for sprains in remote areas where ice isn’t available
Multi-day kayaking trips require waterproof packaging for additions. Separate supplemental items into dry bags organized by category, one for cold-weather supplies, another for camping essentials like blister treatment you’ll access frequently. Consider the weight of your trail food ideas when calculating space for kit supplements, balance comprehensiveness with portability for your specific adventure profile.
Frequently Asked Questions
How often should I replace supplies in my first aid kit?
Check expiration dates on medications and ointments every six months, and replace any items that have passed their shelf life. Adhesive bandages lose their stickiness after about three years, while gauze and tape can last longer if stored dry. After each multi-day trip, restock any used items immediately so you’re ready for your next adventure. If you’re planning remote expeditions like the North Coast Trail verify all supplies are fresh before departing.
What’s the difference between waterproof and water-resistant kits?
Waterproof kits can withstand full immersion in water, making them essential for kayaking trips where your kit might end up in the drink. Water-resistant kits handle light rain and splashes but won’t survive submersion. For combined kayaking-hiking adventures, especially in conditions where you might encounter icebergs on trail a truly waterproof option like the Adventure Medical Kits Ultralight Watertight .7 provides peace of mind.
How much should I spend on a quality hiking first aid kit?
Budget-friendly options like the First Aid Only 298 Piece All-Purpose First Aid Kit (FAO-442) provide solid coverage for shorter trips, while comprehensive kits for multi-day adventures typically cost more but include higher-quality supplies and better organization. Your investment should match your trip duration, group size, and how remote your destination is. For serious backcountry travel in Canadian wilderness, prioritize quality over saving a few dollars.
Do I need different supplies for solo versus group trips?
Solo travelers should carry comprehensive kits since you’re your own first responder, while group leaders need larger quantities of basic supplies like bandages and pain relievers. Multi-person kits like the Adventure Medical Kits Mountain Series Backpacker Kit include enough supplies for small groups on extended trips.
Investing in a quality hiking first aid kit isn’t optional for Canadian wilderness adventures, it’s essential preparation that could save your trip or even your life. Whether you’re paddling alongside icebergs or navigating remote backcountry trails where wildlife encounters are part of the experience, having the right medical supplies within reach brings peace of mind and practical protection. Consider your complete recovery strategy too, including options like CBD for post-hiking recovery to support your body after demanding multi-day expeditions. Before you head out on your next adventure, verify current availability at your preferred retailers. The Canadian wilderness rewards those who prepare thoroughly, and your first aid kit is the safety foundation that lets you explore with confidence.
A cold night on the trail can turn an unforgettable adventure into a miserable ordeal, and your sleeping pad is the only barrier between you and heat-draining ground that pulls warmth from your body faster than any wind chill. Whether you’re preparing for a multi-day trek along iceberg-dotted coastal trails in Newfoundland or planning a backcountry camping trip through bear country in the Rockies, the right sleeping pad determines whether you wake refreshed or stiff, sore, and dangerously cold.
The sleeping pad market in 2026 offers unprecedented options, from featherlight inflatable models weighing under 12 ounces to insulated foam pads built for winter camping. But this variety creates confusion. R-value ratings, packed weight, durability claims, and price points ranging from $30 to over $250 leave many hikers paralyzed by choice or, worse, purchasing the wrong pad for their needs.
Understanding what separates a genuinely comfortable, reliable sleeping pad from marketing hype requires looking beyond brand names. Temperature ratings matter far more than many realize. A pad with an R-value of 2.0 might work fine for summer trips in the Grand Canyon but will leave you shivering on spring shoulder-season hikes when wildlife emerges from hibernation and overnight temperatures still drop below freezing.
This guide cuts through the confusion by examining the core features that actually impact your sleep quality and safety, comparing real products available now, and matching specific pads to different hiking scenarios across North American terrain.
What Makes a Hiking Sleeping Pad Essential
When you settle into your tent after a long day on the trail, what separates you from the cold, uneven ground is more than a luxury, it’s a critical piece of gear that determines whether you wake up refreshed or miserable. A quality sleeping pad serves three vital functions that directly impact your safety and comfort in the backcountry.
First, insulation from the ground is non-negotiable for wilderness camping. Even in summer, the earth beneath you can drain body heat twenty times faster than still air. Your sleeping bag compresses under your weight, losing most of its insulating ability on the bottom side. The sleeping pad fills that gap, creating a thermal barrier that keeps you warm. This matters whether you’re camping on iceberg trails in colder northern regions or in lower-elevation forests where overnight temperatures still drop significantly.
Note: Hypothermia can develop even in moderate temperatures if you lack adequate ground insulation, particularly in remote wilderness areas where help is hours or days away.
Second, cushioning transforms rocky, root-riddled terrain into tolerable sleeping surfaces. Anyone who has tried to sleep directly on hard ground knows that even small stones become painful pressure points after a few hours. A good pad distributes your weight evenly, protecting your hips, shoulders, and spine from the terrain beneath. This cushioning becomes crucial on multi-day expeditions where cumulative fatigue affects both physical performance and decision-making skills.
Third, temperature regulation works both ways. While insulation prevents heat loss in cold conditions, proper airflow in warmer weather helps you stay comfortable without overheating. The pad creates a stable microclimate between your body and the ground, adapting to seasonal variations across North America’s diverse landscapes.
For beginners tackling their first overnight hike and seasoned backpackers pushing into challenging wildlife territories alike, the sleeping pad represents one third of your sleep system alongside tent and sleeping bag. Skimp here, and the entire system fails, no matter how expensive your other gear. The right pad means you recover properly, maintain energy reserves, and stay safe enough to enjoy the adventure you came for.
A properly inflated hiking sleeping pad can make a noticeable difference when the ground is cold and uneven.
Key Features That Define a Quality Hiking Sleeping Pad
Different sleeping pad styles offer distinct insulation and cushioning options for varying hiking conditions.
R-Value and Insulation Performance
The R-value is your sleeping pad’s warmth rating, measured on a scale where higher numbers mean better insulation against cold ground. This single number determines whether you’ll sleep comfortably or shiver through the night. R-value reflects insulation performance through standardized testing, though real-world conditions can vary.
R-Value Range
Season
Temperature Conditions
1.0-2.9
Summer
Warm nights above 50°F
3.0-4.9
Three-Season
Spring through fall, down to 30°F
5.0+
Winter
Cold conditions below 30°F
For serious backpackers chasing warmth without weight penalties, the Exped Ultra 6.5R leads the pack with an R-value of 6.9 at just 12.5 ounces for the medium mummy size. That warmth-to-weight ratio makes it exceptional for high-altitude camps and iceberg trail expeditions where cold ground can sap your energy overnight. At $200, you’re paying for engineering that keeps you warm in harsh environments without dragging down your pack weight.
Contrast that with the Klymit Static V Base, which lacks insulation entirely and works only for summer trips when ground temperatures stay mild. It’s lighter on your wallet and your back, but it’ll leave you cold the moment temperatures drop. Choose your R-value based on where you’ll actually hike, not where you wish you were going. Some reviewers note that Exped’s R-value seems optimistic compared to field performance, so build in a margin if you run cold or camp in exposed areas where wildlife roams and wind cuts through.
Weight and Packability
Every ounce matters when you’re five miles into a backcountry trail with a full pack digging into your shoulders. For backpackers, weight determines how far you can push each day, how your body feels by evening, and whether you’re energized or exhausted when you finally reach that mountain vista. Car campers, on the other hand, can afford to prioritize comfort over grams since they’re parking steps from their tent.
Ultralight pads like the Exped Ultra 6.5R at 12.5 ounces represent the cutting edge of weight reduction without sacrificing warmth. That’s lighter than a water bottle, yet it delivers serious insulation for cold-weather hikes. The Therm-a-Rest Z Lite Sol, weighing 14 ounces, offers another lightweight option that never fails because it’s solid foam with no air chambers to puncture.
The trade-off becomes real when you compare these to heavier alternatives. A plush, three-inch-thick air pad might weigh 24 ounces or more and feel like sleeping on a cloud, but those extra ten ounces add up when you’re also carrying food, water, and safety gear through rugged terrain. Backpackers covering serious mileage typically target total sleeping system weights under two pounds, while weekend warriors on easier trails can afford a bit more cushion.
Packability matters almost as much as weight. Air pads compress into stuff sacks smaller than a Nalgene bottle, freeing space inside your pack for essentials. Foam pads like the Z Lite Sol fold accordion-style and strap externally, which works fine but takes up visible real estate on your pack’s exterior.
Durability and Material Construction
Your sleeping pad’s construction determines whether it survives a season or fails you on night two of a remote trip. Three main designs dominate the market: air pads use inflatable chambers for lightweight packability, foam pads rely on closed-cell material that can’t puncture, and self-inflating pads combine open-cell foam with air for a balance of comfort and convenience.
Air pads like the Exped Ultra 6.5R and Nemo Tensor All-Season deliver impressive warmth-to-weight ratios but demand careful handling. A sharp rock or curious raccoon can end your sleep comfort instantly, so inspect your campsite and carry a repair kit. The trade-off is worth it for serious backpackers who need to shave ounces without sacrificing insulation.
Foam pads, including the Therm-a-Rest Z Lite Sol, are virtually indestructible. You can toss them onto glacial moraine, thorny brush, or rough ground without concern. They’re bulkier and less comfortable, but that reliability matters when you’re days from civilization or camping near wildlife corridors where a bear might wander through your gear.
Self-inflating pads split the difference, offering decent durability with better comfort than pure foam. They’re heavier than air pads but more packable than closed-cell options, making them solid choices for car camping or shorter trips where weight isn’t critical.
Comfort and Sleeping Position
Your sleeping position and movement habits matter more than you might think when choosing a hiking pad. Side sleepers need at least three inches of loft to prevent hip and shoulder pressure points from pushing through to the ground, while back sleepers can often get away with two to two-and-a-half inches. If you toss and turn throughout the night, that extra thickness becomes crucial since you’ll be shifting onto different body parts all night.
Pad shape directly affects how well you sleep. Mummy-shaped pads taper toward the feet, shaving precious ounces while still supporting your torso and shoulders where you need it most. Models like the Exped Ultra 6.5R come in mummy configurations that balance weight savings with adequate width for movement. Rectangular pads offer more room to sprawl and shift positions without rolling off the edge, but you’ll pay for that freedom with added weight and bulk in your pack. Some hikers find the tapered mummy shape restrictive, especially if they sleep on their stomach or change positions frequently.
Width matters too. A standard 20-inch pad works for most back and side sleepers who don’t move much, but restless sleepers or those with broader shoulders often prefer 25-inch options to avoid midnight tumbles onto the tent floor.
Choosing the Right Sleeping Pad for Your Hiking Adventures
For Weekend Warriors and Beginner Hikers
If you’re just starting to explore overnight hiking or heading out for weekend trips on well-maintained trails, your sleeping pad choice should balance comfort with simplicity. You don’t need to obsess over every ounce or spend a fortune, but you do want a pad that’ll actually let you wake up refreshed, not sore and regretful.
A good starter pad strikes a middle ground. Look for something with decent insulation (an R-value around 2-3 works for three-season use on most established trails), enough thickness to cushion your hips and shoulders, and a straightforward setup. Self-inflating pads are beginner-friendly because they partly inflate on their own, saving you from huffing and puffing after a long day on the trail. Air pads offer lighter weight and pack smaller, though they require manual inflation.
Weight matters less for weekend trips since you’re not grinding out multi-day expeditions. A pad in the 1-2 pound range gives you comfort without turning your pack into a torture device. Focus instead on getting the basics right: pair your pad with other camping essentials and solid trail food ideas and you’ll set yourself up for success. Test your pad at home first, practice inflation and packing, and you’ll build confidence before hitting those scenic North American trails.
For Serious Backpackers and Multi-Day Expeditions
Serious backpackers tackling multi-day expeditions need pads that balance warmth, weight, and durability without compromise. Routes like the Long Range Traverse or North Coast Trail demand gear that performs night after night across varied terrain, from rocky highlands to coastal forests where wildlife may be active.
For these adventures, prioritize an R-value of 4.0 or higher to handle unpredictable temperature swings at elevation or near water. The Exped Ultra 6.5R offers exceptional warmth at just 12.5 ounces, making it ideal when every ounce counts but cold nights are likely. Alternatively, the Nemo Tensor All-Season Ultralight Insulated delivers solid insulation while packing down small for tight backpack configurations.
Durability matters on extended trips where punctures mean miserable nights. Air pads with ripstop fabrics withstand abrasion better than bargain options, and carrying a lightweight repair kit becomes non-negotiable. Test your inflation method at home so you can set up quickly after exhausting trail days. Your pad is recovery equipment, not luxury, so invest in proven performance that won’t leave you shivering when you’re days from the trailhead.
For Cold-Weather and High-Altitude Adventures
When you’re venturing into mountainous terrain or environments with icebergs and cold conditions, insulation becomes your sleeping pad’s most critical feature. Look for an R-value of at least 5.0 for three-season alpine trips, and 6.0 or higher for winter camping or extreme cold. The Exped Ultra 6.5R stands out here with its R-value of 6.9 while weighing just 12.5 ounces, offering warmth without the bulk that slows you down on steep ascents. Pair your insulated pad with a closed-cell foam option like the Therm-a-Rest Z Lite Sol as extra ground insulation for added protection in harsh environments. Remember that cold ground drains body heat faster than cold air, so skimping on pad insulation compromises both comfort and safety when temperatures drop.
In cold conditions, an insulated sleeping pad helps protect you from frigid ground so you can rest and recover overnight.
Top Hiking Sleeping Pads Worth Considering in 2026
After understanding the features that make a quality hiking sleeping pad, here’s how top 2026 models stack up for different hiking scenarios. These selections represent tested options across the warmth, weight, and budget spectrum, helping you match a pad to your specific adventures.
Model
Weight
R-Value
Price
Best For
Exped Ultra 6.5R
12.5 oz
6.9
$200
Cold weather, year-round
Nemo Tensor All-Season
Ultralight
All-season rated
Mid-range
Three-season versatility
Therm-a-Rest Z Lite Sol
14 oz
Moderate
Budget-friendly
Reliability, no punctures
Klymit Static V Base
Lightweight
Minimal
Entry-level
Summer trips only
The Exped Ultra 6.5R stands out with a category-leading warmth-to-weight ratio, delivering an R-value of 6.9 at just 12.5 ounces for the medium mummy version. At $200, it’s a serious investment that pays dividends when you’re camping near iceberg trails or in high-altitude environments where nighttime temperatures plummet. Available in both mummy and rectangular shapes with various width options, it suits hikers who refuse to compromise between winter warmth and ultralight performance.
For three-season hikers who want versatility without extreme cold-weather specs, the Nemo Tensor All-Season Ultralight Insulated balances insulation, packability, and comfort. It compresses small in your pack yet provides reliable cushioning and temperature regulation across spring through fall conditions, making it ideal for multi-day expeditions where weather can shift.
The Therm-a-Rest Z Lite Sol at 14 ounces offers a different value proposition: bulletproof reliability. This closed-cell foam pad can’t puncture, requires zero inflation, and doubles as a sitting pad during breaks. It’s perfect for beginners learning trail skills or experienced hikers tackling rocky terrain where sharp stones and wildlife encounters make durability paramount. While it sacrifices some comfort compared to air pads, you’ll never worry about a midnight deflation crisis.
Budget-conscious summer hikers gravitate toward the Klymit Static V Base. Its minimal insulation limits use to warm-weather trips, but if you’re exploring established trails during peak season and prioritizing low cost over year-round capability, it gets you on the trail without breaking the bank. Just recognize its limitations before planning shoulder-season adventures or mountainous routes where temperatures drop unexpectedly.
Caring for Your Sleeping Pad on the Trail
Your sleeping pad can handle tough conditions, but a little care goes a long way. Start by choosing your campsite wisely, clear away sharp rocks, sticks, and pinecones before rolling out your pad. Even durable materials appreciate a buffer, so if you’re in particularly rocky terrain or areas with thorny vegetation, lay down a ground cloth or use your sleeping bag’s stuff sack as a protective layer under key pressure points.
Inflation matters more than you’d think. For air pads, avoid over-inflating in cold weather since the air inside will expand as it warms. Use the manufacturer’s recommended method, whether that’s breath inflation, a pump sack, or an integrated valve system, and always close valves tightly before settling in for the night. In the morning, open the valve and gently press out air rather than forcing it, which stresses seams unnecessarily.
Deflation gets easier with a simple trick: start at the opposite end from the valve and slowly roll toward it, squeezing air out as you go. This prevents trapped air pockets that make packing awkward and protects internal baffles from compression damage.
Pack a lightweight repair kit and know how to use it before you need it. Most kits include patches and adhesive that work on trail-side punctures. For foam pads like the Therm-a-Rest Z Lite Sol, tears can be temporarily fixed with duct tape until you’re home. With air pads, locate leaks by listening for hissing or submerging sections in water if you’re near a stream.
Storage at home matters too. Keep your pad loosely rolled or flat in a dry space, never compressed long-term, which degrades materials and insulation. After trips through wildlife country or muddy trails, wipe down your pad before storing to prevent mold and material breakdown.
Your hiking sleeping pad isn’t just another piece of gear to check off a list. It’s the foundation of every sunrise you’ll wake up to see, every trail you’ll conquer with energy to spare, and every memory you’ll make under North America’s vast skies. Whether you’re paddling to remote campsites where icebergs drift past your shore or hiking through valleys where wildlife roams freely, quality rest transforms good adventures into extraordinary ones.
Investing in the right pad means investing in yourself. It means waking refreshed on day three of a backcountry expedition instead of dragging through exhaustion. It means staying warm on alpine ridges and comfortable on rocky ground. Most importantly, it means exploring with confidence, knowing your body gets the recovery it needs to fully experience everything from coastal fog banks to mountain summits.
So choose wisely, pack smart, and sleep well. The trails are waiting, and you deserve to meet them at your best.
You’ve checked your calendar, circled the weekend, and started daydreaming about crackling campfires under star-filled skies. But between the excitement of planning your outdoor escape and actually arriving at your campsite, there’s one crucial step that separates unforgettable adventures from uncomfortable disasters: packing the right gear.
Forgetting your headlamp means stumbling through darkness. Missing a water filter could leave you dangerously dehydrated. And trust me, realizing you left your tent poles at home ranks among the most deflating moments in outdoor recreation. I’ve watched fellow campers turn back within hours because they overlooked essentials, and I’ve experienced my own learning moments that taught me why systematic packing matters.
Whether you’re planning a backcountry expedition along iceberg trails in Newfoundland or a family camping trip near your favorite kayaking launch point, the fundamentals remain the same. You need shelter from the elements, reliable food and water systems, appropriate clothing for changing conditions, and safety equipment that could literally save your life.
This comprehensive camping checklist breaks down everything you’ll need into organized categories, from the absolute non-negotiables like first aid supplies to the comfort items that transform a rough night into a restorative experience. We’ll cover the gear that protects you during unexpected wildlife encounters, the tools that make camp setup efficient, and the specialized equipment for paddlers who combine camping with water adventures.
By following this structured approach, you’ll pack with confidence and focus on what really matters: connecting with nature and creating memories that last far longer than any gear.
Why a Systematic Camping Checklist Makes or Breaks Your Trip
The difference between a well-planned camping trip and a frustrating ordeal often comes down to what you remembered to pack before leaving your driveway. When you’re three hours into a backcountry paddle or halfway up a remote trail, discovering you’ve forgotten your water filter, sleeping pad, or headlamp transforms an adventure into a survival challenge.
Organized packing matters even more when you’re combining activities. A kayaking-and-camping expedition requires you to balance waterproofing needs with weight restrictions, while a hiking trip demands careful consideration of every ounce in your pack. In North American wilderness areas where the nearest store might be a full day’s travel away, forgotten essentials can’t simply be replaced with a quick shopping run.
This is exactly why Parks Canada and the National Park Service advocate for systematic, category-based packing approaches. The Parks Canada camping checklist organizes gear into logical groups rather than presenting a random jumble of items. This method ensures you think through each aspect of camp life: shelter and bedding, cooking systems, clothing layers, safety equipment, and activity-specific gear.
The category approach works because it mirrors how you’ll actually use your gear in the field. You don’t just need “stuff”, you need a complete sleep system, a functional cooking setup, and adequate clothing for changing conditions. Breaking your packing list into these organized categories helps you spot gaps before you’re stuck dealing with the consequences miles from civilization. It’s the difference between confidently exploring and nervously wondering what critical item you left behind.
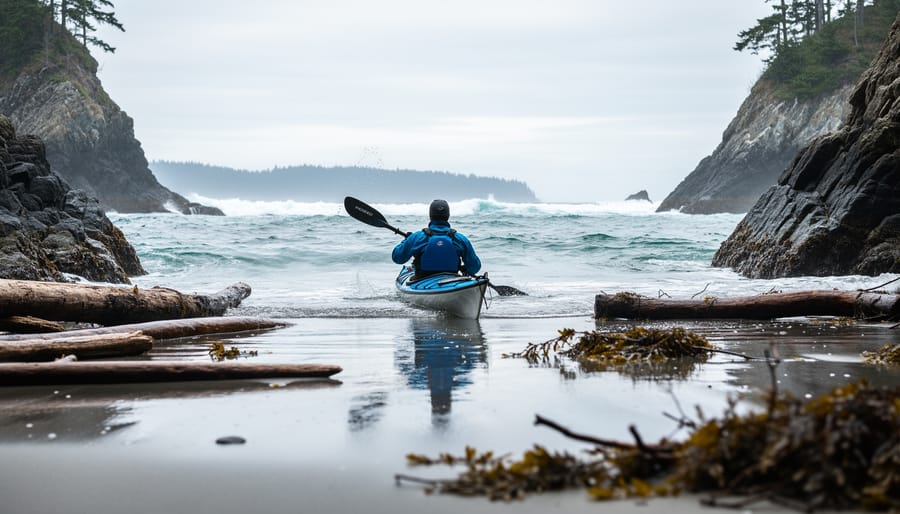
A tidy spread of key camping essentials on a campsite table shows how category-based packing reduces last-minute scrambling.
Shelter and Sleep System Essentials
A waterfront tent setup with sleep gear highlights the shelter-and-sleep essentials needed for comfortable nights outdoors.
Choosing Between Tents and Hammocks
The shelter decision shapes everything else you pack. Tents remain the standard choice for good reason, they offer protection from insects, wildlife, and weather while providing a stable base for organizing gear. They work in any environment, from sandy beaches to rocky mountain sites, which matters when you’re exploring diverse North American landscapes.
Waterproof hammocks, as noted in NPS tent or hammock options guidance, appeal to minimalist campers who value quick setup and weight savings. For kayak camping specifically, a quality hammock system can cut several pounds from your load, critical when every ounce counts in a packed boat. You’ll need sturdy trees spaced correctly, which isn’t guaranteed at waterfront campsites.
Consider your typical camping terrain. Coastal paddling trips to exposed sites? A tent handles wind and provides sand-free storage. Forested river routes with established tree cover? A hammock might deliver better sleep and faster camp breakdown. Many experienced adventurers keep both options ready, choosing based on the specific trip ahead. Your shelter method determines what else makes your essentials list, from ground tarps to suspension systems.
Sleep Comfort Gear That Actually Matters
Your sleep system can transform an otherwise miserable night into genuine rest, which makes all the difference when you’re exploring remote trails or paddling across lakes the next day. A quality sleeping bag paired with the right sleeping pad matters far more than most campers realize.
Temperature ratings are your first consideration when selecting a sleeping bag. North American camping seasons vary dramatically, coastal British Columbia in summer sits worlds apart from a Colorado mountain trip in early October. Choose a bag rated 10 to 15 degrees Fahrenheit below the coldest temperature you expect to encounter. A 20-degree bag works well for summer trips across most regions, while a zero-degree option handles shoulder seasons in alpine areas. Down insulation packs smaller and weighs less than synthetic fills, making it ideal for kayak camping where space is tight, but synthetic materials retain warmth when wet, a critical advantage in humid coastal environments.
Sleeping pads serve two essential functions beyond simple cushioning. They insulate you from cold ground that will sap your body heat faster than any night air. Look for pads with an R-value of 2 to 3 for summer camping, 4 to 5 for three-season use, and above 5 if you’re venturing into colder conditions. Inflatable pads offer the best comfort-to-weight ratio for backpackers and kayakers, while foam pads never fail and double as sitting pads around camp.
A camping pillow completes the system. Compressible pillows take minimal space and provide real neck support, though an inflatable version weighs next to nothing if you’re counting ounces.
Cooking and Food Storage Gear
Your camp kitchen determines whether you’ll enjoy hot, satisfying meals or resort to snacking on granola bars for three days. A portable stove forms the core of your cooking setup, canister stoves work well for quick boils and trail-friendly meals while liquid fuel models perform better in cold weather at higher elevations. Pack a basic cookware set with at least one pot and one pan, a spatula, a sharp knife, cutting board, and enough utensils for everyone in your group.
Don’t overlook the less obvious items that prevent mealtime frustration: aluminum foil, resealable bags, biodegradable soap, a sponge, and dish towels. Bring matches or a lighter in a waterproof container, plus a backup fire starter. A collapsible water container saves repeated trips to the source, and water purification tablets or a portable filter ensure you stay hydrated safely throughout your trip.
Food storage requires serious attention in bear country across North America. Hard-sided bear canisters provide the most secure option for backcountry camping, while car campers should use bear-proof coolers or store food in a vehicle’s trunk. Never keep food, toiletries, or scented items in your tent. Hang food at least 12 feet high and 6 feet from tree trunks where bear canisters aren’t feasible, though this method offers less protection than hard containers.
For kayak camping, prioritize lightweight, compact gear that fits in dry bags. Dehydrated meals reduce weight and pack volume considerably. A small titanium pot and a canister stove weigh under a pound combined, leaving room for essentials without overloading your boat. Plan your menu before packing so you bring exactly what you need, no excess weight, no forgotten ingredients.
Clothing and Personal Gear for All Conditions
The difference between staying comfortable and cutting your trip short often comes down to smart clothing choices that match North American weather extremes. A proper layering system starts with moisture-wicking base layers that pull sweat away from your skin, adds insulating mid-layers like fleece or down for warmth, and finishes with waterproof-breathable outer shells to block wind and rain. This three-layer approach lets you adjust quickly as temperatures shift from chilly mornings to warm afternoons, or when you transition from day hike packing to waterfront camping.
Your footwear deserves careful thought. Broken-in hiking boots with ankle support handle rocky trails, while quick-dry water shoes or sandals work better for launching kayaks and navigating shorelines. Pack both if your trip mixes activities. Rain gear is non-negotiable across most North American camping destinations, get a quality waterproof jacket and pants rather than a cheap poncho that tears after one use.
Tip: Pack an extra mid-layer and waterproof shell even if forecasts look clear, especially near coastal areas or mountain elevations where conditions change fast.
Sun protection matters year-round. Bring a wide-brimmed hat, UV-protective sunglasses, and reef-safe sunscreen rated SPF 30 or higher. Reflective water surfaces double sun exposure during kayaking, making these items critical rather than optional.
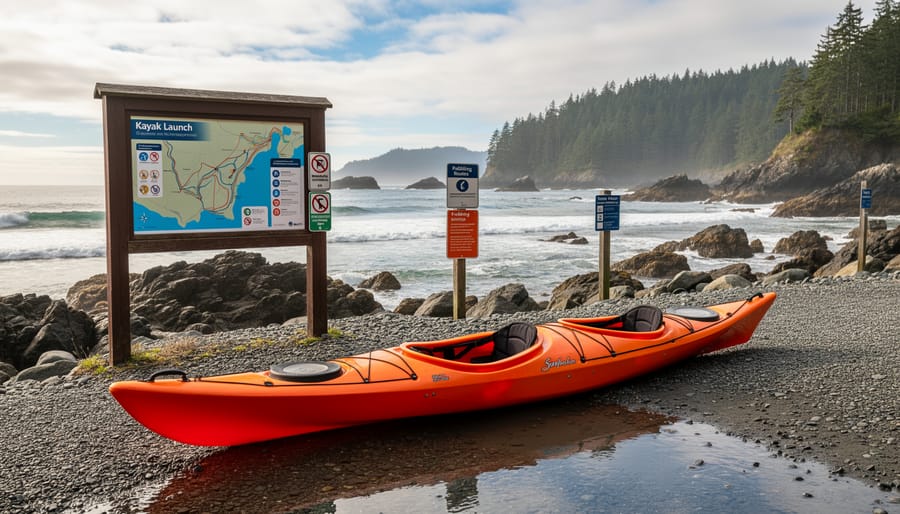
Personal items round out your clothing system: extra socks (wool or synthetic, never cotton), underwear, a warm hat for cold nights, gloves if camping in shoulder seasons, and a lightweight camp outfit separate from your active gear. Quick-dry fabrics beat traditional cotton in every scenario because wet cotton steals body heat and takes forever to dry. The unpredictable weather common across Canadian coastlines and mountain regions rewards campers who pack versatile, performance-oriented clothing that handles moisture and temperature swings without adding excessive bulk to your pack.
Navigation, Safety, and Emergency Essentials
Emergency essentials laid out in a natural setting emphasize readiness and peace of mind for remote camping areas.
First Aid and Health Supplies
A well-stocked first aid kit isn’t optional when you’re miles from the nearest hospital. Start with wound care basics: adhesive bandages in multiple sizes, gauze pads, medical tape, and antiseptic wipes. Pack antibiotic ointment, pain relievers like ibuprofen and acetaminophen, and antihistamines for allergic reactions. Include tweezers for splinters, scissors, and a digital thermometer.
For multi-day trips in remote areas, add blister treatment supplies (moleskin and specialized bandages), an elastic bandage for sprains, and any prescription medications you need, always bring extras. Sunscreen and insect repellent prevent problems before they start, especially in coastal regions where sun exposure intensifies off the water.
Consider your specific adventure when customizing your kit. If you’re tackling challenging terrain similar to your North Coast Trail gear setup, add items for treating more serious injuries: a SAM splint, irrigation syringe for wound cleaning, and perhaps a wilderness medicine guide. Include any personal items like EpiPens, inhalers, or prescription glasses backups. Store everything in a waterproof container clearly marked for easy identification during emergencies.
Navigation and Communication Tools
Even with your phone’s GPS and mapping apps, backcountry camping demands dedicated navigation tools that work without cell service or battery power. A paper map of your specific camping area paired with a compass gives you reliable navigation when electronics fail, which matters most when you’re paddling remote coastlines or hiking trails far from help.
Start with topographic maps showing your camping area and surrounding terrain. Download offline maps to your phone as a backup, but carry the physical versions as your primary resource. A basic baseplate compass doesn’t need batteries and works in any weather, and learning to use it takes just 30 minutes of practice before your trip.
GPS devices designed for backcountry use offer more durability than phones and often include features like waypoint marking and track recording. Many experienced campers carry a handheld GPS unit alongside their map and compass, creating redundancy that keeps them oriented during weather changes or unexpected detours.
Emergency communication tools become critical when camping beyond cell coverage. A whistle carries farther than your voice and uses zero energy, making it essential for signaling your location if you become separated from your group. Three short blasts is the universal distress signal. For longer trips or remote locations, consider a personal locator beacon or satellite messenger that can summon help when you truly need it, though these add weight and cost to your pack.
Test all navigation tools before leaving home. Know how to read your map’s contour lines, take a bearing with your compass, and activate your emergency devices so you’re not fumbling with unfamiliar gear when conditions turn serious.
Lighting, Tools, and Camp Comfort Items
After you’ve secured shelter and packed safety gear, the small items often separate comfortable camps from frustrating ones. The right lighting, tools, and organizational gear transforms your campsite into a functional outdoor home without overloading your kayak or backpack.
**Illumination for Every Camp Task**
A headlamp serves as your primary light source because it keeps both hands free for cooking, setting up tents after dark, or navigating to the latrine at midnight. Pack one with adjustable brightness settings and a red-light mode that preserves night vision during wildlife encounters. Battery life matters more than maximum lumens for multi-day trips, so bring spare batteries or a USB rechargeable model with a backup power bank.
A hanging lantern creates ambient light for the communal camp area and makes evening meals far more pleasant. Collapsible LED lanterns pack small yet illuminate large spaces, perfect for coastal campsites where you’re telling stories after paddling all day. Some models double as phone chargers, adding practical value beyond simple lighting.
Multi-tool
A compact device combining pliers, knife blades, screwdrivers, and other implements into one portable unit, essential for gear repairs and food prep at remote campsites.
Paracord
Lightweight, versatile rope rated for high tensile strength, used for securing tarps, hanging food bags away from wildlife, creating clotheslines, and emergency repairs.
Repair kit
A collection of patches, adhesives, duct tape, and sewing supplies designed to fix torn tents, sleeping pads, or clothing in the field before small problems become trip-enders.
**The Tools That Save Your Trip**
A quality multi-tool handles everything from cutting rope to tightening loose kayak hardware. Choose one with pliers, a sharp blade, scissors, and basic screwdrivers. These solve problems you didn’t know you’d have until you’re an hour from the nearest trailhead.
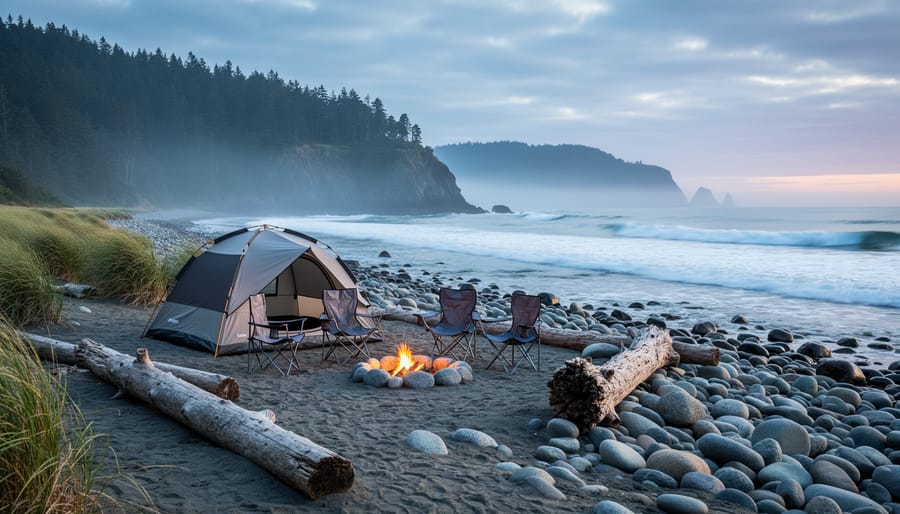
Duct tape and a basic repair kit fix torn raingear, punctured sleeping pads, and broken tent poles. Wrap duct tape around a water bottle or trekking pole to save space rather than carrying the full roll. Add fabric patches, super glue, and safety pins for comprehensive field repairs.
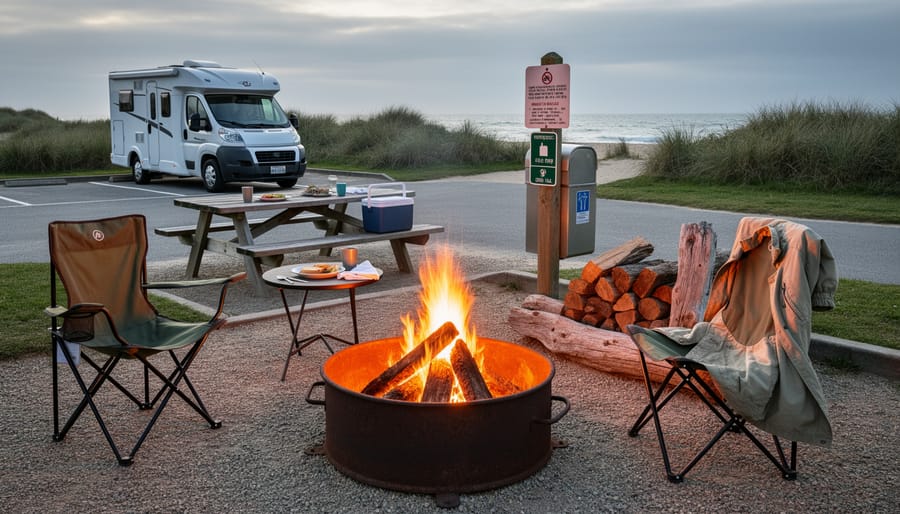
Fifty feet of paracord weighs almost nothing yet handles countless camp tasks. String a bear bag, create a drying line for wet kayaking gear, secure a loose tarp, or replace broken tent guylines. The versatility justifies the minimal pack space.
**Comfort Items Worth Their Weight**
Stuff sacks and dry bags organize gear by category, making items easy to find without dumping your entire pack. Color-code by contents so you grab the cooking bag instead of the clothing bag when hunger strikes after a long paddle.
A camp chair isn’t essential, but sitting comfortably around the fire beats perching on logs for hours. Lightweight, compact models designed for backpackers fold smaller than a water bottle yet support your back during those long evenings under North American skies.
Water Sports and Kayaking-Specific Add-Ons
When you’re paddling out to a remote campsite or exploring coastal waters before settling in for the night, standard camping gear doesn’t cut it. Water-based adventures demand specialized equipment that keeps your essentials dry, keeps you safe on the water, and ensures you can transition smoothly between kayaking and camping.
Start with a reliable dry bag system. Unlike regular stuff sacks, proper dry bags create watertight seals that protect sleeping bags, clothing, electronics, and food during water crossings or sudden rain. Many kayak campers use multiple smaller dry bags (10-20 liters) instead of one large bag, making it easier to organize gear and distribute weight in your kayak’s hatches.
Your personal flotation device isn’t optional, it’s essential. Even strong swimmers need a properly fitted PFD when kayaking to campsites, especially in areas with cold water temperatures or unpredictable currents. Keep it accessible at all times, not buried under camping gear.
Paddle-specific items often get forgotten when planning camping trips. A spare paddle breakdown can end an adventure quickly, particularly on multi-day trips far from marinas or outfitters. A bilge pump and sponge handle the inevitable water that enters your kayak, while a spray skirt keeps waves from soaking you during choppy conditions.
Waterproof cases for phones, maps, and GPS devices protect your navigation and communication tools. Standard ziplock bags work in calm conditions, but dedicated waterproof cases with lanyards prevent devastating losses if items go overboard.
Finally, consider a waterproof headlamp and quick-dry towel. Regular camping headlamps work until they get soaked during an evening paddle or rainstorm. Microfiber towels dry rapidly between water activities and pack smaller than traditional cotton options, leaving more room for the camping essentials that make waterfront sites comfortable.
Cooking near the kayak shows how shelter, food gear, and water-friendly organization work together on combined camping and paddling trips.
Organizing Your 100+ Item Checklist by Category
A comprehensive camping essentials list can seem overwhelming when you’re staring at over 100 items, but the category-organized approach recommended by Parks Canada and outdoor experts transforms chaos into clarity. Instead of frantically scanning a massive list the night before departure, you’ll work through logical groupings that match how you actually pack and use your gear.
Start by organizing items into major categories: shelter and bedding, cooking and food storage, clothing and personal gear, navigation and safety, lighting and tools, and water sports equipment if you’re kayaking. This mirrors the system used by the National Park Service in their camping guidance and ensures you won’t skip entire gear types. Within each category, further divide items by priority: must-haves like your tent and sleeping bag, important items like extra batteries and repair kits, and nice-to-haves like camp chairs or portable speakers.
Customize your checklist based on three key factors. First, trip duration determines quantities, a weekend trip needs fewer clothing changes than a week-long adventure. Second, location matters enormously. Camping near iceberg trails in Newfoundland demands different clothing layers than a summer lakeside trip in Ontario. Third, your activities shape the list. Combining camping with kayaking adds dry bags, PFDs, and paddle gear that car campers skip entirely.
Print or save your organized checklist digitally, then check items off as you pack them into specific bags or containers. This systematic approach catches forgotten essentials before you’re hours from the nearest outfitter.
Pre-Trip Checklist Strategy for Beginners to Experienced Campers
Start packing three to five days before your trip, not the night before. This gives you time to notice gaps, test gear, and make relaxed decisions instead of frantic last-minute compromises.
Your first step is personalizing your base checklist. Print or download a comprehensive camping essentials list, like the organized categories used by Parks Canada or the 100+ item approach verified by outdoor experts for 2026, then cross off what doesn’t apply and add trip-specific items. If you’re kayaking the coast, that means dry bags and PFDs. Heading to bear country? Extra bear spray and food canisters. Tailor the template to your actual adventure, not someone else’s.
Next, do a living room trial run. Set up your tent, inflate your sleeping pad, test your stove, and run through your entire camp routine at home. You’ll discover broken zippers, missing poles, and dead batteries when you can still fix them. First-timers often skip this step and regret it; experienced campers do it religiously.
As you pack, use this verification routine to catch everything:
Lay out all gear by category in separate piles, shelter, cooking, clothing, safety, tools.
Check each item against your printed checklist, marking it off physically as you confirm it works.
Pack the items you’ll need first (rain gear, headlamp) on top or in accessible pockets.
Do a final walkthrough 24 hours before departure, running through your entire checklist one more time.
Take a photo of your packed gear for future reference and improvement.
Experienced campers refine this system trip after trip. Keep notes on what you forgot, what you never used, and what saved the day. Your personal camping essentials list becomes smarter with each adventure, eventually tailored perfectly to how you camp, where you go, and what matters most for your North American wilderness experiences.
With your comprehensive checklist in hand, you’re ready to tackle any North American camping adventure with confidence. Whether you’re planning a weekend at CAMPING Chenal Du Moine or preparing for a multi-day kayaking expedition along coastal trails, systematic packing transforms stress into excitement. Your personalized essentials list isn’t just about avoiding forgotten items, it’s about freedom to focus on what really matters: sunrise paddles, wildlife encounters, and the pure joy of sleeping under the stars.
Take this category-organized approach and make it yours. Adjust for your specific destinations, add those personal comfort items that enhance your experience, and delete what doesn’t serve your adventure style. Every camping trip teaches you something new about what you truly need versus what weighs you down.
The wilderness is waiting, and you’ve got everything covered. Pack smart, stay safe, and get out there.
The best camping meals come together in under 20 minutes and require nothing more than a single pot or skillet. After years of navigating everything from multi-day iceberg trail paddling expeditions to weekend wilderness getaways, I’ve learned that elaborate cooking has no place at the campsite when you’re exhausted from a full day outdoors.
Smart campers prep ingredients at home. Chop vegetables, pre-mix spice blends, marinate proteins, and pack everything in labeled containers before you leave your driveway. This single strategy cuts cooking time in half and keeps you from dealing with messy prep work when all you want is hot food and a campfire.
Foil packet meals solve the eternal camping dilemma of limited cookware and tedious cleanup. Wrap seasoned chicken with potatoes and peppers, seal it tight, and toss it directly onto hot coals for 15 minutes. You get a complete dinner with zero dishes to scrub in the dark.
One-pot breakfasts like skillet scrambles or overnight oats give you fuel without fuss. Combine eggs, pre-cooked sausage, and cheese in a cast iron pan, or let oats soak overnight in a mason jar with dried fruit and nuts. Both options leave you more time to hit the trails instead of babysitting a camp stove.
The camping meals that work best are the ones you’ll actually make when you’re tired, hungry, and surrounded by curious wildlife. Forget Instagram-worthy spreads. Focus on food that tastes great, comes together fast, and uses ingredients that won’t spoil in your cooler.
Why Easy Camping Food Matters for Outdoor Adventures
You’ll burn thousands of calories on a full day of paddling or hiking, and your body needs real fuel to keep going. The difference between a satisfying meal and mediocre trail food isn’t just taste, it’s your energy level at mile seven, your recovery overnight, and whether you’re excited to get back out there the next morning or dragging yourself from the tent.
Smart camping food planning directly impacts how much adventure you fit into your day. When breakfast takes five minutes instead of thirty, you’re on the water catching sunrise light across iceberg trails. When dinner doesn’t require constant stirring or monitoring, you spend that time exploring the shoreline or watching wildlife instead of hunched over a camp stove. The right meals deliver proper carbohydrate for exercise without weighing down your pack or killing your momentum.
Note: The best camping meals balance calorie density, preparation simplicity, and genuine enjoyment, you need all three for multi-day wilderness trips.
Weight matters when you’re portaging a kayak or climbing elevation. Every ounce you carry affects your pace and endurance. Strategic food choices let you pack lighter while eating better, pancake mix in a sealed pitcher weighs far less than individual packages, pre-cracked eggs in a bottle eliminate fragile cartons, and smart ingredient selection means fewer items taking up precious pack space.
Active outdoor enthusiasts need more than survival rations. You’re not just feeding yourself; you’re fueling serious physical output in conditions that demand reliable energy. Proper meal planning transforms camping from an endurance test into something you genuinely look forward to, where good food becomes part of the adventure rather than an afterthought between paddles.
Smart Prep-Ahead Strategies for Camp Cooking
The difference between fumbling with ingredients at your campsite and enjoying a smooth cooking experience comes down to what you do at home before you leave. Smart prep work transforms camping meals from frustrating chores into quick wins that let you spend more time on the water or trails.
Start with your protein. If scrambled eggs are on your breakfast menu, crack them at home and pour them into a sealed bottle or shaker container. This eliminates the nightmare of carrying fragile egg cartons through rugged terrain and gives you pour-ready eggs that cook faster. A good squeeze bottle works perfectly and takes up less space in your cooler than a dozen-egg carton.
Pre-mixing dry ingredients saves significant time and mess at camp. You can store pancake mix in a pitcher with a tight-sealing lid, keeping the powder ready until you add water at your campsite. This approach works for any dry mix you’d normally prepare from scratch. Just label your containers clearly so you’re not guessing what’s inside when you’re hungry after a morning paddle.
Fruit prep deserves attention too. Pre-cut all your produce at home except bananas, which brown too quickly when sliced early. Watermelon, cantaloupe, pineapple, grapes, and berries all travel well when washed, chopped, and stored in sealed containers. You’ll thank yourself when you can grab a handful of ready-to-eat fruit instead of wrestling with a knife on an uneven camp table.
For multi-day trail prep portion your meals into individual servings before leaving home. Pre-measure spices, sauces, and condiments into small containers or bags rather than hauling full bottles. Consider marinating meat before freezing it in zip-top bags, the frozen blocks act as extra cooler ice while they thaw, and your protein arrives pre-seasoned.
The prep-ahead approach extends to creative solutions like bringing tubes of crescent rolls for versatile meal options. These refrigerated doughs need cool storage but reward you with fresh-baked taste that elevates camp cooking beyond typical trail fare.
Prep-ahead ingredients staged at home make campsite cooking faster, simpler, and less stressful on travel days.
Easy Breakfast Ideas to Fuel Your Morning Paddle
A vibrant camp cooking setup by the water shows how quick, satisfying meals can fit right into an active kayaking day.
Pancakes Made Simple
The humble pitcher transforms pancake mornings from frustrating measuring sessions into pour-and-cook simplicity. At home, measure your dry pancake mix and transfer it directly into a sturdy pitcher with a tight-sealing lid. This pre-portioning eliminates the need to haul bulky boxes or fumble with measuring cups at the campsite while keeping the powder completely dry during transport.
When breakfast time arrives, add the required water directly to the pitcher, secure the lid, and shake vigorously until the batter reaches your preferred consistency. The spout design gives you precise control over portion sizes as you pour onto your camp griddle or skillet, preventing the messy drips and spills that come with scooping batter from bowls or bags. This method works equally well whether you’re cooking over a propane camp stove or balancing a pan on grate bars above your campfire.
Choose a pitcher with measurement markings on the side so you can accurately gauge water amounts without additional tools. The container pulls double duty too, after breakfast cleanup, it stores leftover batter for the next morning or serves as a general-purpose camp pitcher for mixing drinks or storing water.
Egg-Based Morning Fuel
Forget the hassle of babying a cardboard carton through your gear, eggs make the trip much better when you crack them at home and pour them into a sealed water bottle or camping-friendly container. This simple trick eliminates the worry of crushed shells in your backpack and gives you ready-to-cook scrambled eggs that just need a quick shake before hitting the pan.
A standard 16-ounce bottle holds about six to eight eggs, perfect for feeding a small group after a morning paddle. Add a pinch of salt and pepper before sealing if you want, or keep it plain and season at camp. The sealed bottle protects your food from the bumps of trail hiking and keeps everything contained if you’re storing it in a cooler with ice packs.
When you’re ready to cook, give the bottle a vigorous shake to mix the yolks and whites thoroughly. Pour straight into your heated skillet over the campfire or portable stove, scrambling as usual. Clean the bottle afterward and you’ve got a container ready for the next adventure, no fragile packaging required.
Quick Grab-and-Go Options
Pre-cut fruit salads save precious morning minutes when you’re eager to launch your kayak at sunrise. Package strawberries, melon chunks, grapes, and apple slices in sealed containers the night before (skip bananas until morning to prevent browning). Hard-boiled eggs peeled at home, individual nut butter packets, and whole-grain muffins wrapped in foil become substantial day hike meals that require zero campsite prep. Granola mixed with dried cranberries and almonds in resealable bags offers crunchy energy you can eat straight from the container while breaking down your tent, keeping you fueled for whatever wilderness adventures await.
Satisfying Dinner Solutions After a Day on the Water
After spending the day paddling through cold waters or navigating rocky terrain, your body craves real food that delivers warmth and substance. Dinner is your chance to refuel completely, and the right approach means satisfying meals without turning your campsite into a complicated outdoor kitchen.
One-pot meals are the foundation of smart camp cooking because they minimize cleanup while maximizing flavor. A simple chili starts with browning ground beef or turkey in your camp pot, then adding canned beans, diced tomatoes, and a packet of seasoning, everything cooks together in under 30 minutes. Pasta dishes work equally well: boil your noodles, drain most of the water, then stir in jarred sauce and pre-cooked sausage you sliced at home. The key is choosing ingredients that don’t require refrigeration and can handle being transported in your pack or dry bag.
Those crescent roll tubes mentioned for breakfast pull double duty at dinner. Wrap the dough around hot dogs for pigs in a blanket, stuff them with pre-cooked ground meat and cheese for makeshift empanadas, or roll them into spirals around a skewer for campfire breadsticks. The dough stays stable for a couple days in cool weather and cooks perfectly over coals or on a camp stove griddle.
Consider organizing your trail dinner ideas by cooking method to match your setup each night:
Campfire options: foil packet meals with chicken, potatoes, and vegetables; skewered kebabs with pre-marinated meat; Dutch oven cornbread
Portable stove meals: ramen upgraded with dehydrated vegetables and an egg; instant rice with canned chicken and seasoning packets; mac and cheese with added tuna
No-cook backup dinners: tortilla wraps with peanut butter and honey; bagels with cream cheese and smoked salmon; trail mix combined with dried fruit for calorie-dense grazing
The meals that work best after wildlife encounters or long paddling days are the ones you can prepare mostly on autopilot. Pre-measure spices into small bags at home, portion out ingredients into daily bundles, and choose recipes where “cooking” means mostly just heating and combining. You’ll spend less time hovering over a stove and more time enjoying the fact that you’re eating hot food under open sky, which somehow tastes better than anything you’d make in a full kitchen anyway.
A cast-iron skillet dinner over the campfire shows how hearty trail meals can be simple and incredibly flavorful.
Fast Snacks and Quickie Lunches for Trail Days
When you’re mid-paddle or halfway up a trail and hunger hits, you need food that doesn’t slow you down. The best trail snacks and lunches work without refrigeration, require zero preparation, and can be eaten with one hand while you’re perched on a rock watching for wildlife.
Trail mix remains unbeatable because you can customize it before you leave home. Toss together nuts, dried cranberries, chocolate chips, and whatever else sounds good, then portion it into resealable bags. Jerky works the same way, it’s protein-dense, doesn’t spoil, and fits anywhere in your pack. Pair either with whole apples or oranges, which handle bumps better than softer fruit and don’t need cutting.
Peanut butter is your secret weapon for midday energy. Spread it on tortillas, crackers, or sturdy bread, then roll or stack them in wax paper. These keep for hours and deliver fat and protein when you’re starting to fade. If you’re feeling fancy, add honey or banana slices before wrapping. String cheese and summer sausage round out the protein options, both travel well without ice if you’ll eat them within a day or two.
For something more substantial, build simple wraps the morning you’ll eat them. Spread cream cheese on a tortilla, layer deli meat and pre-cut veggies, roll tight, and slice into pinwheels. Wrap them in foil and they’ll stay together in your dry bag until lunch. Crackers and hummus packets make another solid combination, the single-serve pouches eliminate the mess of transporting an open container.
Granola bars and energy bars seem obvious, but they’re obvious for good reason. They don’t melt (usually), don’t crumble easily, and you can eat them while kayaking without creating a situation. Stock a variety because you’ll get sick of the same flavor by day three of any backcountry trip.
Campfire Treats Worth the Effort
After mastering breakfast and dinner, it’s time for the reward that makes everyone gather around the fire. Campfire cones deliver that nostalgic sweet fix with way more excitement than standard s’mores, and they’re ridiculously simple to pull off after a long day paddling or hiking.
Grab waffle cones before your trip and stuff them with whatever sounds good: chocolate chips, mini marshmallows, peanut butter, and chopped fruit like bananas create a melted, gooey treat that beats stale graham crackers every time. The cone acts as both bowl and wrapper, which means zero cleanup and maximum fun.
Fill each waffle cone about two-thirds full with your chosen mix of chocolate chips, marshmallows, peanut butter, and fruit.
Wrap the stuffed cone completely in aluminum foil, crimping the edges to seal it tight.
Place the wrapped cone at the edge of your campfire coals, not directly in flames, for about five minutes.
Rotate the cone once or twice with tongs to heat evenly without burning.
Carefully unwrap the foil (it’ll be hot), and let the cone cool for a minute before eating straight from the crispy shell.
Banana boats offer another foolproof option. Slice a banana lengthwise without cutting all the way through, stuff the gap with chocolate chips and marshmallows, wrap in foil, and warm over coals for about five minutes. The banana turns soft and warm, creating a natural bowl for melted toppings.
For groups with adventurous eaters, try cinnamon sugar tortillas. Spread butter on a flour tortilla, sprinkle with cinnamon and sugar, roll it up, wrap in foil, and warm by the fire until the sugar caramelizes slightly. Simple, portable, and satisfying after watching wildlife or navigating iceberg trails all day.
Packing and Storage Tips for Wilderness Trips
Organizing your food properly makes the difference between a smooth wilderness adventure and a frustrating scramble through soggy bags at dinnertime. Whether you’re paddling past icebergs or setting up camp after a full day on the trails, smart packing keeps your meals accessible and your energy high.
Start with rigid containers for fragile items. That pitcher you’re using for pancake mix doubles as protective storage during transport, and sealed bottles for pre-cracked eggs prevent the mess of broken shells in your pack. Hard-sided containers protect items like fruit salads and pre-cut produce from getting crushed under sleeping bags and gear. Place these containers in the center of your pack or dry bag, surrounded by softer items like clothing that cushion impacts.
Weight distribution matters more on multi-day trips. Pack heavier food items closer to your back and centered between your shoulder blades for hiking comfort. In kayak dry bags, position denser foods low and toward the center of the bag to maintain proper balance on the water. Keep the first day’s meals and snacks near the top for easy access, saving freeze-dried or lighter options for later in the trip when you’ve consumed the heavier fresh ingredients.
Wildlife protection requires serious attention in North American wilderness areas. Bear canisters are mandatory in many backcountry zones and worth carrying even where optional. If you’re exploring areas like Camping Chenal Du Moine check specific wildlife protocols before departure. Never store food in your tent or leave it unsecured at camp. Hang food bags at least 12 feet high and 6 feet from tree trunks when bear canisters aren’t available, or use designated food lockers where provided.
Separate your cooking items from your sleeping area by at least 100 yards. Store anything with a scent, including toothpaste and sunscreen, alongside your food supplies rather than near where you sleep.
The difference between a memorable wilderness adventure and one you’re counting down to finish often comes down to the meals. When you’re paddling past towering icebergs or settling into camp after miles on the trail, satisfying food transforms the experience from endurance test to genuine enjoyment. These easy camping food ideas aren’t about gourmet complexity, they’re about fueling your body properly so you can focus on what matters: spotting wildlife, exploring hidden waterways, and soaking in North American landscapes that few people ever see.
The prep-ahead strategies, simple breakfast solutions, and creative campfire treats covered here work because they respect your time and energy. You didn’t travel to remote wilderness areas to spend hours cooking over a camp stove. You came to paddle, hike, and explore. Smart food planning means more sunrises on the water and fewer nights wondering why you bothered hauling ingredients you never used.
Start small on your next trip. Try the pancake pitcher method or crack those eggs into a sealed bottle before you leave home. Experiment with campfire cones after a long day on the trail. Each small improvement compounds, turning camping meals from something you tolerate into something you actually look forward to. The wilderness tastes better when you’re eating well, and these straightforward approaches prove you don’t need to sacrifice flavor for simplicity. Your next adventure deserves better than soggy sandwiches and survival rations, pack smarter, eat better, and make every moment count.
Reserve your French Beach Provincial Park campsite through Discover Camping (discovercamping.ca) starting exactly two months before your arrival date at 7:00 AM Pacific Time. Competition is fierce during summer weekends, so log in early with your BC Parks account already set up and payment details ready. The park offers 69 campsites along Vancouver Island’s stunning Juan de Fuca Strait, about 20 kilometers west of Sooke, and they fill within minutes during peak season.
No special permits are required beyond your campsite reservation for beach access and day use. If you’re planning to paddle here, launch from nearby Possession Point in Parry Bay instead of directly from French Beach. The main beach faces southwest into the strait where strong currents and unpredictable conditions create serious hazards even for experienced kayakers. Park staff consistently warn against launching from the campground beach.
Check current conditions before you arrive. Wildlife encounters here include bald eagles, harbor seals, and during migration season, gray whales visible from shore. The beach’s dramatic driftwood-strewn shoreline and accessible tide pools make it perfect for families, but respect the ocean’s power. Waves here can surge unexpectedly.
Book your 2026 dates now if you’re eyeing July or August visits. The system releases inventory on a rolling basis, so a September trip becomes bookable in early July. Set calendar reminders, because missing that 7:00 AM window often means missing out entirely. French Beach delivers that rare combination of easy accessibility from Victoria and genuine coastal wilderness, making advance planning absolutely essential.
Understanding French Beach Park: Location and Access
French Beach Park sits along Vancouver Island’s spectacular southwest coast, roughly 70 kilometres west of Victoria. You’ll find it on Highway 14, the scenic coastal route between Sooke and Port Renfrew, making it an accessible escape for anyone craving ocean views without venturing to the island’s more remote reaches. The park occupies a prime stretch of the Strait of Juan de Fuca where the Pacific meets the island in a dramatic display of rocky headlands and sandy shore.
Getting there is straightforward. From Victoria, head west on Highway 1, then merge onto Highway 14 toward Sooke. Continue past the town of Sooke for about 20 kilometres, and you’ll spot the park entrance on your right. From Sooke itself, it’s a quick 15-minute drive. The main highway runs directly through the park, so you won’t miss it.
What sets French Beach apart is its position as a year-round coastal retreat that balances convenience with wild beauty. Unlike Victoria’s manicured parks or the remote wilderness areas farther up-island, French Beach gives you immediate ocean access combined with vehicle-accessible camping facilities. The park’s oceanfront location means you can pitch your tent steps from tidal pools and sunset views, yet you’re close enough to Sooke to grab supplies if you’ve forgotten something.
The campground backs onto old-growth forest while the beach itself stretches in both directions, offering tide pooling, beachcombing, and that rare feeling of having found something special without driving all day. Strong currents define the waters here, this is the Pacific, after all, which shapes how visitors experience the park. The coastline is made for walking, not swimming, and the lack of boat launch facilities reflects the challenging marine conditions that characterize this particular stretch of the strait.
How to Book Your Campsite at French Beach
Reservation Windows and Timing Strategy
BC Parks opens reservations for French Beach four months in advance on a rolling basis. If you want a weekend in July, you can book starting early March. The system goes live daily at 7 a.m. Pacific Time, and competition for prime summer weekends gets fierce, especially Friday and Saturday nights in June through August.
Set an alarm for 6:55 a.m. on your booking day. Create your BC Parks account ahead of time, enter payment details, and have your preferred dates queued up. The first 15 minutes after 7 a.m. see the heaviest traffic, so a slow connection or fumbling with login credentials can cost you your top choice. Check the reservation availability details the night before to confirm the exact date your window opens.
Mid-week stays in June or September book slower than July weekends, giving you more breathing room. If your ideal dates vanish immediately, monitor the site daily for cancellations, people’s plans shift, and prime spots reappear without warning. Our 2026 camping booking strategy covers advanced tactics for competitive booking windows that apply here.
Pack light for whatever dates you secure. A kayak-friendly pack list works brilliantly even for vehicle camping, keeping your gear streamlined and manageable on coastal terrain.
Walk-Up and Last-Minute Options
French Beach doesn’t operate on a first-come, first-served basis, all 69 vehicle-accessible campsites require advance reservations through the BC Parks system. There’s no option to simply roll up and claim an empty spot, even during the shoulder season.
Your best strategy for securing last-minute availability is monitoring the reservation system for cancellations. Campers frequently adjust their plans within the two-week window before arrival, releasing coveted weekend spots back into the system. Check the booking portal daily, especially in the evenings when people tend to make final decisions about upcoming trips. Set calendar reminders to check Thursday and Friday evenings, when cancellations for the approaching weekend typically appear.
If French Beach remains fully booked for your target dates, consider these backup options along Vancouver Island’s southern coast. Sooke Potholes Provincial Park offers 23 first-come, first-served sites about 20 minutes east. China Beach Provincial Park, situated between French Beach and Jordan River, provides an alternative coastal experience with smaller crowds. Both parks give you similar Strait of Juan de Fuca access without requiring advance bookings, though arriving early on Friday is crucial during summer months when these sites fill by afternoon.
Permit Requirements and Regulations
Booking a campsite at French Beach Park requires a BC Parks camping permit obtained through the Discover Camping reservation system, not a French forestry permit, which only applies if you’re actually planning to camp in state-owned forests in France (a common source of confusion for those searching “french beach camping”). The permit covers your overnight stay at one of the 69 vehicle-accessible campsites available year-round, and you’ll pay the camping fee at the time of reservation, which varies by season.
Before you arrive, make sure you have:
Valid BC Parks camping reservation confirmation (print or digital)
Vehicle license plate number used during booking
Photo ID matching the reservation name
Payment method for any additional firewood or amenity purchases
Current pet vaccination records if bringing dogs
Fire regulations at French Beach Park align with BC Parks standards: campfires are only permitted in designated fire rings at individual campsites, and you must maintain a clear zone around the fire. During high-risk fire seasons (typically July through September), the park may implement a campfire ban with little notice, so check the official camping information and access page within 48 hours of your arrival. Portable stoves are generally permitted even during bans, but confirm current restrictions.
Group sizes are limited to the capacity of your reserved campsite, typically six people and two vehicles per standard site. Larger groups must book multiple adjacent sites if available. Pets are welcome but must remain leashed at all times, and you’re responsible for waste disposal (carry out what you pack in). The beach itself doesn’t restrict leashed dogs, making it ideal for campers who want to explore with their four-legged companions while watching for whales and icebergs offshore.
If you’re planning water-based activities, note that permits differ from those required for guided kayaking tours in other regions. French Beach itself has no boat launch, and the strong currents make paddling inadvisable here, but observing Vancouver Island wildlife from shore remains a highlight for campers who appreciate coastal ecosystems without getting on the water.
Critical Information for Kayakers and Paddlers
Alternative Nearby Paddling Destinations
Since French Beach itself has no boat launch and paddling there isn’t recommended, kayakers staying at the campground will need to drive to nearby access points. The two closest options are Jordan River and Sooke, both within 30 minutes of French Beach Park.
Jordan River sits roughly 15 kilometers north along Highway 14 and offers experienced paddlers access to the Strait of Juan de Fuca. The shoreline here can be rugged with strong currents, so this launch suits intermediate to advanced kayakers comfortable with ocean conditions. There’s roadside parking and rocky beach access, but no formal boat ramp or facilities.
Sooke, about 25 kilometers east, provides calmer water options. Whiffin Spit and Sooke Harbour offer more sheltered paddling environments suitable for beginners and families. You’ll find better facilities here, including designated parking areas and easier beach access. The protected waters inside the harbour make this the safer choice if you’re building your skills or paddling with kids.
Launch Point
Distance from French Beach
Skill Level
Facilities
Jordan River
15 km north
Intermediate to Advanced
Roadside parking, rocky beach access
Sooke (Whiffin Spit)
25 km east
Beginner to Intermediate
Parking area, sheltered harbour, beach access
Sooke Harbour
25 km east
All levels
Boat ramp, parking, protected waters
For a truly exceptional kayak camping experience, consider Pacific Rim National Park Reserve’s Broken Group Islands. This archipelago offers backcountry camping across seven islands, accessible only by boat. It’s a genuine wilderness paddle requiring solid ocean kayaking skills, but the reward is camping on remote islands with incredible marine life and coastal scenery. Reservations for the 2026 season followed the January 29, 2026 openings for Green Point Campground, and these island sites book quickly. Plan several months ahead if you want to tackle this premier Vancouver Island paddling destination.
A sea kayak at a coastal launch highlights nearby paddling opportunities for visitors when kayaking conditions at French Beach aren’t recommended.
Wildlife Encounters While Paddling
When you launch from nearby sites like Jordan River or Sooke, the Strait of Juan de Fuca offers rewarding wildlife viewing opportunities. Keep a respectful distance, at least 100 meters for marine mammals, and never paddle directly toward or attempt to touch any wildlife.
Paddlers regularly spot harbor seals and California sea lions hauled out on rocky outcrops or surfacing near kelp beds. Minke whales and gray whales pass through these waters, especially during spring migration, though encounters are less predictable. River otters fish along the shoreline, and bald eagles perch in coastal trees scanning for prey. Porpoises occasionally surface in small groups, creating quick splashes that vanish just as fast.
If you encounter orcas, stop paddling and let them pass. Never position yourself in their path or between a mother and calf. Marine mammals have right-of-way, and deliberately approaching or harassing them violates federal law. Carry bear spray even on the water, bears occasionally forage along beaches at low tide.
For a different adventure entirely, Vancouver Island’s northern waters feature iceberg trail opportunities where paddlers can witness calving glaciers and navigate among ice formations, though these expeditions require advanced skills and proper cold-water gear. These trips typically launch from communities much farther north than the Sooke region and demand thorough preparation for remote wilderness conditions.
The Strait of Juan de Fuca’s strong currents and boat traffic require constant attention. Wildlife adds wonder to any paddling trip, but your focus should remain on navigation, weather, and personal safety first.
A peaceful campsite setup near the shoreline shows what French Beach camping feels like, coastal, windswept, and close to the water.
What to Expect at French Beach Campground
French Beach Campground delivers a straightforward coastal camping experience with 69 vehicle-accessible sites spread across forested terrain just steps from the beach. Most sites offer partial privacy through natural vegetation, though expect some visibility of neighboring campers, this isn’t wilderness isolation. Each site includes a picnic table and fire ring, with vault toilets scattered throughout the campground rather than flush facilities. The park provides drinking water from hand pumps, so bring containers for filling at your site.
Beach access is the campground’s standout feature. A short walk from any site takes you to the shoreline, where you’ll find a sandy and cobblestone beach perfect for beachcombing, sunset watching, and coastal exploration. The beach stretches over a kilometer, giving you plenty of space to wander.
What you’ll need to bring covers the basics. Pack all your camping gear including tent or RV setup, sleeping equipment, cooking supplies, and food. The fire rings welcome campfires when regulations allow, so firewood (purchased locally or brought from nearby) and fire-starting materials are essential. Bring sufficient drinking water containers since hand pumps mean you’ll be carrying water to your site. The coastal location means weather can shift quickly, layer up with warm clothing even in summer, as evening temperatures drop and wind off the Strait of Juan de Fuca brings a chill.
The park provides garbage collection, which is uncommon at many BC Parks backcountry sites, making cleanup easier. Cell service is spotty to nonexistent, so download maps and information before arrival. The campground operates year-round, though winter camping means fewer services and potentially closed water pumps, requiring you to bring all water supplies during colder months.
A campfire scene conveys the everyday reality of campground life, warm, functional, and shaped by coastal weather and regulations.
Vaping Policies at French Beach and BC Coastal Parks
BC Parks does not currently have specific regulations that ban vaping devices at French Beach or other provincial parks, meaning vaping is generally permitted in outdoor areas where smoking is allowed. However, the same fire safety restrictions that apply to smoking also apply to vaping, during periods of high fire danger or when campfire bans are in effect, park staff may restrict any activity involving heat-producing devices. Check the current fire ban status for the area before your trip, and always follow posted signage at the park entrance and campground.
Note: Be considerate of neighboring campers by vaping downwind and away from shared facilities like washrooms, picnic shelters, and beach access trails where families gather.
When you’re camping in coastal environments like French Beach, salt air and moisture pose specific challenges for vaping equipment. Store your device and e-liquids in sealed plastic bags or waterproof containers when not in use, as salt air accelerates corrosion on metal components and battery contacts. The constant wind off the Strait of Juan de Fuca can quickly drain your battery if you’re vaping frequently outdoors, so bring backup batteries or a portable charging solution. Clean your device’s mouthpiece and connection points daily during multi-day camping trips to prevent salt residue buildup that can affect performance.
While vaping leaves less visible residue than cigarette smoke, disposing of used pods, cartridges, and batteries properly is critical in backcountry settings. Pack out all vaping waste in your trash, never bury cartridges or toss them in campfire pits, as the plastic and metal components don’t break down and can leach chemicals into the coastal ecosystem. French Beach’s proximity to sensitive marine habitats means extra care with any waste that could wash into storm drains or down to the beach.
French Beach Park delivers an incredible coastal camping experience on Vancouver Island’s Strait of Juan de Fuca, and booking your site through the BC Parks reservation system is straightforward once you understand the process. Remember that year-round vehicle accessible camping means you can plan visits beyond the summer rush, though securing peak-season dates still requires jumping on reservations when they open. While this stunning location offers beach access and coastal scenery, it’s crucial to recognize that kayaking directly from French Beach isn’t advisable due to strong ocean currents and the absence of a boat launch. Paddlers shouldn’t let that discourage exploration of this region, nearby launch sites at Jordan River and Sooke provide excellent access to the same beautiful waters, and the Broken Group Islands further north offer world-class kayak camping for those seeking true backcountry paddling adventures.
With your booking confirmed and realistic expectations about where you’ll actually launch your kayak, you’re set for an outstanding 2026 coastal camping trip. This combination of accessible car camping at French Beach and strategic paddling from nearby locations gives you the best of both worlds: comfortable basecamp amenities and genuine Strait of Juan de Fuca paddling experiences. Pack for variable coastal weather, respect the regulations we’ve covered, and prepare for wildlife encounters that make Vancouver Island’s shoreline truly memorable.