Month: August 2026

Big White Hiking Just Opened for Summer 2026 (What You Need to Know)

Big White Ski Resort’s summer hiking season runs from July 1 to September 7, 2026, transforming the Okanagan’s winter playground into a network of high-alpine trails where crisp mountain air and panoramic views await hikers of every skill level. The resort sits at elevations where wildflower meadows bloom well into August, and the same gondolas that carry skiers in winter now lift hikers above the treeline to access trails that would otherwise require hours of steep climbing.

This isn’t your typical summer hike. The alpine environment here changes the game completely. You’ll navigate terrain where snow patches linger in shaded bowls through mid-July, where sudden weather shifts can drop temperatures 20 degrees in minutes, and where black bears forage in berry patches along popular routes. But you’ll also find yourself standing on ridgelines with views stretching to the Monashee Mountains, walking through what locals call iceberg trails where brilliant blue wildflowers carpet entire hillsides, and spotting mountain goats picking their way across rocky outcrops.

The 1,350% surge in search interest tells a story: people are waking up to what British Columbia locals have known for years. Summer at Big White offers something rare, a chance to experience true alpine hiking without the grueling approach that usually guards such landscapes. Whether you’re planning your first mountain trail or you’re a seasoned hiker looking for new terrain, understanding what makes this place unique and how to prepare properly will transform a good day into an unforgettable one.

What Makes Big White Hiking Different from Other Alpine Trails

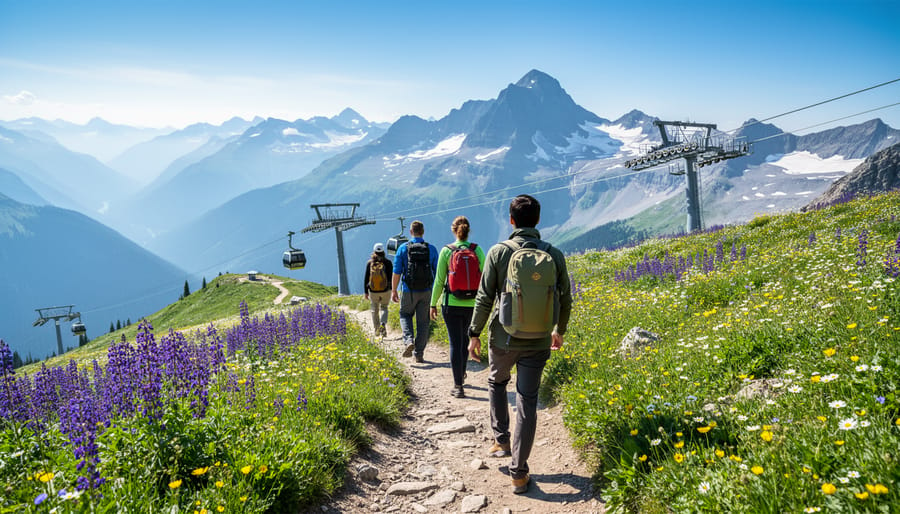
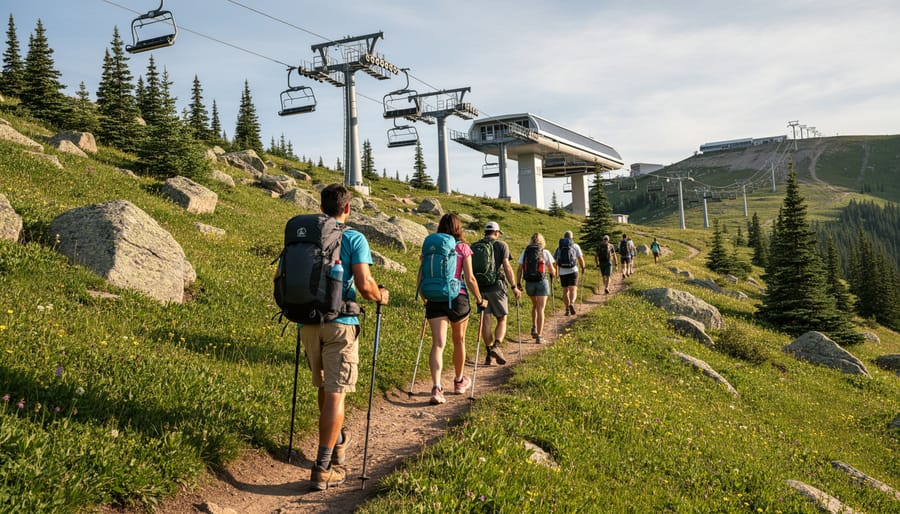
Hikers walking along a high-altitude alpine trail at Big White in summer with lift infrastructure in the background
Hikers enjoy a summer alpine route with Big White’s lift infrastructure visible in the distance.

Most alpine trails require long drives down forest service roads and trailhead parking scrambles. Big White flips that script. You ride a gondola up from the Village, step off at 2,319 meters, and start hiking immediately, no dusty approach, no guesswork about where the trail begins.

The ski-resort infrastructure transforms the alpine hiking experience. Groomed trails from winter operations become your summer routes, meaning consistent trail widths, clear signage, and regular maintenance you won’t find on backcountry paths. You can grab coffee at the Village before heading up, refill water bottles mid-hike, and actually use a real bathroom instead of scouting behind a tree. It’s wilderness with a safety net, perfect for pushing your limits without the full expedition logistics.

That high starting elevation matters more than you’d expect. While most BC hikes climb through dense forest for hours before reaching alpine meadows, Big White puts you above treeline from the start. You’re walking through subalpine terrain where wildflowers carpet the slopes and sightlines stretch for kilometers in every direction. The air’s thinner here, you’ll feel it in your lungs, but the payoff is immediate access to the landscape other hikers spend half their day reaching.

The blend works because Big White doesn’t try to hide its resort origins. Chairlift towers dot the ridges, ski runs cut visible lines down the mountain, and you might share the trail with mountain bikers training for events like the August BC Cup. Rather than detracting from the experience, this mix creates something distinct: alpine adventure that welcomes all skill levels instead of demanding backcountry expertise as the entry fee.

Planning Your Big White Hiking Adventure: Season and Timing

Big White’s 2026 summer season runs from July 1 through September 7, giving you over two months to explore the resort’s alpine trails. Unlike many ski hills that open sporadically or only on weekends, Big White commits to a full summer operation, which means you can plan weekday escapes to avoid crowds or weekend trips when the mountain comes alive with events.

Early July offers the freshest wildflower displays and longest days, but trails may still have snow patches at higher elevations. Mid-July through early August delivers peak conditions: trails are fully clear, temperatures hover comfortably in the teens to low twenties Celsius, and the alpine meadows hit their stride. Late August into September brings quieter trails, crisp mornings, and the first hints of fall color, though afternoon thunderstorms become more common.

Event Date(s) What to Expect
Season Opening July 1, 2026 First day of trail access
Fiv’r Fridays July 3 – September 4 Weekly social gatherings, 2:30 PM – 6:45 PM
Bike Big White BC Cup August 14-16 Premier downhill mountain bike racing series
Dog Days August 22, 11 AM – 2 PM Dog-friendly activities and socializing
Summer Music Series August 29, 2 PM – 4 PM Live outdoor performances
Season Closing September 7, 2026 Last day of summer operations

Timing your visit around events adds another dimension to your hiking trip. Fiv’r Fridays run throughout the season and create a vibrant après-hike atmosphere. The BC Cup weekend in mid-August draws serious mountain biking talent and energy to the resort. If you’re bringing your four-legged hiking partner, Dog Days in late August celebrates canine adventurers. The Summer Music Series wraps up the season with live performances that pair nicely with a day on the trails.

Book accommodations well ahead for event weekends, especially the BC Cup period. For solitude and wildlife viewing, target weekdays in early July or after Labour Day as the season winds down.

Trail Options for Every Skill Level

Beginner-Friendly Routes

Big White’s beginner trails let you taste alpine hiking without the intimidation. The Village Trail loops through the resort base with minimal elevation change, making it perfect for families with young kids or anyone adjusting to the thinner air at this altitude. You’ll walk past summer wildflowers and get mountain views without needing technical gear or serious fitness.

The Gondola Summit Trail offers another gentle option if you ride up first. It’s a short interpretive walk at the peak that gives you bragging rights for reaching the top without the climb. Most families complete it in under an hour, including plenty of photo stops. These routes prove you don’t need mountaineering experience to enjoy Big White’s summer trails.

Intermediate and Advanced Options

For seasoned hikers ready to push beyond gentle loops, Big White delivers sustained elevation gain and technical challenges that reward your effort with expansive alpine vistas. The summit trails climb above the treeline, exposing you to rocky terrain and steep grades where what are switchbacks becomes essential knowledge for managing steep ascent without exhausting yourself.

Expect routes that demand cardiovascular fitness and solid footing, loose scree, exposed ridgelines, and sections requiring hands for balance are common at higher elevations. These trails often extend beyond the 8-kilometer mark with vertical climbs exceeding 500 meters, so plan for three to five hours round-trip and start early to avoid afternoon thunderstorms. The payoff is solitude, dramatic drop-offs into valleys below, and that rare sense of being truly immersed in the alpine environment rather than touring it.

Wildlife Encounters and Natural Highlights

Marmot standing near wildflowers along an alpine hiking trail at Big White
An alpine marmot watches from the trail edge as wildflowers bloom nearby.

The alpine landscape at Big White unfolds across a unique ecosystem where summer transforms ski runs into wildflower corridors and rocky ridges into wildlife highways. As you climb above 1,800 meters, you’ll enter a world where hoary marmots whistle from boulder fields, Clark’s nutcrackers forage among whitebark pines, and meadows explode with colour, Indian paintbrush, alpine lupine, and arnica carpeting the slopes from mid-July through August. The high elevation creates a compressed growing season, concentrating blooms into a brilliant six-week window that peaks around early August.

Watch the treeline carefully. Columbia ground squirrels dart across trails, while Columbian black-tailed deer graze the edges of clearings at dawn and dusk. Ravens and Steller’s jays follow hikers, hoping for dropped snacks. Less common but increasingly spotted in recent years: black bears foraging for berries in late summer, and the occasional glimpse of a northern flying squirrel in the stunted forests near the gondola base.

Note: Black bears are active in Big White’s backcountry during berry season (August-September). Carry bear bells for hiking make noise on blind corners, and practice ethical bear viewing by keeping at least 100 meters distance if you spot one.

The views reward every climb. From higher trails, you’ll see the Monashee Mountains rolling toward the horizon, glacial valleys carving between peaks, and on clear days, the jagged line of the Selkirk Range to the east. Morning light hits the western faces first, illuminating the lichen-covered rock and casting long shadows across the alpine bowls that still hold snow patches into July.

Bring binoculars. The wildlife here doesn’t perform on schedule, but patience at a rocky outcrop or beside a mountain tarn often pays off with sightings that make the elevation gain worthwhile.

Essential Gear and Preparation for Alpine Hiking

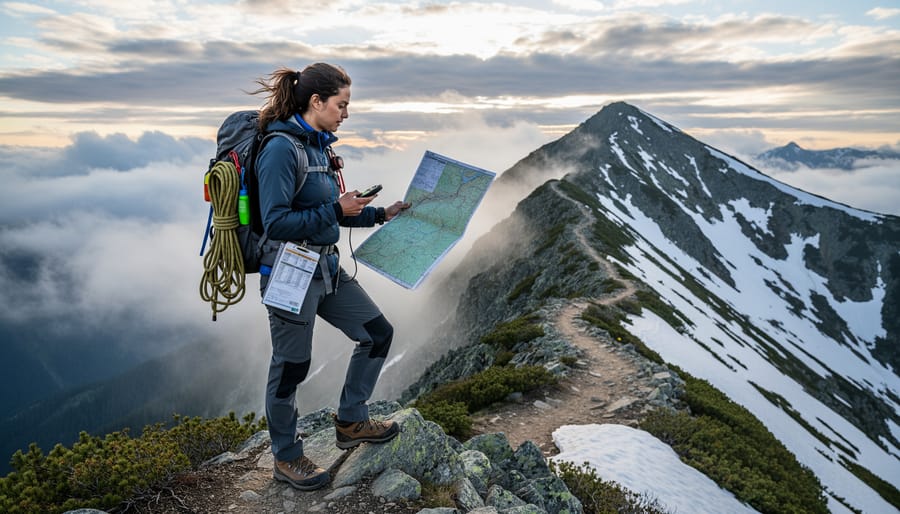
Hiker with daypack and navigational tools standing on a ridge overlooking mountains at Big White
A prepared hiker checks direction and conditions before heading onto alpine terrain.

Alpine hiking demands thoughtful preparation, especially at Big White’s elevation where weather shifts without warning and the ski resort’s summer infrastructure operates differently than peak-season mountain facilities. Your gear list should prioritize adaptability over minimalism.

Start with a layering system built around the three-layer principle. A moisture-wicking base layer pulls sweat away from your skin, a mid-layer insulating fleece or down jacket provides warmth when temperatures drop, and a waterproof shell protects against sudden rain or wind. Mornings might start crisp at the resort, warm up dramatically by midday, then chill again as afternoon clouds roll in. Pack all three layers even if the forecast looks perfect.

Sun protection becomes critical at higher elevations where UV exposure intensifies. Bring broad-spectrum sunscreen rated SPF 30 or higher, reapplying every two hours regardless of cloud cover. A wide-brimmed hat shades your face and neck, while polarized sunglasses reduce glare off exposed rock and remaining snow patches. Don’t skip lip balm with SPF either.

Hydration systems matter more than you’d expect. Carry at least two liters of water per person for a half-day hike, more for full-day excursions. A hydration bladder makes sipping easy without stopping, but pack a backup bottle in case of leaks. High altitude accelerates dehydration before you feel thirsty.

Navigation tools provide security when trails aren’t as clearly marked as groomed ski runs. Download offline maps to your phone since cellular coverage can be spotty. A physical trail map from the resort serves as backup. A basic compass and the ability to use it adds another safety layer.

Pack energy-rich snacks, a basic first-aid kit, and a headlamp with fresh batteries in case you’re out longer than planned. The resort may have limited food service during summer operations, so self-sufficiency keeps your adventure on track.

Combining Hiking with Other Big White Summer Activities

Big White’s summer season transforms the resort into a hub where hiking is just one part of a larger mountain adventure. If you’re investing the drive and elevation gain, consider extending your stay to experience the variety of activities running from July through early September.

Mountain biking shares many of the same trails and chairlift access, creating natural synergy with your hiking plans. The Bike Big White BC Cup running August 14-16, 2026 brings Canada’s premier downhill racing series to the mountain, turning the resort into a gravity-fueled spectacle. Even if you’re not racing, watching skilled riders tackle technical descents adds perspective to the terrain you’ve been hiking and offers a chance to see the trails from a completely different angle.

Fiv’r Fridays run throughout the season (July 3 through September 4, 2026) with afternoon events that pair well with morning hikes. Start early on the trails, return by mid-afternoon, and join the social atmosphere without sacrificing peak hiking hours when lighting and temperatures are ideal.

Dog owners should circle August 22, 2026 for Dog Days (11:00 AM to 2:00 PM), when trail-friendly pups get dedicated time on the mountain. The Summer Music Series on August 29, 2026 (2:00 PM to 4:00 PM) provides another reason to build a weekend itinerary around your hiking objectives.

For those planning multi-day hiking logistics coordinate your accommodation around these events to create a balanced trip that includes both solitary trail time and communal mountain experiences, maximizing what the resort offers beyond just the footpaths.

Safety Considerations for High-Elevation Hiking

Alpine hiking at Big White demands respect for the mountain environment, even when the ski lifts are running and facilities are open. The elevation here presents challenges that lowland hikers may not expect, and conditions can shift quickly once you’re on the trails.

Your body needs time to adjust to thinner air above 2,000 meters. If you’re arriving from sea level, spend your first day exploring lower-elevation areas or taking shorter walks around the resort village. Watch for signs of altitude sickness: headache, nausea, unusual fatigue, or dizziness. These symptoms mean you should descend immediately and rest before attempting higher routes.

Weather volatility is the norm at this altitude. A sunny morning can turn into afternoon thunderstorms with little warning. Check Big White’s current conditions and forecast before you head out, and watch the sky continuously while you’re on the trail. If you see lightning or hear thunder, descend immediately, you’re the tallest object on most alpine ridges. Pack layers even on warm days, including a windproof jacket and hat, because temperatures drop fast when clouds roll in.

Big White’s trail marking system uses standard signage at junctions and trailheads, but markers can be sparse along some routes. Stay on designated paths to avoid damaging fragile alpine vegetation and to prevent getting lost. Carry hiking first aid kits extra water, high-energy snacks, a fully charged phone, and a backup navigation method like a downloaded trail map.

Warning: If weather deteriorates, visibility drops, or you feel unwell, turn back immediately, summits will be there tomorrow, and alpine rescues are complex and dangerous.

Know when to turn around. Pride has no place in mountain safety. If you’re moving slower than expected and won’t reach your destination with enough daylight to return, reverse course. If trail conditions exceed your skill level or the weather turns threatening, head down. Tell someone your planned route and expected return time before you leave, and stick to that plan or update them if you change it.

Big White’s transformation from winter playground to summer hiking haven proves that alpine adventure doesn’t end when the snow melts. With the July 1 to September 7 season offering everything from gentle meadow walks to challenging summit trails, this mountain delivers accessible thrills for hikers at every level. The high-elevation trails, gondola access, and maintained infrastructure remove many barriers to alpine exploration while preserving that genuine wilderness feeling.

What sets this experience apart is the opportunity to push your comfort zone in a relatively controlled environment. Whether you’re testing your endurance on a challenging ascent, spotting marmots in wildflower meadows, or bringing your dog along for Dog Days, you’re building skills and confidence that transfer to other backcountry pursuits. The combination of natural beauty, manageable risk, and varied terrain makes Big White an ideal training ground for anyone looking to expand their outdoor repertoire.

The principles that make great hiking, kayaking, or any adventure succeed remain constant: proper preparation, respect for the environment, awareness of your limits, and a willingness to adapt when conditions change. At Stanley Kayaking, we’ve seen how guided exploration across North America’s diverse landscapes helps people discover capabilities they didn’t know they had. Big White’s summer trails embody that same spirit of safe, supported adventure that opens doors to bigger journeys ahead. This season offers 68 days to find out what you’re capable of at altitude.

This West Kootenay Hiking Book Reveals Trails You’ve Never Heard Of

Abby Wilson’s West Kootenay Hiking Guidebook serves as your comprehensive resource for exploring one of British Columbia’s most rewarding yet under-documented hiking regions, offering detailed trail descriptions, difficulty ratings, and navigation tips for routes ranging from family-friendly forest walks to challenging alpine scrambles. This guidebook fills a genuine gap for hikers venturing into the West Kootenay, where trail information has historically been scattered across online forums and local knowledge rather than consolidated into a single, reliable source.

The West Kootenay region stretches across southeastern British Columbia, encompassing pristine wilderness around Nelson, Castlegar, Trail, and Rossland. Trails here wind through old-growth cedar forests, climb to glacier-carved lakes, and traverse ridgelines offering views of the Selkirk and Monashee mountain ranges. Wildlife encounters are frequent, from black bears foraging on berry-laden slopes to mountain goats navigating rocky ledges above treeline.

What sets this guidebook apart is its focus on lesser-known trails that reward exploration without the crowds found at more famous BC destinations. Wilson provides practical details that matter when you’re standing at a trailhead: accurate distances, elevation gain, seasonal considerations, and hazard warnings. Whether you’re a weekend warrior looking for a solid day hike or an experienced backcountry traveler planning multi-day routes, the book offers the information you need to match your ambition with appropriate terrain.

Understanding how to use this guidebook effectively, combined with proper preparation and safety awareness, transforms it from a simple trail catalog into a tool for building unforgettable experiences in West Kootenay backcountry.

What Makes the West Kootenay Hiking Guidebook Different

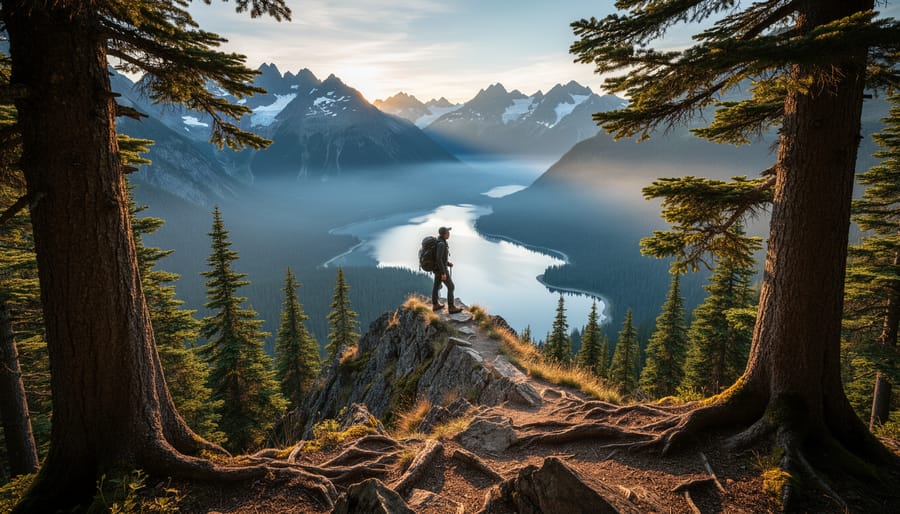
Hiker on a rocky viewpoint trail overlooking alpine meadows and mountain ridgelines in West Kootenay
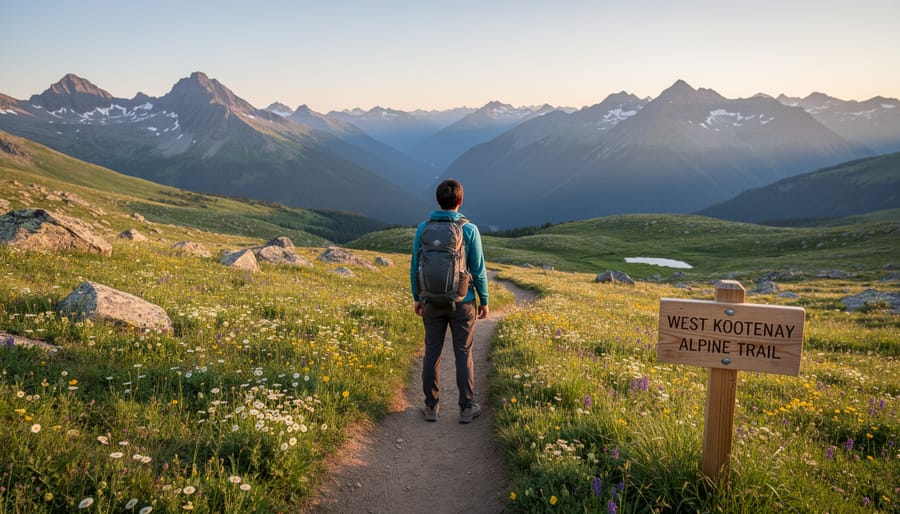
A lone hiker takes in panoramic views across West Kootenay alpine meadows. The image sets the stage for discovering less-known trails through Abby Wilson’s guide.

Most hiking resources for British Columbia cast a wide net across the entire province, leaving the West Kootenay region buried in generalizations or ignored completely. Abby Wilson’s West Kootenay Hiking Guidebook takes the opposite approach: it zeroes in exclusively on this mountainous corner of southeastern BC, documenting trails that rarely appear in provincial guides or popular mapping apps.

What sets this book apart is its hyper-local perspective. Wilson doesn’t just list trails, she provides the kind of on-the-ground intelligence you’d typically get from a longtime resident. You’ll find detailed trailhead directions for routes that lack clear signage, insight into which paths turn into overgrown bushwhacks by mid-summer, and honest assessments of trail conditions that generic platforms can’t capture. The guidebook includes routes through the Selkirk and Monashee ranges that have been hiked by locals for decades but remain virtually unknown outside the region.

Unlike trail apps that rely on user-generated content of wildly varying quality, Wilson’s guidebook maintains consistent standards across every entry. Each trail description follows a structured format covering elevation gain, estimated time, difficulty rating, and specific navigation notes. The book documents both established trails maintained by recreation districts and lesser-known paths that require solid route-finding skills.

The guidebook also fills gaps left by outdated regional resources. Many older West Kootenay trail guides haven’t been updated in years, meaning they reference trailheads that no longer exist or ignore new access restrictions. Wilson’s work reflects current conditions, including recent logging road changes, updated parking information, and trail modifications made by local hiking clubs.

For anyone planning to explore beyond the handful of popular West Kootenay hikes that show up in provincial guidebooks, this focused resource eliminates the guesswork. It’s the difference between fumbling through incomplete online descriptions and having reliable, field-tested information for one of BC’s most underrated hiking regions.

Who This Book Serves Best

Abby Wilson’s West Kootenay Hiking Guidebook wasn’t designed with a single type of hiker in mind. It works for families planning their first mountain hike, solo adventurers searching for quiet wilderness, and veteran backcountry travelers looking to fill gaps in their regional knowledge. The book’s strength lies in its honest trail ratings and detailed descriptions that help you match routes to your actual abilities, not your aspirations.

Note: Be realistic about your fitness level and experience when selecting trails, mountain conditions can change rapidly, and a moderate rating in alpine terrain differs significantly from valley hiking.

Beginners benefit from clearly marked starter trails with shorter distances, gentle elevation gains, and straightforward navigation. Wilson includes information on parking access, trail conditions, and what to expect around each corner, which removes the anxiety many new hikers feel about venturing into unfamiliar territory. These accessible routes still deliver rewarding views and genuine wilderness experiences without requiring technical skills or specialized equipment.

Experienced hikers appreciate the book’s coverage of lesser-known backcountry routes that don’t appear in mainstream trail databases. Wilson documents challenging scrambles, multi-day traverses, and remote peaks that demand navigation skills and self-sufficiency. She doesn’t sugarcoat difficulty, if a trail involves river crossings, sustained steep grades, or requires route-finding through unmarked terrain, the guidebook says so plainly.

The book also serves hikers who fall somewhere in the middle, those ready to push beyond easy lakeside walks but not yet prepared for technical alpine routes. Wilson provides progression suggestions, helping you build skills systematically rather than jumping into situations beyond your capabilities. Whether you’re hiking twice a year or fifty times, the guidebook meets you where you are and points toward your next adventure.

Trail Diversity in the West Kootenay Region

Wildlife Encounters to Anticipate

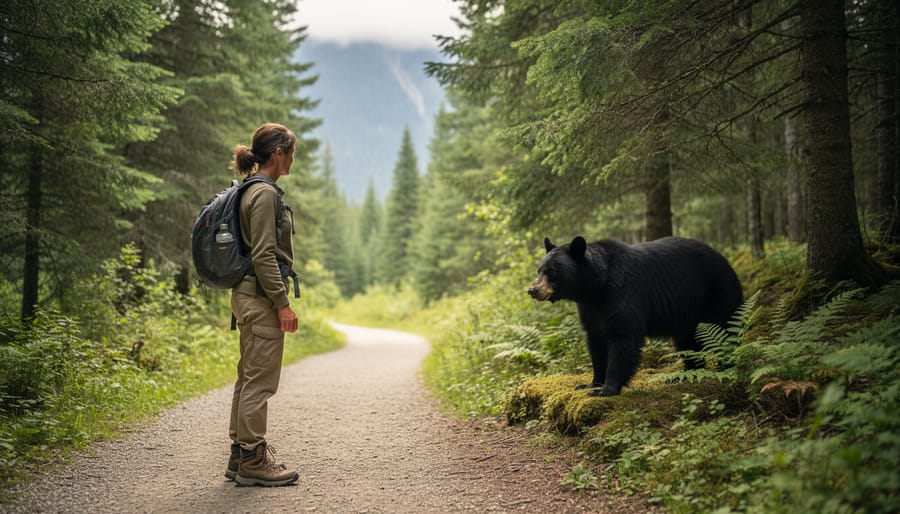
Hiker observing a black bear from a safe distance near a West Kootenay forest trail
A hiker watches a black bear from a safe distance at the edge of a forest trail. The scene highlights wildlife awareness and responsible observation on West Kootenay hikes.

The West Kootenay’s mountain corridors and forested valleys create prime habitat for wildlife encounters that transform ordinary hikes into unforgettable experiences. Black bears are the most common large mammals you’ll spot, particularly in berry-rich areas during late summer. Mountain goats navigate rocky outcrops in the region’s alpine zones, while mule deer frequent meadows at dawn and dusk. Birdwatchers can identify Clark’s nutcrackers, varied thrushes, and occasionally golden eagles soaring above ridgelines.

Wilson’s guidebook includes wildlife likelihood ratings for specific trails, helping you choose routes based on your comfort level with animal encounters. The key to safe wildlife watching is maintaining distance and never approaching animals for closer views. Carry bear spray on every hike, make noise when rounding blind corners, and store food properly even during short breaks. If you encounter a bear, stay calm, speak in a low voice, and back away slowly without turning your back. Mountain goats deserve equal respect, they can become aggressive if they feel cornered on narrow ledges. These sightings add richness to your hiking experience when approached with proper awareness and preparation.

Seasonal Considerations

The West Kootenay’s dramatic elevation changes create four distinct hiking seasons, each offering its own rewards. Summer brings alpine wildflowers that carpet mountain meadows from late June through August, while trails above treeline open fully by mid-July. The guidebook notes which routes showcase the best blooms and which high passes remain snow-covered into summer.

Fall transforms the region from September through October, when larch trees turn brilliant gold against evergreen forests. These weeks offer cooler temperatures, fewer crowds, and spectacular photography conditions. Many mid-elevation trails featured in Wilson’s book shine during this season, combining comfortable hiking with visual drama.

Winter opens a different set of possibilities. Lower-elevation forest trails and lakeside routes remain accessible for snowshoeing, while certain valleys offer gentle terrain perfect for winter exploration. The guidebook identifies trails suitable for cold-weather adventures, though most alpine routes close until snowpack recedes.

Spring arrives gradually in the West Kootenay, with valley trails opening by April while mountain passes stay buried until June. This transition period requires flexible planning, checking current conditions becomes essential when following the guidebook’s recommendations during these shoulder months.

How to Use This Guidebook Effectively

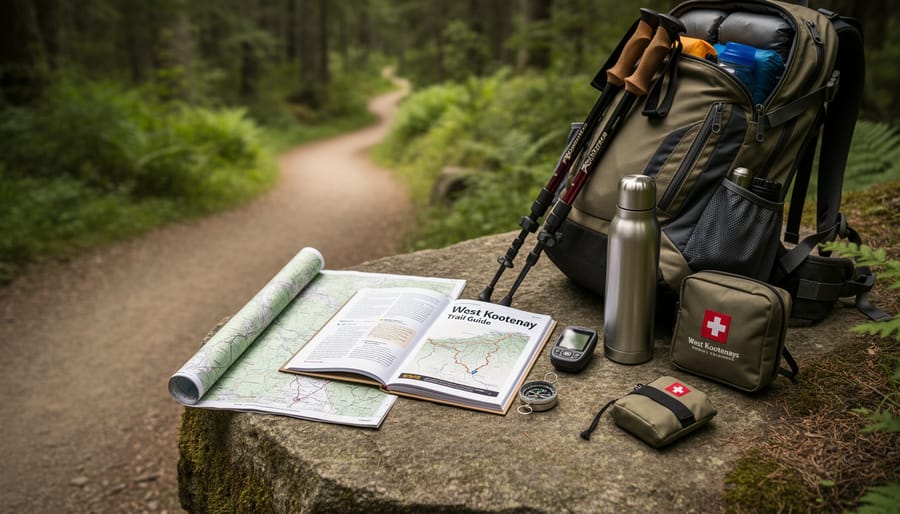
Backpack and West Kootenay hiking guidebook placed on a log beside a forest trail
A guidebook and hiking essentials are set up along a quiet West Kootenay trail. It reinforces how the book helps hikers plan and prepare for the right routes.

Start by reading through the entire West Kootenay Hiking Guidebook before your first outing. This gives you a sense of trail variety and helps you match routes to your fitness level and experience. Wilson’s book uses a clear rating system that accounts for distance, elevation gain, and trail conditions, which helps you avoid underestimating a hike or choosing something too ambitious for a first venture into the region.

  1. Identify your starting location and how far you’re willing to drive, the West Kootenay spans a large area and some trailheads sit several hours apart.
  2. Review the trail description thoroughly, noting elevation profiles and any mentions of creek crossings or sections where you’ll need to understand what are switchbacks to gauge difficulty accurately.
  3. Cross-reference the guidebook’s maps with a current topographic map or GPS app like Gaia or CalTopo for detailed terrain features and backup navigation.
  4. Check regional weather forecasts up to 24 hours before departure, as mountain conditions can shift rapidly and affect trail accessibility.
  5. Note any warnings about seasonal closures, wildlife activity, or trail maintenance issues mentioned in the book, then verify current conditions through local ranger stations or hiking forums.

Combine the guidebook with real-time resources rather than treating it as your only information source. Download offline maps to your phone since cell coverage is patchy throughout much of the West Kootenay backcountry. Keep the physical book in your pack as a reliable reference when batteries die or screens become unreadable in bright sunlight.

Use the book’s difficulty ratings as guidelines, not absolutes. Your personal experience, the season, and recent weather all influence how challenging a trail actually feels on the day you hike it.

Essential Gear for West Kootenay Trails

West Kootenay’s mountain terrain demands gear that can handle rapid weather shifts and remote trail conditions. Start with a layering system: moisture-wicking base layer, insulating mid-layer, and a waterproof shell. Afternoon thunderstorms roll in quickly at elevation, so pack rain gear even on cloudless mornings.

Sturdy boots with ankle support are non-negotiable on rocky alpine routes and creek crossings. Trekking poles reduce knee strain on steep descents and provide stability on loose scree. Carry a navigation system beyond your phone, a physical map and compass work when batteries die in the backcountry.

For overnight trips into the remote areas Wilson’s guidebook covers, bring the right sleeping pad rated for mountain temperatures that can drop sharply after sunset. A bear canister or bear hang rope protects food in areas with active wildlife. Review camp food ideas that balance nutrition with pack weight for multi-day routes.

Pack a first-aid kit, headlamp, fire starter, and emergency shelter. Cell service is unreliable or absent on many West Kootenay trails, so a satellite communicator adds a safety layer. Always carry more water than you think you’ll need, mountain springs can dry up by late summer, and hydration matters at altitude.

Safety First: Preparing for Remote Trails

Remote West Kootenay trails demand a different level of preparation than well-trafficked routes near urban centers. The region’s rugged terrain and distance from services mean that small oversights can escalate quickly, making thorough safety planning essential before you set foot on the trail.

Warning: Always share your planned route and expected return time with someone who will notice if you don’t check in, especially when exploring the isolated trails detailed in Abby Wilson’s guidebook.

Cell service disappears rapidly once you venture into mountainous areas, so plan for limited cell service by downloading offline maps and carrying a physical compass alongside topographic maps. A satellite communicator or personal locator beacon adds a crucial safety layer for trails where help is hours away. Know how to use your navigation tools before you need them in thick fog or after sunset.

Wildlife encounters, particularly with bears, require specific preparation. Study bear safety awareness principles and carry bear spray within immediate reach, not buried in your pack. Many hikers also use bear bells for hiking to announce their presence on trails where sightlines are limited. Fresh tracks or scat mean moving through bear territory with extra caution and making plenty of noise.

Protecting these pristine environments matters as much as protecting yourself. Following Leave No Trace guidance keeps trails accessible and wildlife undisturbed. Pack out everything you bring in, stay on established paths to prevent erosion, and camp only in designated areas when overnight trips are permitted. The West Kootenay’s beauty persists because hikers treat it with respect, ensuring future adventurers can experience the same unspoiled wilderness.

Beyond the Book: Connecting with the West Kootenay Hiking Community

The trails described in Abby Wilson’s guidebook thrive because dedicated locals maintain them, advocate for their protection, and welcome newcomers into the fold. Joining the West Kootenay hiking community extends your experience far beyond the pages.

Several regional hiking clubs organize group outings throughout the year, perfect for meeting fellow adventurers and discovering trails with experienced leaders who know the terrain intimately. These groups often coordinate trips for various fitness levels, from casual Sunday morning walks to demanding backcountry expeditions.

Trail maintenance organizations depend on volunteers to clear windfall, repair erosion damage, and mark routes. A few hours spent maintaining trails you love deepens your connection to these landscapes and ensures they remain accessible for future hikers.

Conservation groups working in the region need advocates who understand what’s at stake. Attending meetings, participating in trail cleanups, and supporting habitat restoration projects turns your passion for hiking into tangible protection for the wilderness that draws you back season after season.

These connections transform solitary hikes into lasting relationships with both people and place, enriching every adventure you take in the West Kootenays.

Abby Wilson’s West Kootenay Hiking Guidebook offers something increasingly rare: deep, local knowledge packaged for real-world use. Generic trail apps can’t match the insight that comes from someone who has walked these paths repeatedly, noted the seasonal quirks, and understands what makes a West Kootenay hike special. With this resource in your pack, you’re equipped to move beyond the crowded front-country trails and discover the region’s hidden alpine lakes, ridge walks with views that stretch for miles, and quiet forest routes where the only sounds are your footsteps and birdsong.

The West Kootenay’s trails connect to a larger adventure ecosystem. After a morning summit push, you might find yourself paddling a glacier-fed lake or exploring the interconnected waterways that make this region a haven for multi-sport exploration. Whether you’re planning a weekend of varied activities or a dedicated hiking trip, Wilson’s guidebook gives you the confidence to venture deeper, stay safer, and truly experience what makes this corner of British Columbia unforgettable. Start with one trail. You’ll quickly find yourself planning the next.

Hiking in Spanish: Essential Vocabulary and Phrases for Trails Across North America

Hiking in Spanish opens two powerful doors: it gives you the vocabulary to explore trails safely across Spanish-speaking regions and connects you with Spanish-language guided adventures throughout North America. Whether you’re planning to navigate backcountry routes in South America, communicate with guides in Mexico, or simply join a Spanish-speaking hiking group closer to home, mastering trail-specific vocabulary transforms how you experience the outdoors.

The beauty of learning hiking Spanish is its practicality. You don’t need fluency to benefit. A focused approach to essential terms like “sendero” (trail), “cima” (summit), and “refugio” (shelter) immediately makes you a more confident, safer hiker in Spanish-speaking environments. These aren’t classroom phrases but real communication tools that help you read trail markers, understand weather warnings, and connect with fellow adventurers who share your love of wild places.

Spanish-language hiking tours are also expanding across North America, creating opportunities to combine language immersion with outdoor exploration. Tour operators now offer Spanish-guided experiences that range from 3-day excursions to 23-day adventures, with August being a particularly popular month for Canadian routes. GetYourGuide runs Spanish-speaking departures from Toronto to Algonquin Provincial Park, while destinations like Jasper attract international groups to trails including Sulphur Skyline, Cavell Meadows, and the dramatic Path of the Glacier.

The practical value goes beyond conversation. Understanding Spanish trail terminology prepares you for wildlife encounters, navigation challenges, and the kind of spontaneous trail moments where quick, clear communication matters most. You’re not just learning words; you’re building bridges to new landscapes and the diverse community of hikers who explore them.

Key Takeaway: Focus first on safety phrases (¡Ayuda!, peligro, perdido), trail navigation terms (sendero, cima, distancia), and basic conversation starters (¿Dónde está…?, Me llamo…). These foundational phrases cover 80% of trail communication needs and build confidence quickly.

Why Spanish Matters on North American Trails

Spanish bridges gaps on the trail that maps and GPS can’t cross. When you hike in regions with strong Hispanic heritage, from the Southwest’s desert canyons to California’s coastal ranges, you’ll encounter Spanish-speaking guides, park rangers, fellow adventurers, and local communities whose knowledge runs deep. Understanding trail vocabulary lets you tap into that expertise, ask for route recommendations from people who’ve walked these paths for years, and join conversations that reveal hidden waterfalls or seasonal wildlife patterns you’d otherwise miss.

Safety is where language skills matter most. If you’re injured, lost, or facing sudden weather changes, being able to communicate clearly in Spanish with nearby hikers or emergency responders can be critical. Many popular North American trails feature bilingual signage, understanding warnings about terrain hazards, wildlife activity, or trail closures in both languages ensures you’re never second-guessing important information.

The cultural dimension enriches every step. Spanish-language hiking tours across North America create spaces where language learners and native speakers explore together, sharing stories and building friendships around campfires. In areas with deep Mexican-American or Latino roots, trails often connect to cultural sites, historical routes, and natural landmarks that carry Spanish names and narratives. Knowing the language transforms these hikes from simple walks into layered experiences where landscape and heritage intertwine.

Community building happens naturally when you speak the language. You’ll find yourself welcomed into group hikes, invited to share meals at trailheads, and connected to networks of outdoor enthusiasts who organize adventures in Spanish. This isn’t just about vocabulary, it’s about becoming part of a vibrant, growing community that sees trails as places for connection as much as exploration.

Core Hiking Vocabulary in Spanish

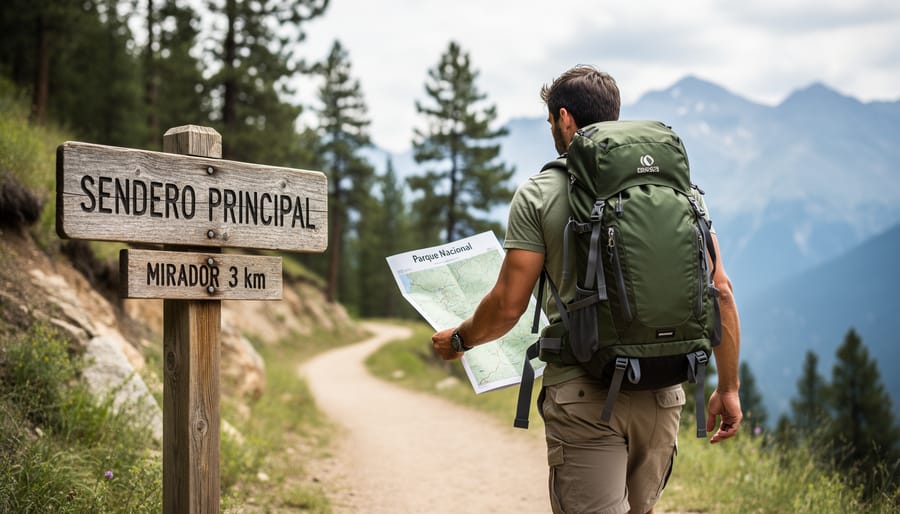
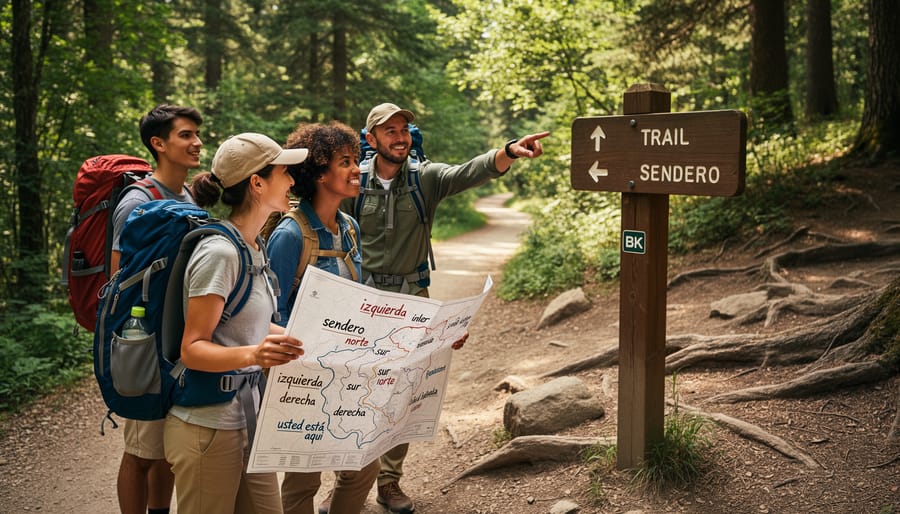
Hikers at a forest trail junction reviewing a guide book and pointing to the path ahead.
A hikers’ decision point on a North American trail shows how Spanish vocabulary supports navigation and confidence while exploring with others.

Trail Navigation and Directions

When you encounter fellow hikers or guides on North American trails, a few key phrases help you navigate confidently. Start with “¿Dónde está el sendero?” (Where is the trail?) or “¿Por dónde se va a…?” (Which way to…?) when you need directions. To understand what’s ahead, ask “¿Cuántos kilómetros faltan?” (How many kilometers remain?) or “¿Cuánto tiempo tarda?” (How long does it take?).

Trail difficulty levels follow a simple pattern: “fácil” means easy, “moderado” indicates moderate, and “difícil” signals difficult or challenging terrain. You’ll also hear “empinado” for steep sections and “plano” for flat stretches. When discussing elevation changes, particularly switchbacks in hiking the term “zigzag” works universally, though some guides use “curvas cerradas.”

Directional phrases include “todo recto” (straight ahead), “a la izquierda” (to the left), and “a la derecha” (to the right). To confirm you’re on track, ask “¿Vamos bien?” (Are we going the right way?). These basics transform uncertainty into clear communication, whether you’re reading bilingual trail markers or chatting with Spanish-speaking hikers sharing the path.

Safety and Emergency Phrases

When hiking in remote areas, knowing emergency Spanish can literally save lives. Start with the essentials: ¡Ayuda! (AH-yoo-dah) and ¡Socorro! (soh-KOH-roh) both mean “Help!” and will get immediate attention. If you’re injured, say “Estoy herido” (es-TOY eh-REE-doh) for “I’m injured” or “Necesito ayuda médica” (neh-seh-SEE-toh ah-YOO-dah MEH-dee-kah) for “I need medical help.”

For navigation emergencies, “Estoy perdido” (es-TOY pehr-DEE-doh) means “I’m lost,” while “Hay peligro” (eye peh-LEE-groh) warns of danger ahead. Weather threats require quick recognition: tormenta (storm), niebla (fog), and avalancha (avalanche) appear on warning signs across bilingual trail systems.

Wildlife encounters need clear communication too. Beyond carrying bear bells know “¡Cuidado con el oso!” (watch out for the bear) and “No te muevas” (don’t move). Practice these phrases before your hike so they come naturally under stress, when fumbling for words wastes critical seconds.

Spanish-Language Hiking Tours in Canada

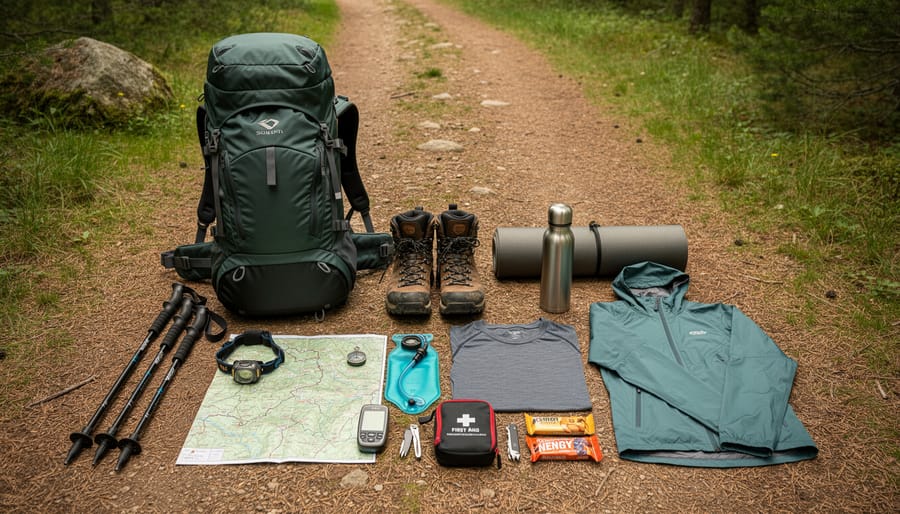
Close-up of hiking equipment, backpack, trekking poles, canteen, and trail boot, on a rocky campsite surface.
On-the-ground hiking gear laid out near the trail highlights the key vocabulary hikers need for equipment and preparation.

Canada’s wilderness beckons Spanish-speaking adventurers through a growing network of guided hiking experiences designed specifically for those who prefer exploring in their native language. From the rugged peaks of the Rockies to the pristine forests of Ontario, multi-day hiking tours conducted in Spanish are opening doors to immersive backcountry experiences where language is never a barrier to adventure.

Currently, over 120 hiking and trekking trips operate across Canada, with options ranging from compact 3-day weekend getaways to immersive 23-day expeditions that traverse multiple provinces. August stands out as the peak month for these adventures, when stable weather and abundant daylight create ideal conditions for tackling challenging alpine routes. For 2026 bookings, many operators now offer free cancellation up to 7 days before departure, giving you flexibility as you plan your adventure around work schedules or weather forecasts.

Destination Duration Range Featured Routes
Algonquin Provincial Park 3-7 days Forest trails, lake portages, wildlife viewing
Jasper National Park 5-12 days Sulphur Skyline, Cavell Meadows, Skyline Trail
Canadian Rockies Circuit 14-23 days Multi-park routes, glacier walks, mountain passes

Eastern Canada’s Algonquin Provincial Park serves as an accessible entry point for Spanish-language hiking groups, with departures from Toronto making it convenient for international travelers. The park’s network of backcountry trails weaves through dense boreal forests where moose sightings are common and the sound of loons echoes across countless lakes.

Out west, Jasper National Park offers some of the most dramatic alpine hiking terrain accessible with Spanish-speaking guides. Routes like Sulphur Skyline deliver panoramic mountain vistas after a challenging climb, while Cavell Meadows showcases wildflower-carpeted meadows beneath the Angel Glacier. The multi-day Skyline Trail, perhaps Jasper’s most celebrated backcountry route, takes hikers above treeline for extended periods, where you’ll need a quality sleeping pad to ensure comfortable rest at high-elevation campsites where temperatures drop sharply after sunset.

For extended adventures, the Path of the Glacier route and Wilcox Pass provide access to some of Canada’s most pristine wilderness, where your Spanish-speaking guide can share ecological insights while navigating ancient ice fields and reading subtle changes in mountain weather patterns.

Building Your Spanish Trail Vocabulary Naturally

The best way to learn Spanish trail vocabulary is through real hiking situations, not textbook drills. Start by joining Spanish-speaking hiking groups in your area or online communities where members organize bilingual trail outings. These groups naturally blend conversation practice with actual outdoor experiences, so you’re learning the words “sendero” and “cima” while walking a trail, not just memorizing flashcards at home.

Language exchange apps work well when you focus them specifically on outdoor topics. Find a conversation partner who also hikes, and structure your sessions around planning imaginary trips or discussing recent adventures. This approach keeps the vocabulary relevant and sticks in your memory because you’re attaching words to real scenarios you care about.

Spanish hiking podcasts and outdoor travel shows provide passive exposure that builds your ear for trail terminology. Listen while you drive or during gym workouts, and you’ll pick up pronunciation and conversational rhythms without dedicated study time. Look for content featuring Latin American mountain guides or travel hosts exploring trails.

Bilingual trail guides and maps offer another practical learning tool. Regions like Mont-Tremblant provide bilingual signage, giving you instant translation context as you hike. You can compare English and Spanish terms side by side while experiencing the actual terrain they describe. This works particularly well for hiking Tremblant where French-English-Spanish resources are increasingly available.

Build your skills gradually through consistent exposure rather than cramming. Your comfort level will grow naturally as you encounter the same terms repeatedly in different hiking contexts across weeks and months of practice.

Conversational Spanish for Group Hikes

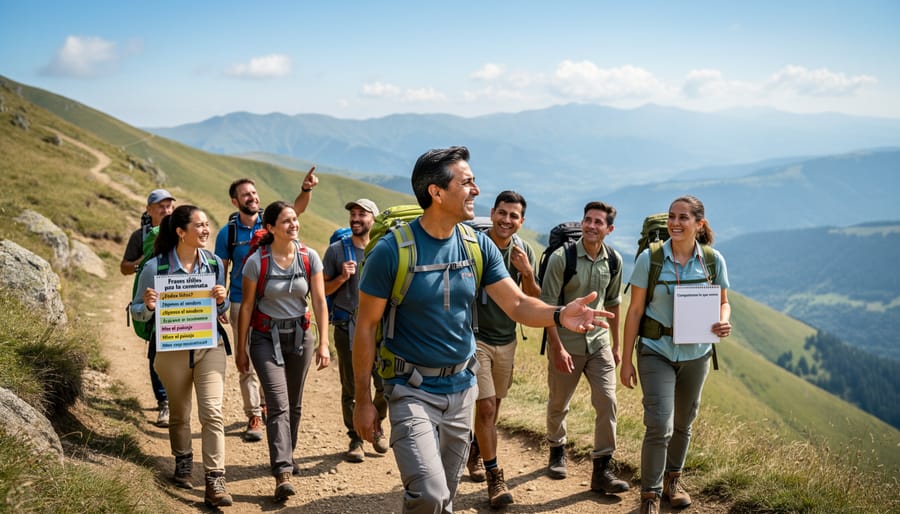
A guide and hikers walking together on a mountain trail during golden hour.
A guide-led hike on scenic terrain illustrates how Spanish phrases help with group coordination, sharing observations, and enjoying the landscape together.

Sharing the trail with Spanish-speaking hikers creates connections that go beyond the scenery. Start with simple introductions: “Me llamo Sarah” (I’m called Sarah) and “Soy de Vancouver” (I’m from Vancouver) open doors immediately. When someone asks “¿De dónde eres?” (Where are you from?), you’ve got your conversation starter.

Trail conditions come up constantly during group hikes. “El sendero está resbaladizo” (The trail is slippery) warns companions about hazards, while “Hay mucho barro” (There’s a lot of mud) prepares everyone for messy sections ahead. If you’re struggling with elevation, “Estoy cansado” or “Estoy cansada” (I’m tired, masculine/feminine) signals you need a slower pace without embarrassment.

How do I ask someone to slow down on a trail?

Say “¿Podemos caminar más despacio?” (Can we walk more slowly?). Pronounce it: POH-deh-mohs kah-mee-NAR mahs dehs-PAH-see-oh.

What’s the best phrase for coordinating a water break?

“¿Descansamos aquí?” (Should we rest here?) works perfectly. The response “Sí, buena idea” (Yes, good idea) shows agreement.

How do I point out wildlife without scaring it away?

Whisper “Mira” (Look) followed by the animal name: “Mira el ciervo” (Look at the deer). Keep your voice low and gesture gently.

Wildlife sightings turn into shared excitement with phrases like “Veo un pájaro grande” (I see a big bird) or “¡Qué hermoso!” (How beautiful!). When the views get stunning, “Mira las montañas” (Look at the mountains) invites everyone to pause together. For break coordination, “¿Tienes agua?” (Do you have water?) checks on hydration, while “Descansemos aquí” (Let’s rest here) proposes a stopping point. These phrases build camaraderie naturally, turning strangers into trail companions.

What You Need to Know Before You Go

Mastering basic Spanish trail vocabulary opens doors to richer hiking experiences across North America, especially in regions with strong Hispanic communities and Spanish-language tour offerings. You’ll find it most valuable in popular destinations like Jasper, Algonquin Provincial Park, and throughout the Southwest, where you’re likely to encounter Spanish-speaking guides, fellow hikers, and bilingual trail signage.

Start small rather than aiming for fluency. Learn five to ten phrases before your next hike, practice them out loud, and build from there through real conversations on the trail. The beauty of learning hiking Spanish is that you can apply it immediately in authentic situations, whether you’re joining a guided tour in Canada, chatting with other hikers, or simply reading trail markers with better understanding.

Language learning enhances every outdoor adventure by connecting you more deeply with the landscape and the people who share it. At Stanley Kayaking, we believe inclusive exploration means embracing opportunities to communicate across cultures, and the trail offers the perfect classroom for putting new vocabulary into practice. Pack your phrasebook alongside your gear and let curiosity guide both your journey and your learning.

How to Choose a Wakeboarding Helmet: A Buying Guide for 2026

A wakeboarding helmet should meet CE EN 1385 certification, fit snugly without pressure points, and match your riding environment, with quality options starting around $80 in Canada for 2026. Whether you’re learning behind the boat at Canadian kayaking destinations that double as wake parks or progressing to cable park features, choosing the right helmet comes down to understanding the difference between soft EVA foam shells for flexibility and hard-shell designs for high-impact protection.

The shift toward helmet use in wakeboarding mirrors what happened in snowboarding two decades ago. What was once considered optional gear for beginners has become standard equipment as riders push bigger tricks and cable parks add more technical obstacles. If you’re hitting kickers, sliding rails, or learning inverts, a helmet isn’t about fear, it’s about extending your session when things don’t go as planned.

The challenge isn’t finding a helmet. Brands like Liquid Force, Follow, and Sandbox now offer dedicated wakeboard models at retailers like . The real decision lies in matching certification standards to your riding style, understanding when a $80 soft-shell helmet provides enough protection versus when you need a premium hard-shell design, and avoiding the common mistake of prioritizing style over proper fit. A helmet that shifts on impact or sits too high on your head offers little more than false confidence.

This guide breaks down the key factors that separate effective protection from wasted money, compares helmet types for boat versus cable park riding, and highlights the purchasing mistakes that leave riders either over-protected for mellow sessions or under-protected when it matters most.

Key Takeaway: The Liquid Force Hero ($84.99) and Follow Pro Charcoal ($79.99) both carry CE EN 1385 certification and represent solid mid-range options for Canadian riders. Look for these and other certified models at, which stocks Sandbox, Follow, and Liquid Force helmets with verified water sports protection.

Why Helmet Wakeboarding Matters: Safety First on the Water

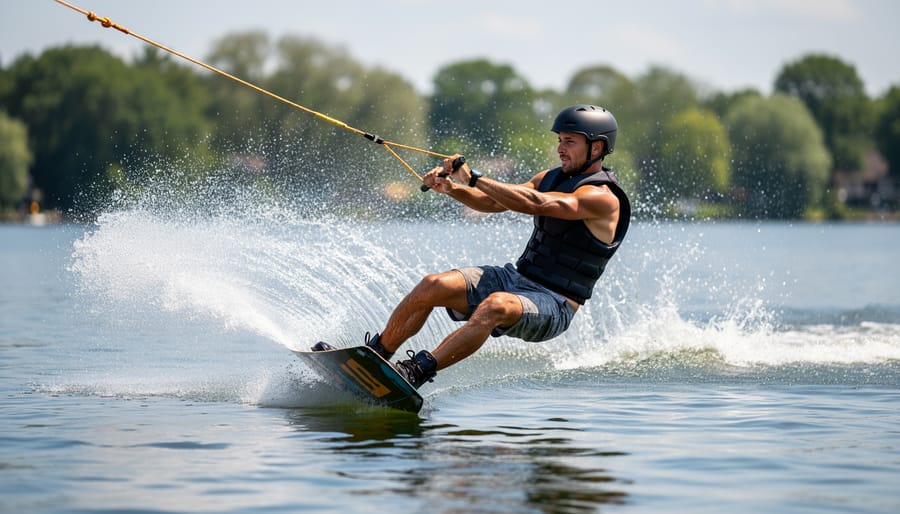
Wakeboard rider wearing a water helmet jumping through spray near the wake.
A helmeted wakeboard rider cuts across the water, illustrating how head protection fits naturally into real riding conditions.

Wakeboarding used to be the one water sport where helmets were rare, but that’s changing fast. Riders are waking up to the reality that head injuries don’t discriminate by activity, and the forces involved in wakeboarding crashes rival those in water sports safety incidents on whitewater rivers. When you’re carving at speed behind a boat or launching off cable park features, a fall can send you into the water at angles and velocities that make head protection essential, not optional.

The impacts wakeboarding riders face are diverse and unpredictable. Behind the boat, a botched landing can whip your head back or send you tumbling into the wake. At cable parks, the hazards multiply: metal obstacles, wooden kickers, and the cable itself all pose collision risks. Then there’s the wakeboard itself, which can swing around during a fall and strike you before you even hit the water. These scenarios create genuine concussion risk, and Helmets during water sports falls have been shown to absorb impact energy that would otherwise reach the skull.

Tip: Wakeboarding impacts can be as serious as whitewater kayaking collisions, protect your head with the same diligence you’d bring to rapids.

The broader water sports community has long embraced helmets for kayaking, rafting, and kiteboarding, and wakeboarding is finally catching up. Manufacturers now offer CE EN 1385-certified helmets designed specifically for water impacts, balancing protection with the drainage and comfort riders need for long sessions. As helmet wakeboarding gains momentum in 2026, it’s joining a culture that values progression without compromising safety, a mindset that resonates with anyone who’s navigated technical rapids or explored remote coastlines where preparation makes all the difference.

What to Look for in a Wakeboarding Helmet: Key Buying Factors

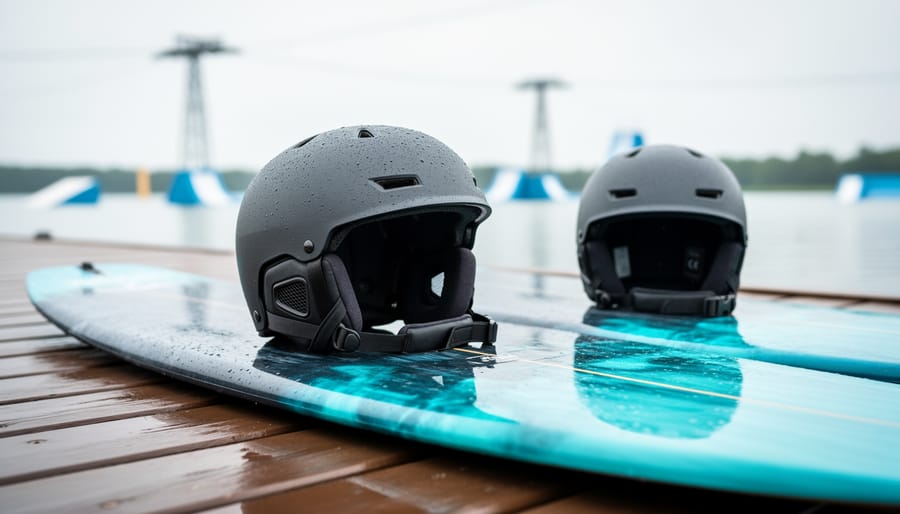
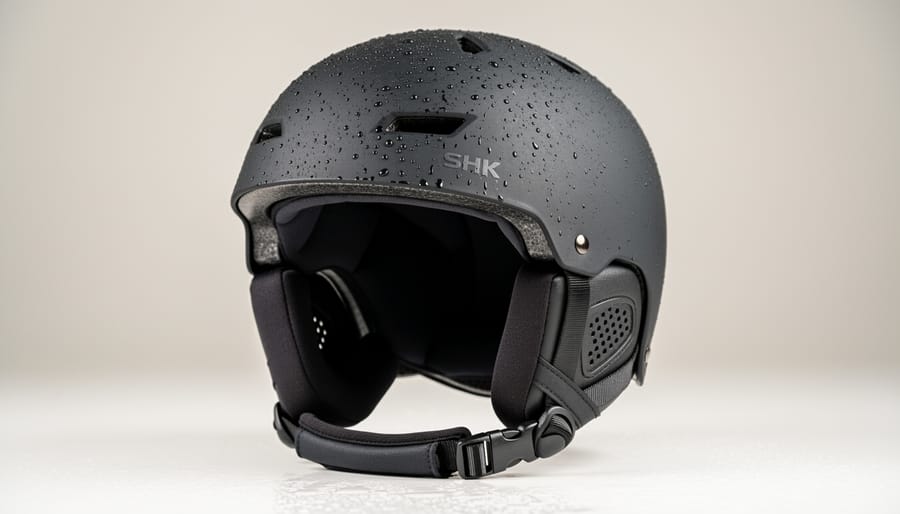
Close-up of a wakeboarding helmet on a wet dock near wakeboarding gear.
A close view of a water-ready wakeboarding helmet highlights the kind of materials and features that matter for safety and comfort.

Understanding CE EN 1385 Certification

CE EN 1385 is the international benchmark for helmets used in white water and water sports, covering environments from Class I to Class IV rapids. Originally designed for canoeing and whitewater kayaking, this standard tests helmets for impact resistance, penetration protection, and retention system strength, exactly the qualities you need when you’re learning to wakeboard or pushing your limits at a cable park. Falls onto water at speed, strikes from the board, and cable obstacles all create impact scenarios similar to what whitewater paddlers face, which is why wakeboarding has adopted this certification.

When you’re shopping for a helmet, look for “CE EN 1385” or “CE Approved EN 1385” printed on the label or listed in the product specifications. The Liquid Force Hero Wakeboard Helmet ($84.99) carries CE certification, as does the Follow Pro Wakeboard Helmet Charcoal 2026 ($79.99). Many helmets from Follow, Liquid Force, and Sandbox available at Canadian retailers like meet this standard, though you’ll want to verify on each specific model since not all water helmets are tested to EN 1385.

If the certification isn’t clearly marked on the helmet itself, check the manufacturer’s website or ask the retailer directly before you buy. A helmet without CE EN 1385 certification might look the part but hasn’t been independently tested for the impacts you’ll encounter on the water.

Soft-Shell vs. Hard-Shell Construction

Wakeboarding helmets fall into two main construction camps: soft-shell EVA foam and hard-shell ABS plastic. Each design serves distinct riding environments and impact scenarios.

Soft EVA helmets dominate recreational wakeboarding for good reason. The foam flexes on impact, distributing force across a wider area rather than concentrating it at a single point. You’ll find these helmets lighter and more comfortable for hour-long sessions behind the boat, with better drainage since water flows through the foam cells. Models like the Liquid Force Hero ($84.99) and Follow Pro ($79.99) use soft EVA construction while maintaining CE EN 1385 certification. The trade-off? They offer less protection against sharp, localized impacts, think metal cable park features or dock edges.

Hard-shell helmets bring reinforced outer casings, typically ABS plastic over foam padding. Cable park riders favor this construction when hitting rails, kickers, and overhead obstacles where point impacts are common. The rigid shell prevents penetration and spreads force before it reaches the foam liner. You’ll pay for that durability with added weight and reduced ventilation compared to soft designs.

Choose soft-shell for boat wakeboarding, recreational cable sessions, and any scenario prioritizing comfort during repetitive falls into open water. Opt for hard-shell when your riding involves frequent contact with fixed obstacles, cable park features, bridge pilings, or aggressive freestyle progression where impact angles vary widely. Some riders keep both types and swap based on the day’s plan.

Types of Wakeboarding Helmets Compared

Three wakeboarding helmet styles arranged on a wet surface near cable equipment and water.
The three helmets arranged side-by-side visually reinforce how helmet styles differ for different wakeboarding environments.

Choosing between helmet categories can feel overwhelming, but each type is purpose-built for specific riding conditions. A boat wakeboarding helmet prioritizes minimal weight and maximum drainage because riders spend most of their time cutting through clean water with controlled falls. These helmets typically feature extensive ventilation ports and quick-dry foam that won’t trap water against your skull during surface recoveries. The lightweight construction means you’ll barely notice it after the first few minutes on the water, which matters during long sessions behind the boat.

Cable park helmets take a different approach entirely. If you’re hitting rails, kickers, and obstacles at the local park, you need reinforced protection where it counts. These designs usually incorporate harder shell panels over high-impact zones, crown, temples, sides, while maintaining flexibility elsewhere. The trade-off is slightly more weight and reduced ventilation compared to boat-specific models, but that extra armor becomes essential when you clip an overhead slider or take an awkward hit from a feature. Cable riders regularly face impacts that boat wakeboarders rarely encounter, so the construction reflects those realities.

Multi-sport water helmets split the difference, offering versatility for riders who cross over between wakeboarding, kayaking, SUP, and other paddle sports. You’ll find these helmets carry CE EN 1385 certification, the water sports standard covering Class I to Class IV rapids, which makes them equally valid whether you’re carving wakes or running whitewater. The compromise? They often weigh a bit more than dedicated wakeboarding helmets and may lack sport-specific refinements like optimized ear coverage or wake-oriented drainage patterns.

Helmet Type Best Use Case Key Features Typical Price Range 2026
Boat Wakeboarding Riding behind boats, clean water falls Lightweight, maximum drainage, extensive vents $75, $110
Cable Park Obstacles, rails, kickers, park features Reinforced shell panels, higher impact protection $85, $130
Multi-Sport Water Wakeboarding, kayaking, SUP, whitewater CE EN 1385 certified, versatile, all-around protection $80, $120

The right category depends on where you ride most often. If you’re exclusively behind the boat on weekends, a dedicated wakeboarding helmet makes sense. Cable park regulars should invest in the reinforced protection. Paddlers who wakeboard occasionally benefit from multi-sport designs that pull double duty without compromising safety standards. Brands like Liquid Force and Follow offer models across these categories, with options like the Liquid Force Hero at $84.99 and the Follow Pro at $79.99 serving boat riders well, while Sandbox helmets available through Canadian retailers cover the cable park and crossover segments.

Top Wakeboarding Helmet Recommendations for 2026

When shopping for a wakeboarding helmet in Canada, your best bets center around proven models that balance certification, comfort, and value. The Liquid Force Hero Wakeboard Helmet stands out at $84.99 with CE certification to EN 1385 standards, making it a reliable choice for riders who want verified impact protection without breaking the bank. Its soft EVA construction absorbs shock effectively while maintaining the lightweight feel boat wakeboarders prefer during long sessions.

For riders seeking a dedicated 2026 model, the Follow Pro Wakeboard Helmet in Charcoal comes in at $79.99 and delivers CE-certified protection to EN ISO standards. This price point makes it an accessible entry for beginners or intermediate riders building out their safety kit, though the specific fit system and drainage features vary by design. Follow’s reputation in wakeboarding gear adds credibility, and the charcoal colorway fits riders who prefer understated aesthetics over flashy graphics.

Beyond these specific models, carries helmets from Sandbox, a brand known for hard-shell construction that appeals to cable park riders facing rails, kickers, and obstacle impacts. While exact Sandbox pricing wasn’t verified for this guide, their availability through Canadian retailers means you can compare multiple brands side-by-side rather than settling for a single option shipped from the U.S.

The sweet spot for a quality wakeboarding helmet sits around $75 to $85 in Canada, where you’ll find CE EN 1385 certification, proper drainage, and construction materials suited to water impacts. Avoid chasing the absolute cheapest option if it lacks clear certification markings; the difference between a $50 uncertified helmet and an $80 verified model could matter when your head meets the water at speed.

Common Mistakes to Avoid When Buying a Wakeboarding Helmet

Buying your first wakeboarding helmet can feel straightforward, but several common traps lead to regret or compromised safety. Understanding where beginners go wrong helps you make a smarter choice from the start.

The biggest mistake is prioritizing style over substance. A sleek design means nothing if the helmet lacks CE EN 1385 certification, the international benchmark for water sports headgear used in rapids from Class I to Class IV. Fashion-forward helmets without proper certification won’t protect you during hard impacts. Always verify the CE mark before you buy, brands like Follow and Liquid Force clearly label their certified models, such as the Liquid Force Hero Wakeboard Helmet at $84.99, which carries CE certification.

Here are the pitfalls that compromise safety and value:

  • Skipping certification checks and assuming all water helmets meet safety standards
  • Buying based on looks alone without verifying CE EN 1385 compliance
  • Ignoring size charts and guessing at fit instead of measuring head circumference
  • Reusing damaged helmets after significant impacts, cracks, or visible foam degradation

Another critical error is choosing helmets designed for other sports. Bike and skate helmets aren’t built for water, they lack drainage holes and absorb water, becoming heavy and uncomfortable during prolonged sessions. Water-specific helmets feature integrated drainage systems that shed water instantly, keeping you light and agile.

Don’t overlook proper fit and adjustment. A helmet that shifts during movement won’t protect you when it matters. Test stability before purchasing, and take time to adjust retention systems correctly. Comfort matters for long sessions, but security is non-negotiable.

Finally, many riders ignore replacement timelines. Even without visible damage, helmets degrade over time from UV exposure, saltwater, and repeated stress. Retiring a helmet after any substantial impact protects you from hidden structural weaknesses that compromise safety.

How to Ensure a Proper Fit and Comfort

A helmet that doesn’t fit properly won’t protect you, no matter how impressive the certification. Start by measuring your head circumference at its widest point, typically just above your eyebrows and ears, using a flexible tape measure. Most manufacturers provide size charts (small, medium, large, or specific centimetre ranges), but these vary by brand, so always consult the chart for the specific model you’re considering rather than assuming your usual hat size will translate.

Once you have a helmet on, test its stability before you hit the water. Shake your head side to side and nod up and down; the helmet should move with your head as a single unit, not shift independently or slide around. If it rocks forward to cover your eyes or slips backward, try a smaller size or adjust the retention system. Most wakeboarding helmets use adjustable dial systems or strap configurations at the back, allowing you to fine-tune the fit even within a size category.

Pay attention to pressure points during this testing phase, because gear comfort matters for long sessions on the water. The helmet should feel snug but not painfully tight, with even pressure distribution around your entire head. Check that ear coverage (if present) doesn’t press uncomfortably or restrict hearing too much, and ensure chin straps sit flat without pinching. Remember that foam liners may compress slightly with use, so a helmet that feels almost too snug when new will likely settle into a perfect fit after a few sessions.

Caring for Your Wakeboarding Helmet: Maintenance and Lifespan

Your wakeboarding helmet takes a beating on the water, so proper care extends its protective lifespan and keeps you safe. After every session, rinse your helmet thoroughly with fresh water to remove salt, sand, and lake debris that can degrade foam and straps. Saltwater is especially corrosive, so never skip this step after ocean wakeboarding. Air-dry your helmet completely in a shaded, well-ventilated spot, avoiding direct sunlight or heat sources that can warp materials and encourage mold growth inside the padding.

Inspect your helmet regularly for cracks in the shell, compressed or crumbling foam, and frayed retention straps. Any visible damage means it is time to retire the helmet, even if it looks minor. After any significant impact, a hard fall, or a direct blow from your board or a cable park obstacle, replace your helmet immediately. The foam inside compresses on impact and loses its ability to protect you in a second hit, even if the exterior looks fine.

Treat helmet maintenance like the camping gear checklists you follow for kayaking trips: routine care prevents failure when you need it most. A well-maintained CE EN 1385 helmet lasts three to five years under normal use, but always prioritize safety over squeezing extra seasons from aging gear.

Frequently Asked Questions About Wakeboarding Helmets

Do I really need a helmet for wakeboarding?

While not legally required in most locations, a helmet significantly reduces concussion risk from falls, cable park obstacles, and board strikes. The same trail safety habits that protect you on outdoor adventures apply to wakeboarding, prevention is always smarter than recovery.

Can I use a kayaking helmet for wakeboarding?

Yes, if it’s CE EN 1385 certified. This standard covers both whitewater kayaking and wakeboarding because both sports involve similar impact risks from water, obstacles, and equipment. A kayaking helmet with proper drainage works well for wakeboarding, though wakeboarding-specific models often have sleeker profiles optimized for the sport.

What’s the difference between CE EN 1385 and other certifications?

CE EN 1385 is specifically designed for water sports helmets in Class I to Class IV rapids conditions, accounting for drainage, buoyancy, and water-specific impacts. Bike and skate helmets use different standards that don’t address water drainage or the unique forces from water landings, making them unsuitable for wakeboarding despite offering general head protection.

How long does a wakeboarding helmet last?

Most manufacturers recommend replacing helmets every three to five years, or immediately after any significant impact. UV exposure, saltwater, and repeated stress degrade foam over time, reducing protective capability even when visible damage isn’t apparent.

Are more expensive helmets safer?

Not necessarily. Safety comes down to CE EN 1385 certification and proper fit, which you’ll find on helmets ranging from $79.99 to over $150. Higher prices typically reflect premium materials, advanced ventilation systems, or brand positioning rather than measurably better protection, so focus on certification and fit over price alone.

The answers above clear up the most common confusion points when shopping for a wakeboarding helmet. Remember that certification matters more than brand recognition, and a $80 helmet that fits perfectly offers better protection than a $200 model that shifts during impacts. Cross-sport compatibility with kayaking helmets gives you flexibility if you already own water sports gear, though wakeboarding-specific designs offer streamlined profiles that reduce drag. Replace your helmet after crashes or when the foam shows compression marks, regardless of age, because compromised structure won’t protect you when it counts.

Helmet wakeboarding represents more than just a passing trend. It’s a shift toward making this exhilarating sport safer for riders at every level. By choosing a CE-certified helmet that fits securely and suits your riding environment, whether you’re carving behind the boat or hitting features at the cable park, you’re protecting yourself without sacrificing performance or fun.

At Stanley Kayaking, we champion adventures that balance excitement with smart preparation. The same principles that guide you when selecting the right kayak or canoe safety equipment apply here: quality gear matters, proper fit is non-negotiable, and investing in protection lets you push your limits with confidence. Wakeboarding joins the family of water sports where helmets have become standard, and the $80 to $85 models available in Canada today prove that serious protection doesn’t require a massive budget.

Ready to explore more ways to stay safe on the water? Check out our guides on kayak safety equipment and choosing the right PFD for kayaking to round out your adventure toolkit. Get out there, ride hard, and wear your helmet.

How to Plan Hiking in Spanish: Your Guide to North American Trails and Spanish-Language Resources

Finding hiking trails and resources in Spanish connects you to North American wilderness through language, culture, and community. Whether you’re searching for trail guides written in Spanish, planning a trip through Spanish-speaking regions of North America, or learning essential hiking vocabulary, the good news is that Canada and the western United States offer extensive bilingual resources and tour operators ready to accommodate Spanish speakers.

Canada alone features 123 hiking and trekking trips ranging from 3 to 23 days, with August being the most popular departure month. TourRadar lists over 2,500 operators and maintains a 4.6-star rating across more than 10,000 reviews, giving you plenty of vetted options. Popular destinations like Johnston Canyon in Banff (the park’s most visited waterfall hike), the Bruce Trail along the Niagara Escarpment, and Jasper’s backcountry trails increasingly offer Spanish-language materials and guides.

The challenge isn’t finding great hiking, it’s connecting the right language resources to the trails that match your skill level and interests. Many adventure companies now provide Spanish-speaking guides, translated safety materials, and culturally inclusive group experiences. This guide walks you through evaluating operators, verifying credentials, preparing essential Spanish hiking vocabulary, and booking trips that deliver both linguistic comfort and genuine wilderness adventure. You’ll learn how to confirm language support before you commit, what questions to ask tour companies, and how to stay safe when trail signs might not be in your preferred language.

Key Takeaway: Successful preparation means having written confirmation of your meeting point, verified guide credentials, a complete equipment checklist in hand, and emergency contacts programmed into your phone. If anything feels unclear or unconfirmed three days before departure, contact your operator directly rather than assuming details will work out.

What You’ll Need Before You Start

Hiking gear laid out on a wooden table, including boots, a first-aid kit, a headlamp, and water bottle.
Hiking readiness is shown through essential gear laid out for inspection, reinforcing what to prepare before heading to the trail.

Before you set foot on a North American trail with Spanish-language guides or resources, you’ll need the right planning tools and physical preparation. This isn’t just about packing a backpack, it’s about ensuring you can research destinations, communicate effectively, and stay safe from the moment you book until you return.

Planning and Research Tools

Start with a reliable booking platform that aggregates hiking operators. TourRadar lists 100+ Canadian trips with 2500 operators to compare, making it an essential starting point. You’ll also want access to trail-specific websites for destinations like Johnston Canyon or the West Coast Trail, where route details and permit information live. Create a dedicated folder (digital or physical) for confirmation emails, itineraries, and emergency contacts.

Basic Spanish vocabulary for hiking makes a real difference, even if your trip doesn’t require fluency. Learn essential trail terms: “sendero” (trail), “refugio” (shelter), “cumbre” (summit), “agua potable” (drinking water), and “socorro” (help). Free apps like Duolingo or SpanishDict can build your hiking-specific vocabulary in a few weeks.

  • Booking platform account (TourRadar or similar aggregator)
  • Basic Spanish hiking vocabulary list or translation app
  • Trail-specific gear including proper footwear, layered clothing, and sleeping pad choice
  • Valid identification and any required permits for Canadian national parks
  • Budget covering tour costs, equipment purchases, and emergency funds

Physical Gear and Documentation

Your gear list depends on trip length, those 3-day excursions require less than 23-day expeditions, but non-negotiables include weatherproof layers, navigation tools, first-aid supplies, and region-appropriate equipment for iceberg trails or wildlife areas. Verify your passport validity if crossing borders, and confirm whether your chosen operator requires advance permit applications for protected areas.

Budget preparation goes beyond the tour price. Factor in gear purchases, travel to trailheads, travel insurance covering hiking activities, and a contingency fund of at least 20% of your total trip cost for unexpected needs.

Safety Considerations and Red Flags

A hiker stands at a scenic canyon overlook with trekking poles and a daypack against limestone cliffs in warm golden light.
A lone hiker pauses at a scenic canyon viewpoint, capturing the kind of North American landscape people visit when planning hikes with Spanish-language options.

Before you book a Spanish-language hiking adventure in North America, address these critical safety concerns to protect yourself on the trail and avoid costly booking mistakes.

Weather in regions like British Columbia, Jasper, and Quebec shifts rapidly, especially at elevation. Check multi-day forecasts before departure and understand how to read Spanish-language weather warnings if your tour materials or guides communicate in Spanish. Pack layers for sudden temperature drops and waterproof gear for unexpected storms, even during the popular August departure window when conditions are generally stable.

Wildlife encounters require serious preparation in Canada. Black bears, grizzlies, cougars, moose, and elk inhabit popular hiking areas including Johnston Canyon and the Bruce Trail corridor. Carry bear bells know how to use bear spray, and learn the Spanish terms for wildlife warnings your guide might use: “oso” (bear), “alce” (moose), “puma” (cougar). Never approach wildlife for photos, store food properly, and hike in groups when possible.

Warning: Verify tour operator credentials carefully, legitimate operators should meet or exceed the 4.6-star rating benchmark based on substantial reviews, as established by verified platforms listing 100+ Canadian trips.

Scam bookings plague adventure travel. Red flags include operators without verifiable reviews, prices significantly below market rates, refusal to provide written confirmation, pressure to pay via wire transfer, and vague meeting point details. Cross-reference operators across multiple platforms and confirm they hold proper permits for protected areas like national parks.

Trail difficulty ratings in Spanish differ from English systems. “Fácil” (easy), “moderado” (moderate), and “difícil” (difficult) are subjective, ask for specific elevation gain, distance, and technical requirements. A “moderate” trail spanning 15 kilometers with 800 meters of elevation gain demands different fitness than a flat 15-kilometer route.

Emergency communication is non-negotiable. Save offline maps, carry a charged phone or satellite communicator, know your guide’s emergency contact protocol, and memorize key Spanish phrases: “ayuda” (help), “emergencia” (emergency), “perdido” (lost). Share your itinerary with someone not on the trip.

Step-by-Step: Finding and Booking Your Spanish-Language Hiking Adventure

A group of hikers walking on a forest trail at dusk with headlamps, rain jackets, and backpacks visible.
Hikers navigate a forest trail as light fades, emphasizing practical safety and preparedness for unfamiliar conditions.

Step 1: Choose Your Destination and Region

Start by identifying which Canadian regions align with your language learning goals and hiking skill level. Canada offers verified Spanish-language tour options across 123 different hiking trips, giving you substantial choice whether you’re seeking cultural immersion or simply trail descriptions in Spanish.

For first-time hikers, Johnston Canyon in Banff represents Canada’s most visited waterfall hike and frequently appears in Spanish-language tour itineraries due to its accessibility and dramatic scenery. If you prefer longer coastal routes, British Columbia’s West Coast Trail delivers multi-day wilderness experiences that several operators market to Spanish-speaking adventurers.

The Bruce Trail along the Niagara Escarpment provides a gentler option closer to urban centers, while Quebec’s trails offer genuine francophone cultural connections that often extend to Spanish-language guides serving international groups. Jasper’s backcountry routes attract advanced hikers seeking wildlife viewing opportunities, particularly during August when most departures occur.

Research each region’s distinctive features before committing. Iceberg trails along coastal areas require different preparation than inland mountain hikes. Check whether operators provide Spanish trail maps, whether guides speak Spanish conversationally or fluently, and whether the Spanish connection is cultural programming versus simple translation services. TourRadar’s platform lets you filter Canada’s 100+ trips by language preference and compare operators, helping you match destinations to your specific Spanish-language expectations rather than booking blindly.

Step 2: Review Available Routes, Trip Lengths, and Difficulty

Start by filtering trips by duration to match your available time and fitness level. Canada’s 123 hiking options span 3 to 23 days, so narrow your search based on whether you want a weekend escape or a multi-week expedition. Shorter trips (3-7 days) typically suit beginners or those testing Spanish-language guiding, while 14+ day adventures assume prior backpacking experience and higher stamina.

Pay close attention to difficulty ratings in Spanish-language descriptions. Terms like “moderado” (moderate), “difícil” (difficult), and “técnico” (technical) signal different skill requirements. Look for elevation gain figures, routes climbing more than 500 meters daily demand solid conditioning. Check if descriptions mention what are switchbacks steep ascents, or scrambling sections, which increase difficulty regardless of distance.

Compare daily mileage against your normal hiking pace. A route listing “15 km diarios” might sound manageable, but factor in terrain type, pack weight, and altitude. Read full itineraries to spot rest days, acclimatization periods, or shuttle-assisted sections that reduce physical demands. Cross-reference operator ratings, platforms show 4.6-star averages from 10,000+ reviews, to gauge whether past hikers found difficulty levels accurate.

Step 3: Check Seasonal Timing and Departure Options

Timing your hiking adventure correctly shapes everything from weather conditions to wildlife sightings. August stands out as the peak departure month for Canadian hiking trips, offering the most tour options and typically the most stable weather. Summer months provide longer daylight hours and clearer trails, but they also bring higher demand, book early if you’re targeting popular routes like Johnston Canyon.

Consider what you want to experience when choosing your dates. Early summer (June-July) offers wildflower blooms and active wildlife preparing for warmer months, while late summer into early fall (August-September) provides ideal temperatures and the chance to spot animals like bears foraging before hibernation. If iceberg viewing interests you, coastal regions in Newfoundland and Labrador show icebergs primarily from late spring through early summer, not during the August peak hiking season.

Check specific departure calendars on booking platforms, as many operators concentrate their trips within narrow windows based on trail accessibility. Some high-elevation routes in British Columbia or Jasper remain snow-covered until mid-summer, limiting your options if you book too early in the season.

Step 4: Compare Operators and Read Reviews

Choosing the right tour operator determines the quality and safety of your entire hiking experience. Start by browsing platforms like TourRadar, which lists over 100 trips across Canada and aggregates more than 2500 operators specializing in hiking and trekking. This gives you a comprehensive view of available options in one place.

Pay close attention to operator ratings and review volume. A 4.6-star rating based on 10,000+ reviews serves as a solid quality benchmark, it indicates consistent positive experiences across thousands of hikers. Read beyond the star rating: look for reviews mentioning guide expertise, safety protocols, group size management, and how operators handle trail conditions at destinations like Johnston Canyon or Jasper.

Filter your search by trip length, difficulty level, and specific regions you identified in earlier steps. Check whether operators offer Spanish-language guides or materials if that’s important to your experience. Compare what’s included in the price, some operators bundle permits, gear, and meals, while others charge separately.

Verify the operator holds proper certifications and insurance for Canadian wilderness guiding. Red flags include vague itineraries, reluctance to answer questions about safety procedures, or pressure to book immediately without reviewing details.

Step 5: Register or Book Your Hike

Once you’ve selected your operator and trip, the booking process typically follows a straightforward sequence. Most platforms like TourRadar streamline registration into a few clear steps, though you should allow extra time if forms appear in Spanish or require translation.

Here’s the typical booking workflow:

  1. Select your exact departure date from the August options (or alternative months if your schedule differs)
  2. Create an account on the booking platform or log in to an existing profile
  3. Complete the registration form with personal details, emergency contacts, and any dietary restrictions or medical information
  4. Review the pricing breakdown including base cost, permits, equipment rentals, and any add-on services
  5. Choose your payment method and decide between full payment or deposit (many operators accept a partial deposit to secure your spot)
  6. Confirm terms and conditions, cancellation policies, and travel insurance requirements
  7. Submit your booking and save the confirmation number immediately

Within 24 to 48 hours, you should receive a detailed confirmation email containing your booking reference, final payment deadlines, and pre-departure instructions. If any forms were in Spanish and you’re uncertain about what you’ve agreed to, contact the operator directly for an English summary before your payment clears. Keep all confirmation documents in both digital and printed formats for easy access during travel.

Preparing Practical Details After Booking

Once you’ve confirmed your booking, shift your focus to the practical groundwork that turns a reservation into a safe, comfortable adventure. Start by contacting your tour operator to confirm whether permits are included or if you need to secure them independently, many Canadian national parks require advance permits, especially for multi-day routes like the West Coast Trail. Your operator should provide a detailed equipment list, but cross-reference it against North American conditions: trails near Jasper or British Columbia demand layers for sudden weather shifts, while iceberg trails in coastal regions require waterproof gear and sun protection for intense glare off ice and water.

Finalize your packing by including wildlife deterrents such as bear spray (mandatory in many Canadian parks), noise-makers, and secure food storage bags. North American hiking brings close encounters with bears, moose, and mountain goats, so understand proper wildlife protocols before departure. Add trail food ideas that travel well and meet your energy needs for long days on steep terrain.

Arrange transportation to trailheads early, remote starting points like those along the Niagara Escarpment may require shuttle services or carpools coordinated through your group. Learn basic Spanish trail phrases if your guides or fellow hikers speak Spanish: “agua” (water), “peligro” (danger), “ayuda” (help), and “cansado” (tired) cover essential communication. Reach out to your guide or group members before departure to establish meeting points, clarify gear questions, and build rapport that makes the trail experience smoother.

How to Verify Your Booking and Prepare for Departure

Review your booking confirmation within 24 hours of receiving it. Check that your departure date, meeting location, trip duration, and group size match what you selected. Contact the operator immediately if any details appear incorrect or if confirmation materials are missing Spanish-language safety information you were promised.

Verify your guide’s credentials by requesting their certification details and emergency response training. Legitimate operators provide guide names and qualifications before departure. For Canadian trips, confirm your guide holds Wilderness First Aid certification and knows the specific region you’ll be hiking, whether that’s Johnston Canyon in Banff or trails along the Niagara Escarpment.

Cross-reference your equipment list against the operator’s requirements and the specific trail conditions for your departure month. August departures to Canadian destinations require different gear than shoulder-season trips. Confirm whether the operator supplies group safety equipment like satellite communicators or if you need your own.

Establish your emergency contact protocol before leaving home. Save the operator’s emergency number, local park ranger contacts for your destination, and your country’s consular emergency line if hiking in a different region. Share your full itinerary, including trailhead GPS coordinates and expected return date, with someone who isn’t joining the trip. Pack a printed copy of all confirmation documents and emergency numbers as backup to digital versions.

Common Questions About Hiking in Spanish-Speaking Contexts

Do I need to speak Spanish fluently to join these hiking trips?

No, fluency isn’t required for most North American hiking trips. Many operators in Canada and the U.S. offer bilingual guides or Spanish-language materials alongside English support, making trails accessible to beginners who want cultural connection without advanced language skills.

Are there Spanish-speaking guides available in Canada?

Yes, several tour operators among the 2500+ companies offering Canadian hiking trips employ Spanish-speaking guides, particularly for popular destinations like Johnston Canyon and Jasper. You can filter for language preferences when searching on platforms like TourRadar to find operators with bilingual staff.

How do I communicate trail emergencies if there’s a language barrier?

Carry a translation app with offline capability and learn basic emergency phrases in both English and Spanish before your trip. Most Canadian trails have emergency contact numbers posted at trailheads, and guides on organized trips carry satellite communication devices regardless of language.

Can beginners join Spanish-language hiking trips?

Absolutely. Canada’s 123 hiking trips range from 3 to 23 days with varying difficulty levels, and many operators specifically design beginner-friendly routes. Check trip descriptions for skill requirements and look for routes labeled as introductory or suitable for first-time hikers.

Beyond these common concerns, you might wonder about finding reliable Spanish-language hiking resources. Digital platforms now offer trail guides, safety briefings, and equipment checklists in Spanish, making preparation straightforward even if you’re coordinating everything yourself. When booking through established operators, ask whether pre-trip materials come in your preferred language. The 4.6-star average rating across 10,000+ reviews on platforms like TourRadar shows that many operators successfully accommodate diverse language needs while maintaining high safety and experience standards.

If you’re traveling during August, the peak departure month for Canadian hiking trips, you’ll find more group options with varied language support simply because of higher demand and more scheduled departures. This timing also coincides with optimal weather for trails featuring iceberg viewing and active wildlife, so you won’t sacrifice experience quality while prioritizing language accessibility.

Finding and booking a hiking adventure that connects you with Spanish language or culture across North American trails is more accessible than you might think. With 123 trips ranging from 3 to 23 days available in Canada alone, and over 2500 operators to choose from, your options span iconic destinations like Johnston Canyon in Banff and the Bruce Trail along the Niagara Escarpment. Whether you’re drawn to iceberg trails in coastal regions or wildlife encounters in the Rockies, the key is proper preparation and careful verification of your chosen operator. Start with the fundamentals covered in this guide: research your destination, compare credible operators with strong reviews, understand the route difficulty, and confirm all details before departure. The blend of outdoor adventure with Spanish-language immersion or cultural connection creates a uniquely rewarding experience that goes beyond typical hiking trips. Take that first step today.